PC200_Manual_REV_G-1.pdf - 第33页
PC200 PVA Revis ion G (201 9) 33 of 56 Perio dic M ai ntena nce How to Replace a S tatic Mixer Remove the old sta tic mixer and do th e steps in Se ction 3.2 to install a n ew static mixer. How to Re place Lip Seals The …
PC200
PVA
Revision G (2019)
32 of 56
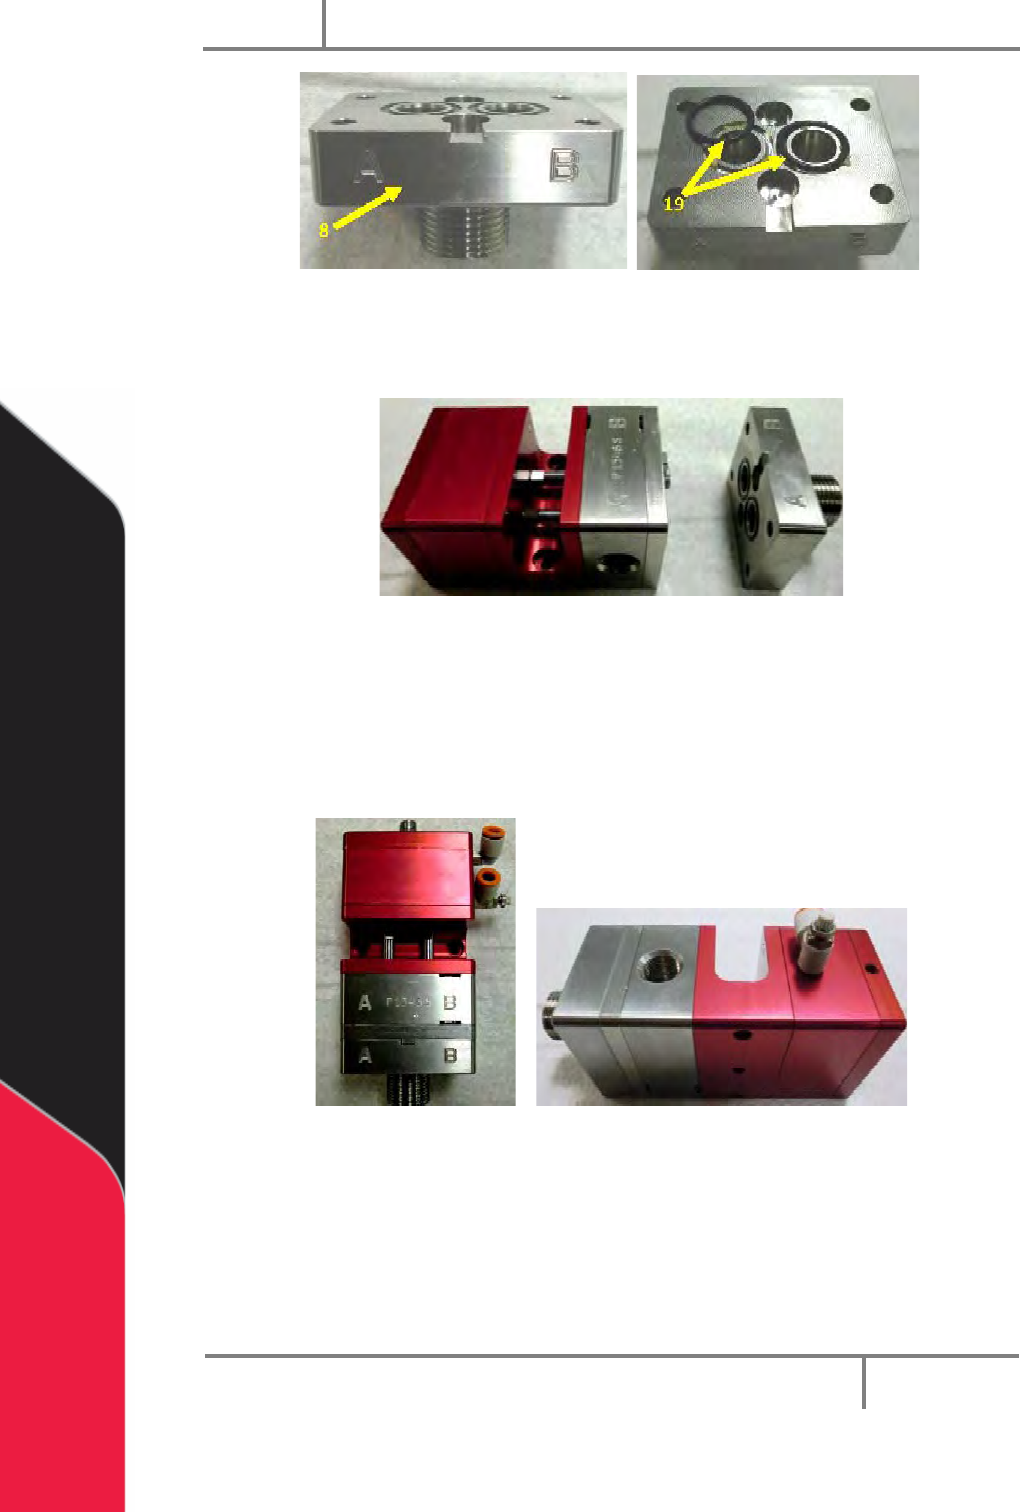
Figure 56: O-rings in the Fluid Manifold
40. With the lettering on the front, put the fluid manifold on the seal plate and
install four machine screws.
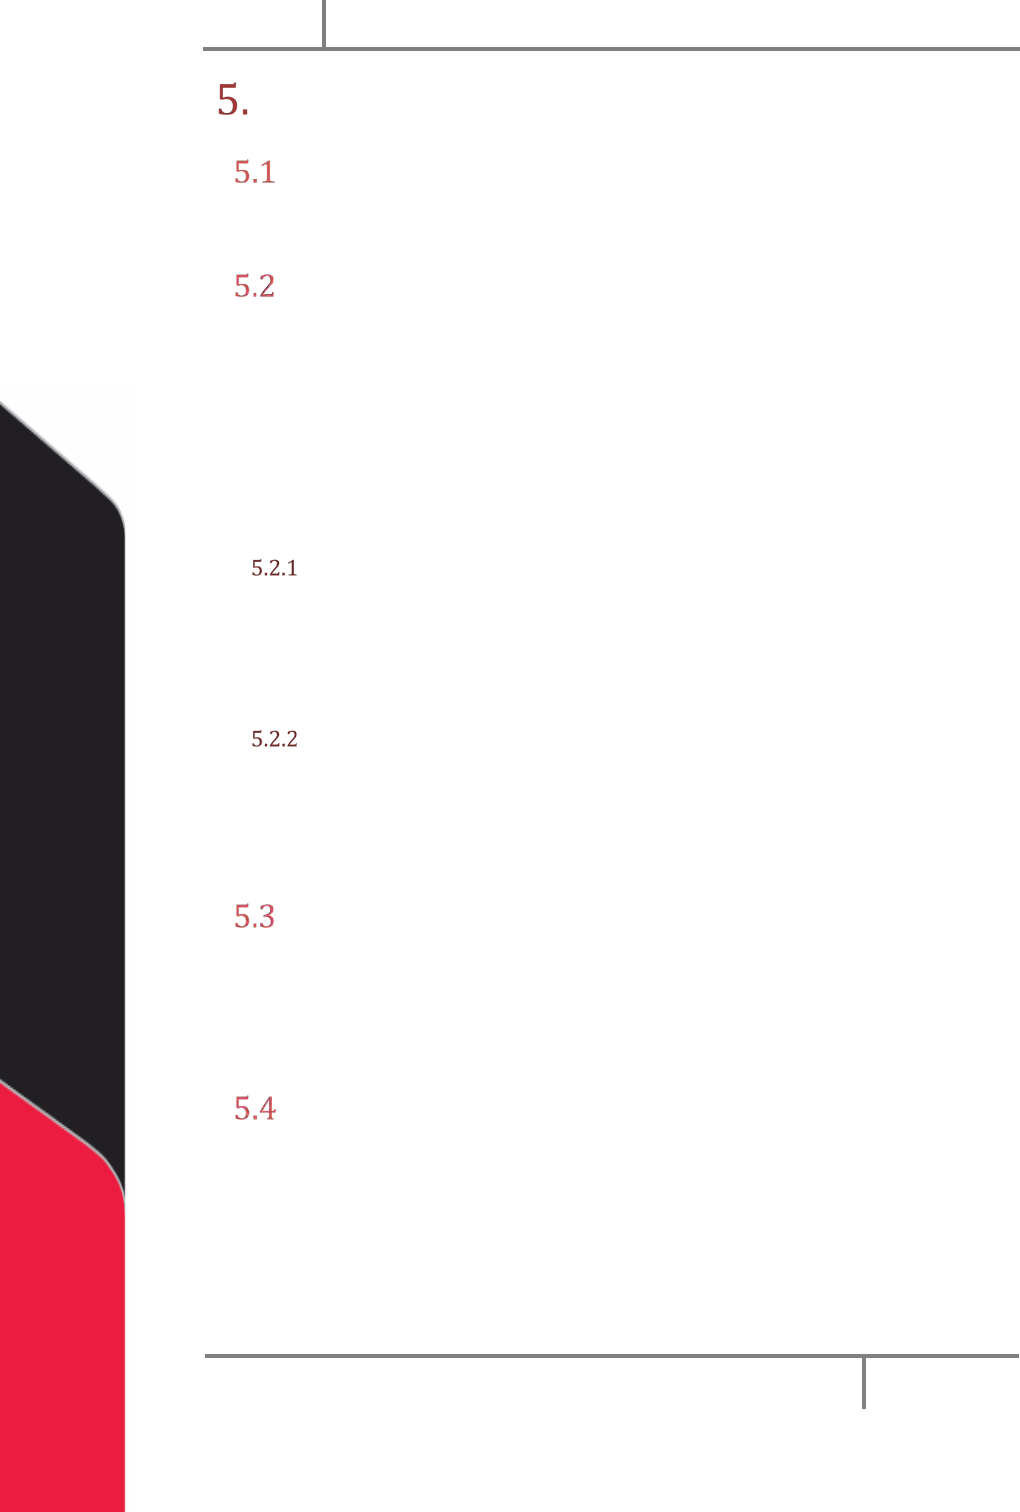
Figure 57: Fluid Manifold Aligned with Valve
41. Use a 5/32” hex key to tighten the screws.
42. The PC200 valve and its mechanical portion are now assembled.
43. Additional air and fluid fittings should be correctly sized and installed in the
applicable ports on the valve for operation.
Figure 58: Assembled Valve
PC200
PVA
Revision G (2019)
33 of 56
Periodic Maintenance
How to Replace a Static Mixer
Remove the old static mixer and do the steps in Section 3.2 to install a new static mixer.
How to Replace Lip Seals
The PC200 valve will require lip seal replacement periodically. The interval between seal
replacement varies widely depending on duty cycle, material type, and day to day care
of the valve. It is highly recommended that spare parts kits and a tool kit be on hand for
fast and easy seal replacement. Refer to Section 9 for spare parts kits information.
For a more extensive valve rebuild, refer to Sections 6 and 7 for a complete bill of
materials and exploded drawings.
Seal Plate Lip Seals
1. Disassemble and clean the valve.
2. Do steps 1-8 in Section 4.3 and replace the lips seals in the seal plate.
3. Refer to Section 4.3 to assemble the valve again.
Fluid Section Lip Seals
1. Disassemble and clean the valve.
2. Do steps 1-11 in Section 4.3 and replace the lips seals in the seal plate.
3. Refer to Section 4.3 to assemble the valve again.
How to Replace Valve Rods
1. Disassemble and clean the valve.
2. Do steps 1-2 in Section 4.3 and replace the rods.
3. Refer to Section 4.3 to assemble the valve again.
How to Replace Sleeve Bearings
1. Disassemble and clean the valve.
2. Do steps 1-7 in Section 4.3 and replace the sleeve bearings in the separation
block.
3. Refer to Section 4.3 to assemble the valve again.

PC200
PVA
Revision G (2019)
34 of 56
How to Replace O-rings
Piston O-ring
1. Disassemble and clean the valve.
2. Do steps 1-5 in Section 4.3 and replace the O-ring in the piston with a new
O-ring from the spare parts kit.
3. Refer to Section 4.3 to assemble the valve again.
Fluid Section O-rings
1. Disassemble and clean the valve.
2. Do steps 1-14 in Section 4.3 and replace the O-rings in the fluid section with
new O-rings from the spare parts kit.
3. Refer to Section 4.3 to assemble the valve again.
Air Cylinder O-rings
1. Disassemble and clean the valve.
2. Do steps 1-18 in Section 4.3 and replace the O-rings in the air cylinder with
new O-rings from the spare parts kit.
3. Do steps 19-31 and replace the 016 O-ring in the air cylinder groove.
4. Refer to Section 4.3 to assemble the valve again.
Fluid Manifold O-rings
1. Disassemble and clean the valve.
2. Do steps 1-39 in Section 4.3 and replace the O-rings in the fluid manifold
with new O-rings from the spare parts kit.
3. Refer to Section 4.3 to assemble the valve again.
PC200R Series Reference
NOTE: If your valve has Teflon
®
lip seals you must use Kalrez O-rings. To order these
parts please contact PVA.