PC200_Manual_REV_G-1.pdf - 第27页
PC200 PVA Revis ion G (201 9) 27 of 56 Fig ure 41 : Ali gn the O - ring s 20. Align the air c ylinder and the assem bly. Fig ure 42 : Air Cy l inder Ope nings Alig ned with the As sembly 21. Put the air c ylinder on the …
PC200
PVA
Revision G (2019)
26 of 56
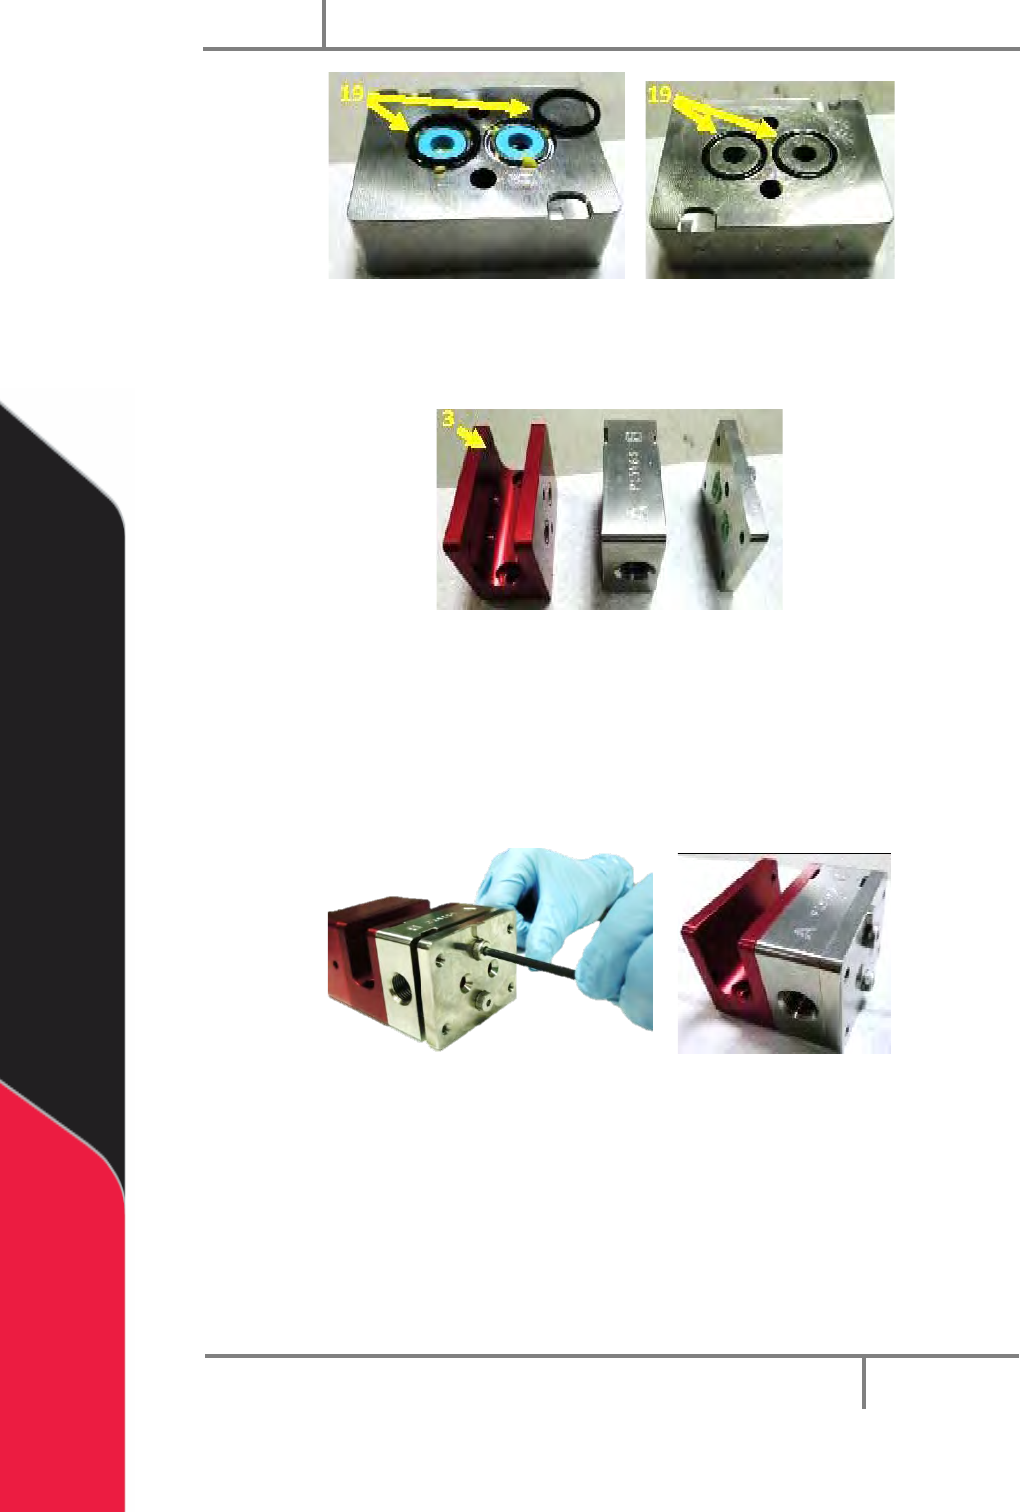
Figure 38: O-rings for the Fluid Section
16. Align the separation block, the fluid body and the seal plate. Make sure the
sections point the correct way (as shown).
Figure 39: Align the Sections
17. Use a hex key to install two #10-24 shoulder bolts at the seal plate to attach the
assembly. Tighten the first bolt 1-2 turns and then the second bolt 1-2 turns.
Repeat this procedure until the bolts are fully engaged.
NOTE: When bolts are tightened in small increments of 1-2 turns, the lip seals stay
correctly positioned.
Figure 40: Assemble the Separation Block, Fluid Body and Seal Plate
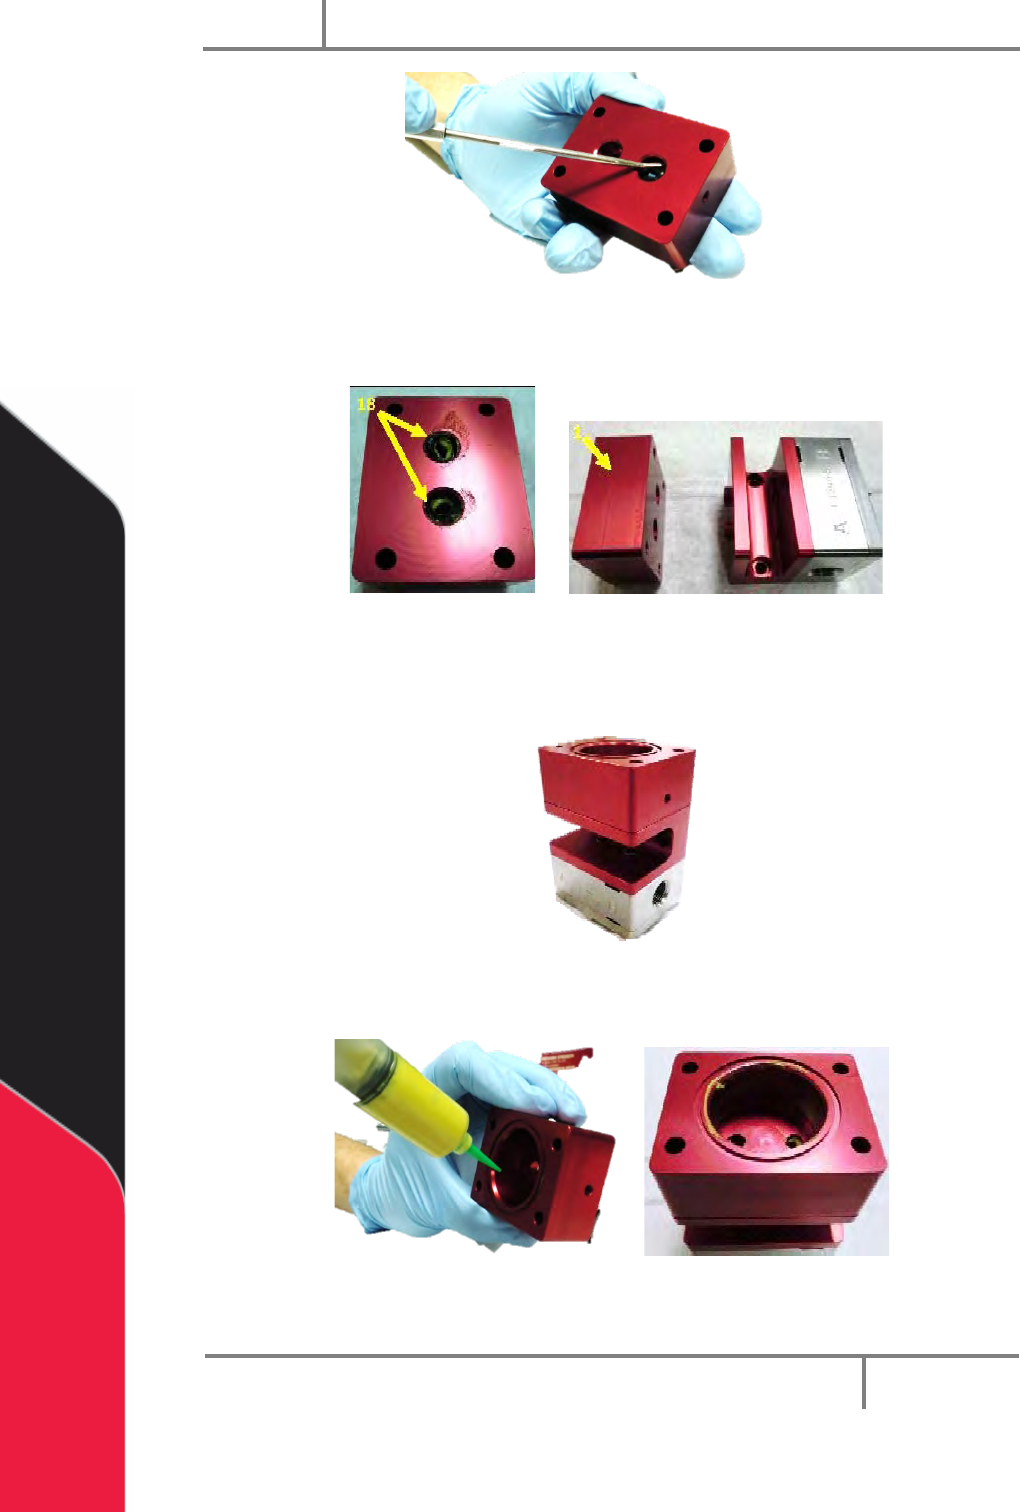
18. Apply silicone grease to two 108 Buna O-rings and put them in the bottom
openings of the air cylinder.
19. Use a pick to make sure the O-rings are correctly aligned and installed.
PC200
PVA
Revision G (2019)
27 of 56
Figure 41: Align the O-rings
20. Align the air cylinder and the assembly.
Figure 42: Air Cylinder Openings Aligned with the Assembly
21. Put the air cylinder on the fluid assembly. Make sure the air port is on the
right side.
Figure 43: Air Cylinder and Fluid Assembly
22. Apply silicone grease to the cylinder wall.
Figure 44: Apply Grease to the Cylinder Wall
23. Apply silicone grease to the O-ring on the piston-rod assembly.

PC200
PVA
Revision G (2019)
28 of 56
Figure 45: Apply Grease to the O-ring
Figure 46: Piston-Rod Assembly
24. Carefully install the piston-rod assembly into air cylinder opening.
25. Push the piston-rod assembly straight down through separation block, slowly,
with pressure that stays the same, until resistance is met (position as shown
below).
Figure 47: Install Piston
To fully engage the piston-rod assembly you can use a press or do it by hand.
• To use a press continue to step 26.
• To engage the piston-rod assembly by hand, continue to step 28.
With a Press
26. Put the valve on the press with the piston up.