00195397-01_Installation Manual Setup Center 2.3.pdf - 第64页
Installation Steps to perform after Installation Scanner Configuration 64 Installation Manual SIPLACE Setup Center 2.3 X Open the setting dialog for scanner in Setup Center configuration. X Click “ Connect scanner… ” to …
Installation
SIPLACE Setup Center Database and Windows XP SP2 Steps to perform after Installation
Installation Manual SIPLACE Setup Center 2.3
63
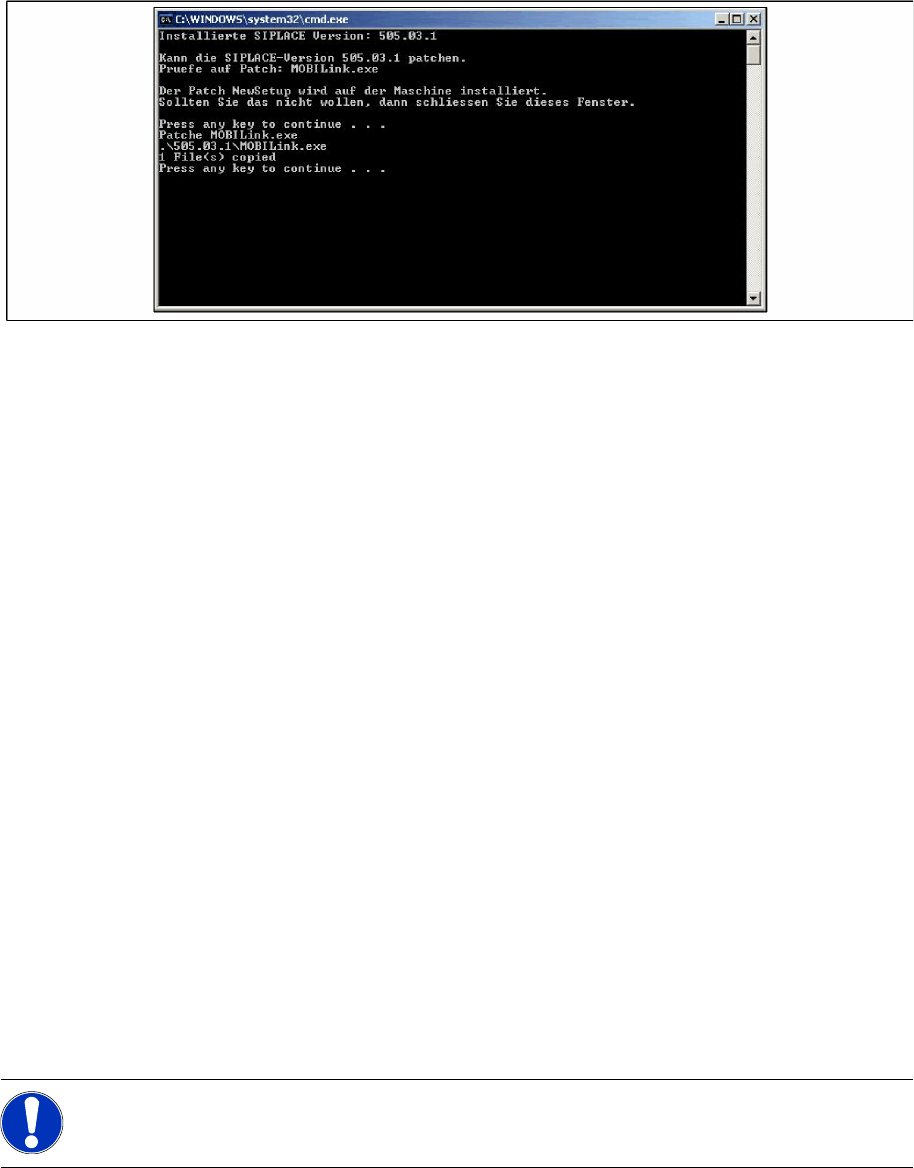
X When installation is finished the command window looks like this:
X Press any key to finish the setup.
5.4 Steps to perform after Installation
5.4.1 SIPLACE Setup Center Database and Windows XP SP2
When installing Windows XP Service Pack 2 (SP2), the Windows Firewall, formerly ICF (Internet
Connection Firewall), is enabled by default. The default configuration in SP2 blocks incoming traffic for
the most TCP ports.
If you are running the SIPLACE Setup Center GUI on a Windows XP SP2 host and the SIPLACE Setup
Center database on another host, you have to open the port 1433 and 1434 for the database connection.
Furthermore, you have to open the port 445, because blocking will cause errors when using mans MMC
snap-ins like Event Viewer, Local Users & Groups, Services, Computer Management, Disk
Management, Device Manager, Group Policy, and others.
Please refer to Windows help to get further information how to open TCP ports.
5.4.2 Settings in the station software
In order to use Setup Center you should make settings in the station software. For detailed information,
please refer to SIPLACE Setup Center 2.3 User Guide (item no. 00195402-xx).
5.4.3 Scanner Configuration
5.4.3.1 Dragon Scanner
New scanners and scanner base stations require the set-up once before the first use.
This doesn’t necessarily need to happen after the Installation of SIPLACE Setup Center, but it is
recommended. The Scanner configuration is independent from the software installation.
You can setup up one or more scanner by Setup Center. To configure scanner, ensure that the Datalogic
OM-Cradle is connected with the Setup Center computer.
NOTE:
The scanner powers off after a period of inactivity. Pulling the trigger will power the scanner on.
Installation
Steps to perform after Installation Scanner Configuration
64 Installation Manual SIPLACE Setup Center 2.3
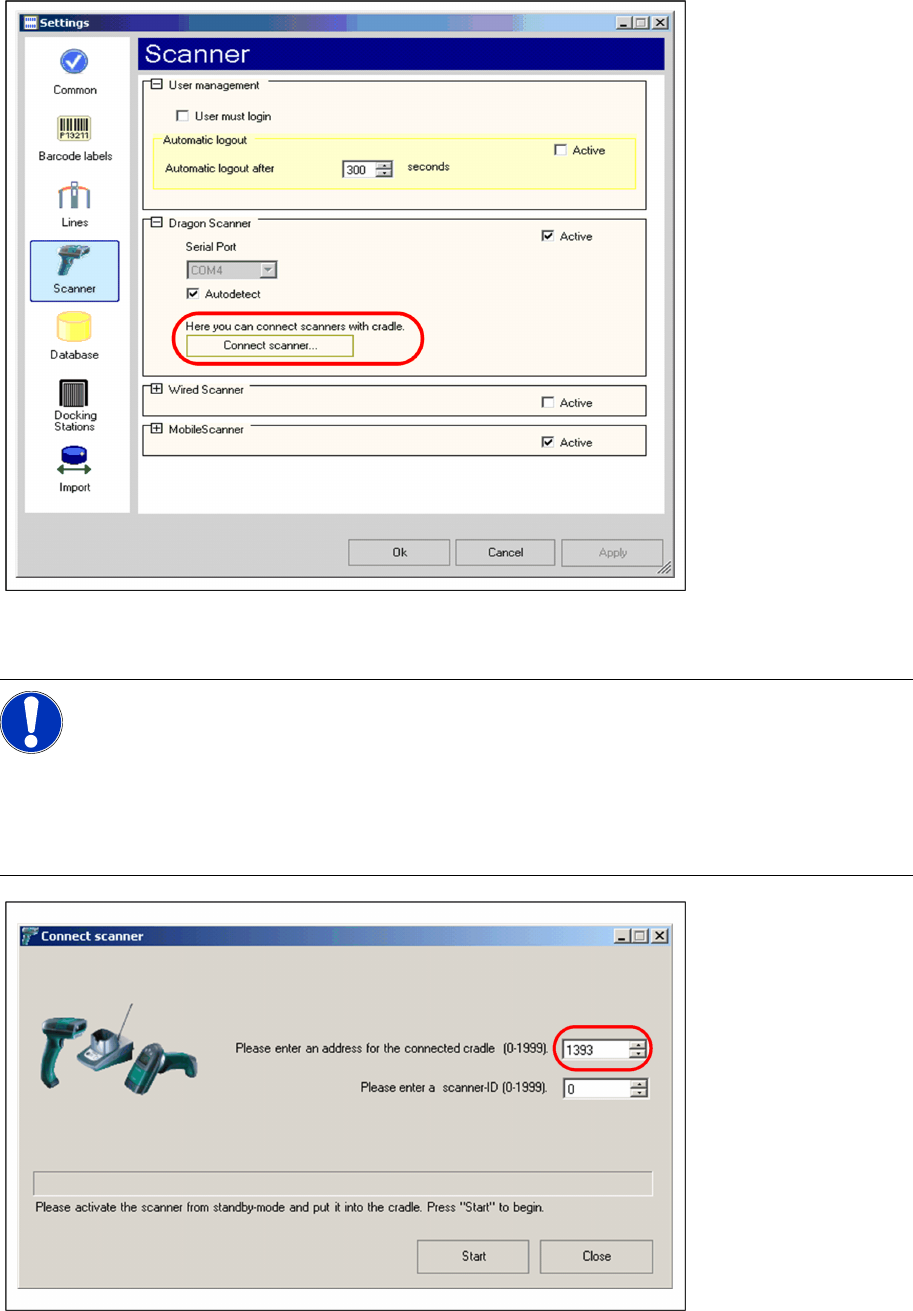
X Open the setting dialog for scanner in Setup Center configuration.
X Click “Connect scanner…” to begin.
By first configuration of a scanner by this Setup Center, the cradle address is set by random.
X Click the barcode trigger-key on scanner one time to activate it from standby-mode.
X Put the scanner into the cradle and click “Start” to set up the scanner.
NOTE:
If the button is disabled, Setup Center was not able to detect a cradle on startup.
X In this case, ensure the connection to a serial port and restart Setup Center.
X Alternatively you can manually change the port, where the cradle is connected, by removing
the “Autodetect” checkbox.
After changing, click “Apply” to take over the new port.
Click “Connect Scanner…” to continue.
Installation
Scanner Configuration Steps to perform after Installation
Installation Manual SIPLACE Setup Center 2.3
65
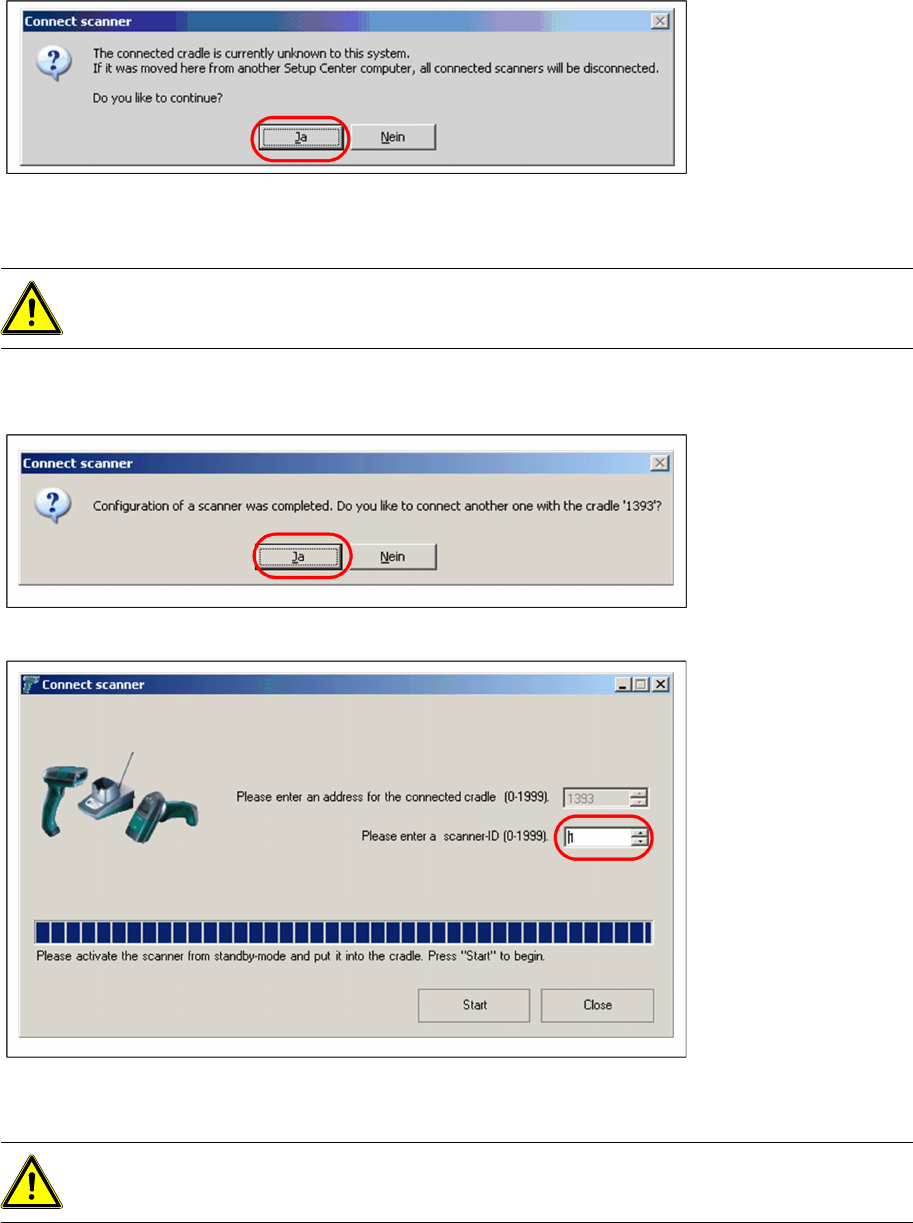
By first configuration the cradle is unknown for Setup Center.
X Validate the message with “Yes” to continue.
X Remove the scanner from cradle and press the “Enter”-key on scanner to check the connection to
Setup Center.
X Click “Yes” to connect another scanner with Setup Center.
X The scanner-ID is now incremented to the next unused address. Activate the next Scanner from
standby, put it into cradle and click “Start”.
If you manually enter an already used address, Setup Center will warn you by following.
ATTENTION:
Configure each scanner again, if you moved the cradle from another Setup Center computer.
ATTENTION:
Do not scan or press keys at an already connected scanner, while configuring a new one.