SC_450 PreciseCoat Conformal Coating Jet_Rev_04.pdf - 第15页
SC-450 PreciseCoat C onformal C oating J et Installation an d Configuration © 2024 Nordson Corporation 9 3.4.2 Triple or Dual Applicator Bracket To install the app licator (Figure 3-2): 1. Verify the co ating system is t…
SC-450 PreciseCoat Conformal Coating Jet Installation and Configuration
8 © 2024 Nordson Corporation
3.4 Installing the SC-450 PreciseCoat Jet
If the applicable applicator bracket is not installed on the Z-head, refer to the applicable coating system
Installation, Operations, and Maintenance Manual for installation.
Tools and Materials Needed:
•
Metric Allen Wrench Set
•
Torque Wrench (0
-
50 in
-
lbs)
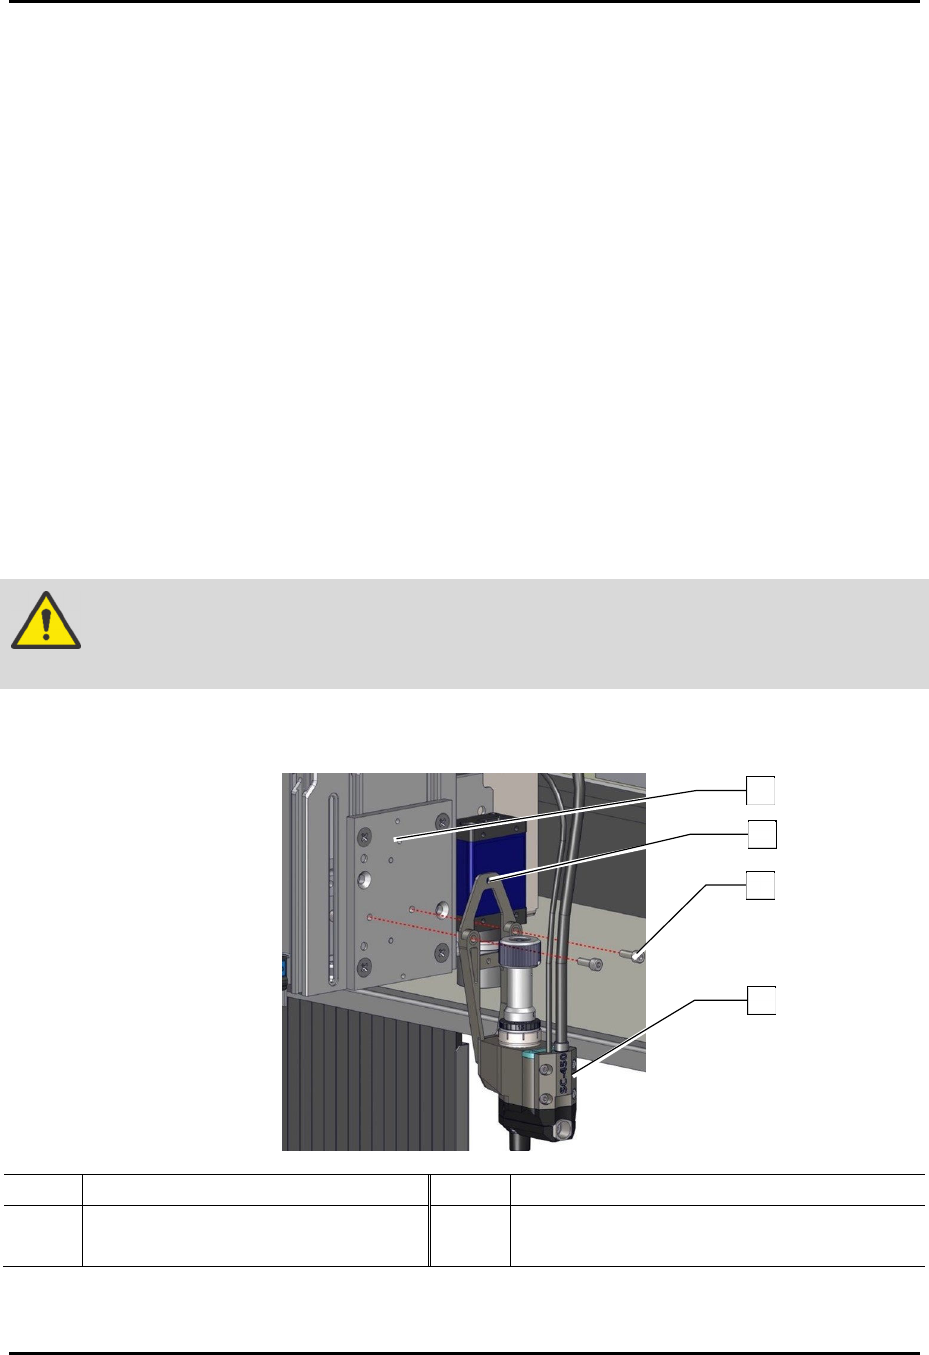
3.4.1 Single Applicator Bracket
To install the applicator (Figure 3-1):
1. Verify coating system is turned off. Press the Stop button on the front panel.
2. Open the front hood of the coating system.
3. Manually move the dispense head to the front of the coating system.
4. Align the alignment hole on the mounting plate of the SC-450 to the locating pin on the
valve mount bracket.
5. Install the SC-450 to the valve mount bracket with two (2) screws.
6. Torque the two (2) screws to 2.82 Nm (25 in-lbs).
WARNING!
Before tightening the screws, verify the mounting plate and valve mount bracket
are flush with no gaps between them, or damage may occur.
7. Install the pneumatic, electrical, and fluid connections, see 3.5 Pneumatic, Electrical, and
Fluid Connections.
Item Description Item Description
1 Locating Pin 3 Screws (2)
2 Alignment Hole 4 SC-450
Figure 3-1 Installing the SC-450
1
2
3
4
SC-450 PreciseCoat Conformal Coating Jet Installation and Configuration
© 2024 Nordson Corporation 9
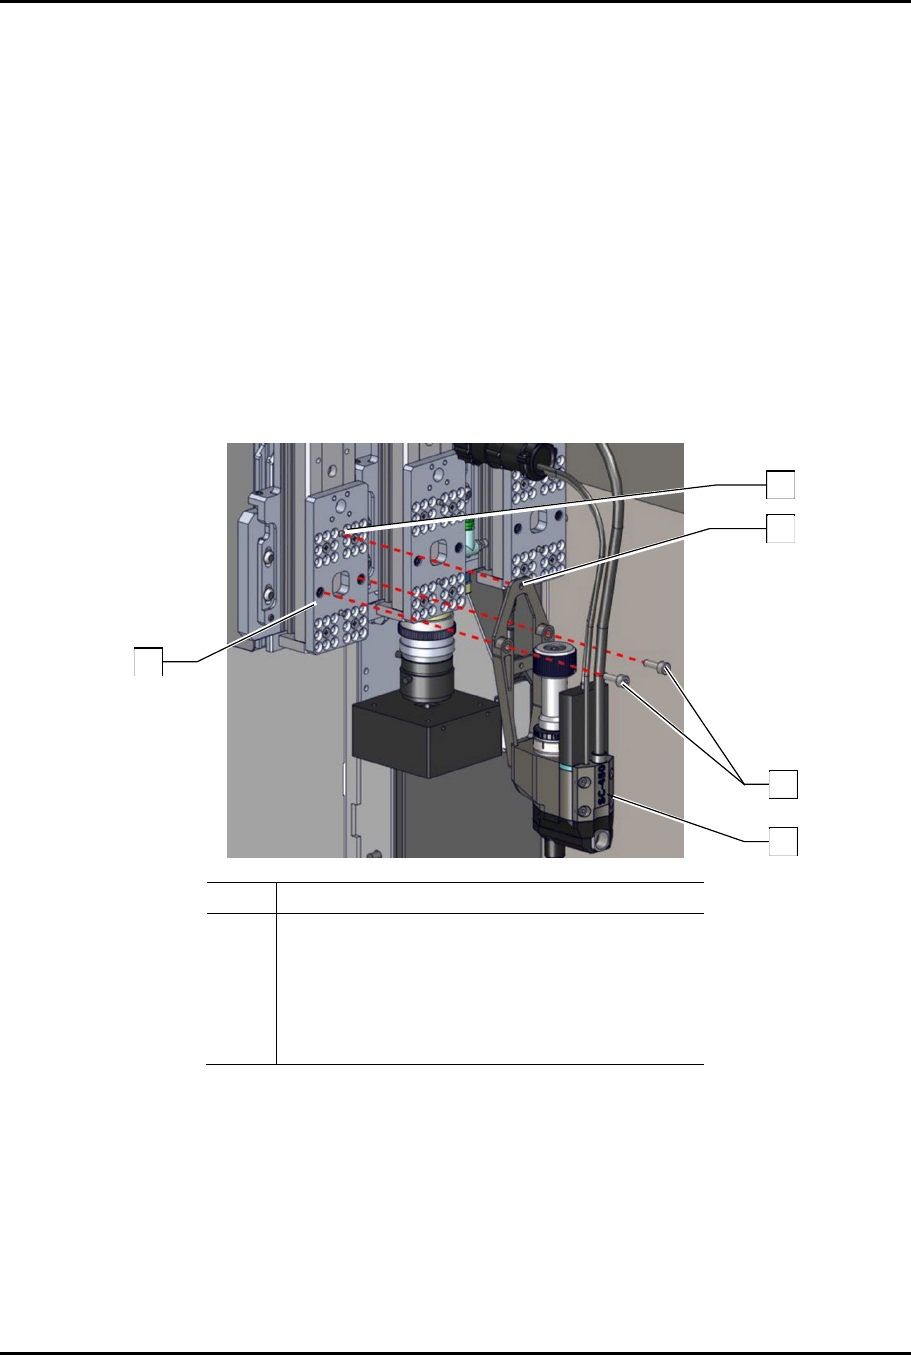
3.4.2 Triple or Dual Applicator Bracket
To install the applicator (Figure 3-2):
1. Verify the coating system is turned off. Press the Stop button on the front panel.
2. Open the front hood of the coating system.
3. Manually move the dispense head to the front of the coating system.
4. Align the alignment hole on the mounting plate of the SC-450 to the locating pin on the
valve mount bracket.
5. Install two (2) screws securing the SC-450 to the applicator bracket.
6. Torque the two (2) screws to 2.82 Nm (25 in-lbs).
7. Install the pneumatic, electrical, and fluid connections, see 3.5 Pneumatic, Electrical, and
Fluid Connections.
Item Description
1 Assy, Mount Triple Toggle
2 Alignment Pin
3 Alignment Hole
4 Screws (2)
5 SC-450
Figure 3-2 Installing the SC-450
1
5
4
2
3
SC-450 PreciseCoat Conformal Coating Jet Installation and Configuration
10 © 2024 Nordson Corporation
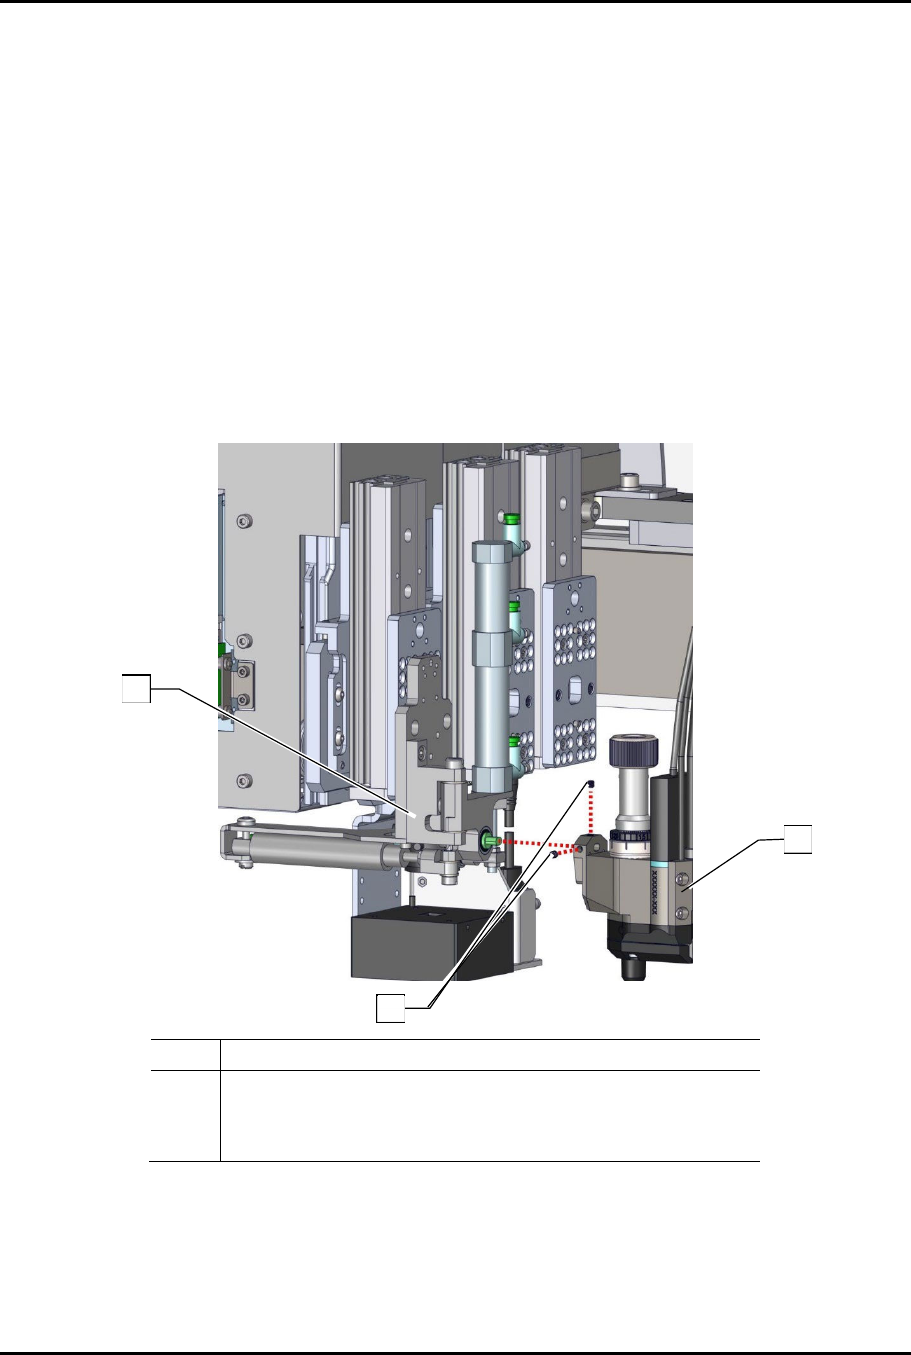
3.4.3 Four Position Tilt and Rotate Mechanism
To install the applicator (Figure 3-4):
1. If not installed, install the four position tilt and rotate mechanism to the Z-head. Refer to the
applicable coating system Installation, Operations, and Maintenance Manual.
2. Verify the coating system is turned off. Press the Stop button on the front panel.
3. Open the front hood of the coating system.
4. Manually move the dispense head to the front of the coating system.
5. Install the SC-450 on the tilt and rotate mechanism with two (2) set screws.
6. Torque the two (2) set screws to 2.82 Nm (25 in-lbs).
7. Install the pneumatic, electrical, and fluid connections, see 3.5 Pneumatic, Electrical, and
Fluid Connections.
Item Description
1 Four Position Tilt and Rotate Mechanism
2 Set Screws (2)
3 SC-450
Figure 3-3 Installing the SC-450
1
2
3