SC_450 PreciseCoat Conformal Coating Jet_Rev_04.pdf - 第18页
SC-450 PreciseCoat C onformal C oating J et Installation an d Configuration 12 © 2024 Nordson Corporation 3.6 Installing the Flu id Needle The correct fl ui d ne edle to the applicatio n being used must be completed firs…
SC-450 PreciseCoat Conformal Coating Jet Installation and Configuration
© 2024 Nordson Corporation 11
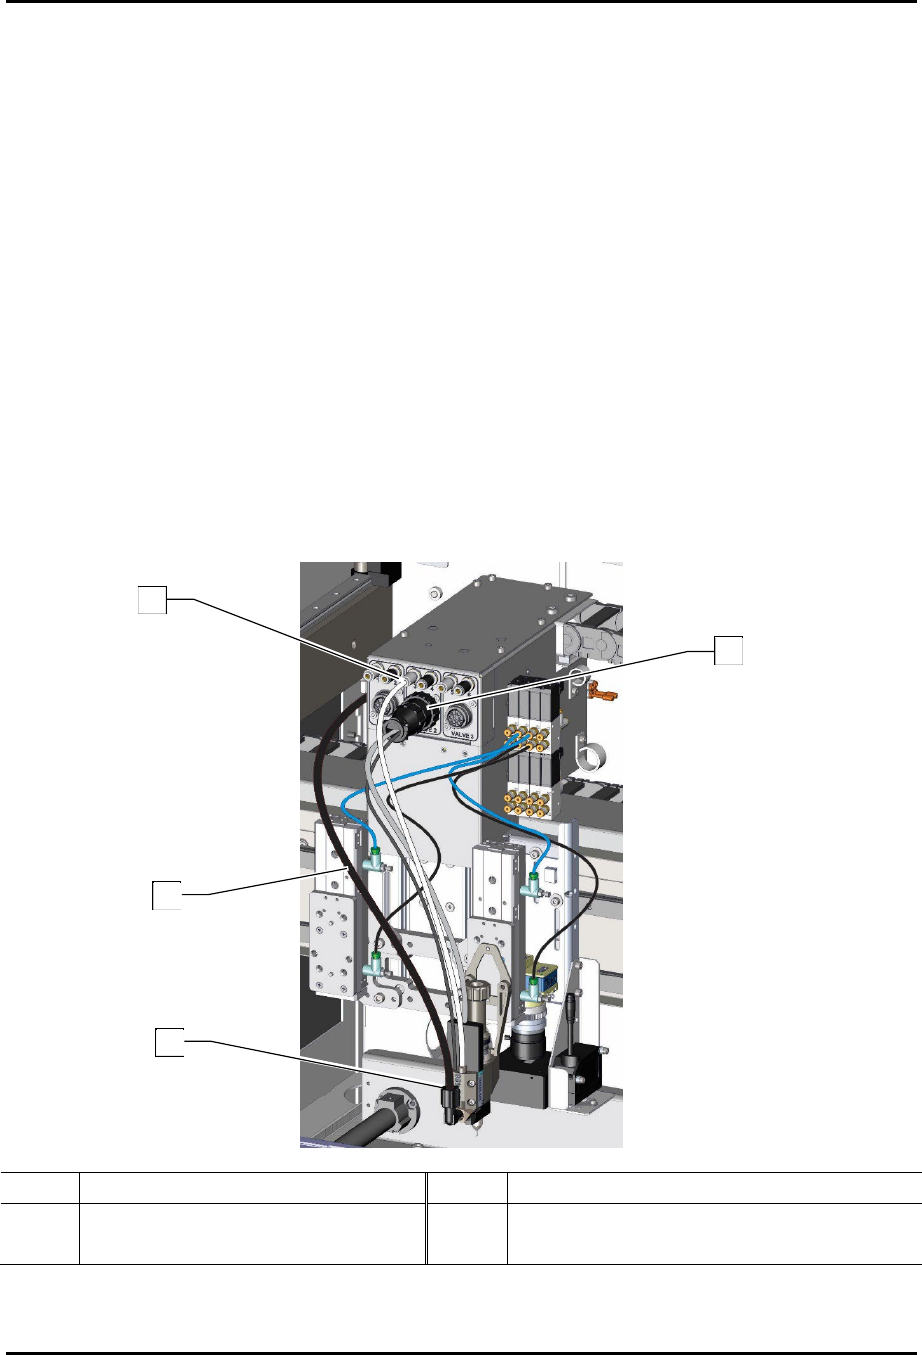
3.5 Pneumatic, Electrical, and Fluid Connections
To connect the pneumatic, electrical, and fluid connections (Figure 3-5):
1. For the SL-940:
a. Connect the valve solenoid cable from the SC-450 to the V2 position.
?
NOTE
The heater will not function if connected to the V1 position.
b. Connect the white pneumatic connector from the SC-450 to the corresponding black
disconnect of the valve air connection on the dispense head.
c. Connect the fluid line (red tubing) to the fluid fitting on the SC-450.
2. For the SL-1040:
a. Connect the valve solenoid cable from the SC-450 to the desired valve connection on
the dispense head.
b. Connect the white pneumatic connector from the SC-450 to the corresponding silver
fitting of the valve air connection on the dispense head.
c. Connect the fluid line (black tubing) to the fluid fitting on the SC-450.
3. Install the fluid needle, see 3.6 Installing the Fluid Needle.
Item Description Item Description
1 Valve Air Connection (silver) 3 Fluid Fitting (Elbow)
2 Fluid Line 4 Valve 2 Electrical Connection
Figure 3-4 Connecting the Pneumatic and Fluid Connections
(Dual Applicator Bracket Shown on SL-1040)
2
1
3
4
SC-450 PreciseCoat Conformal Coating Jet Installation and Configuration
12 © 2024 Nordson Corporation
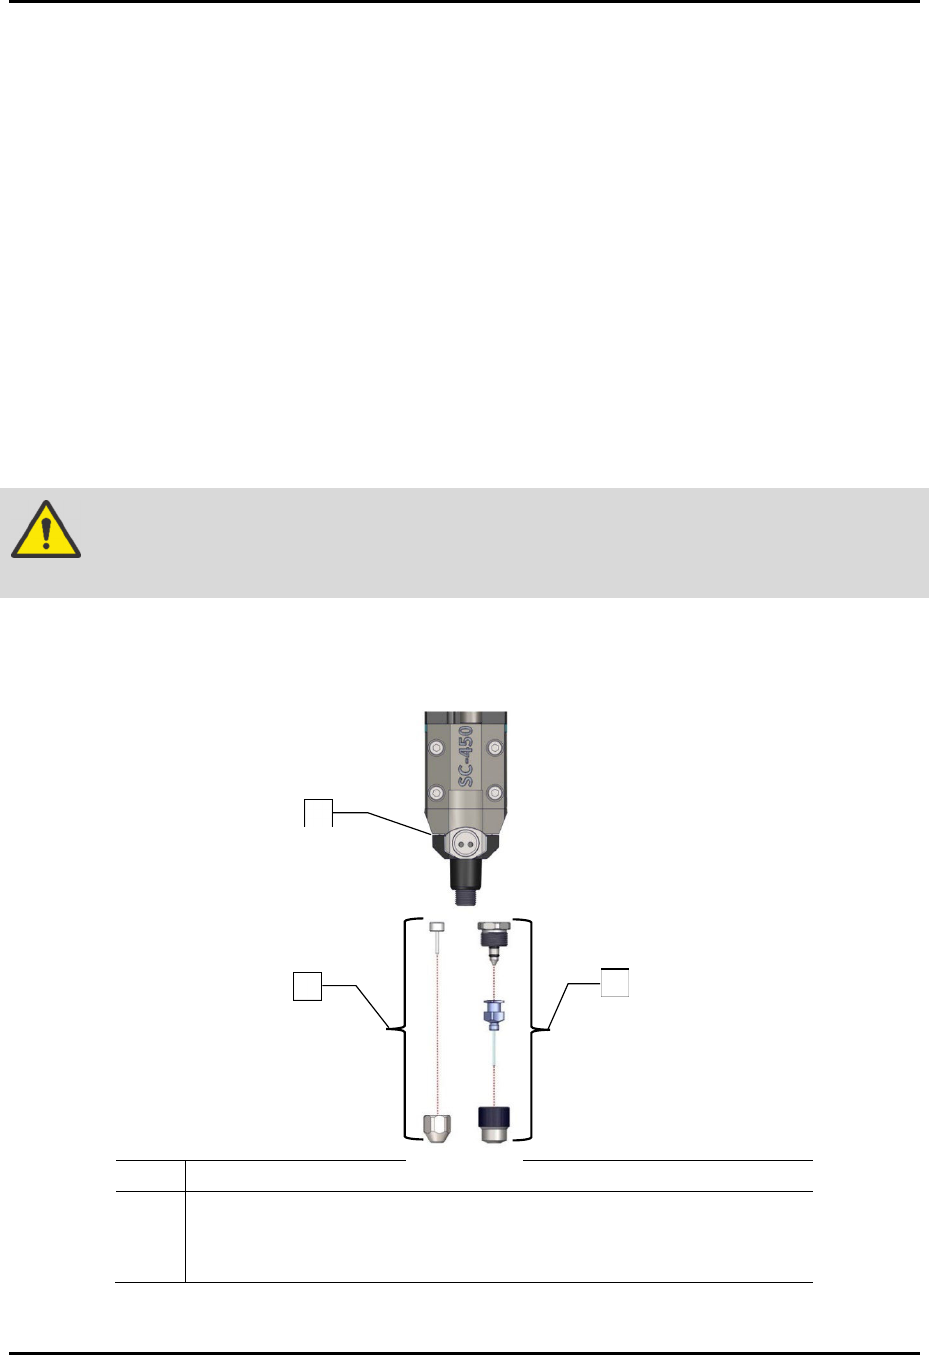
3.6 Installing the Fluid Needle
The correct fluid needle to the application being used must be completed first, see 4.5.1 Fine Tuned
Settings.
To install the fluid needle (Figure 3-6):
1. If required, perform a service shutdown. Refer to the applicable coating system Installation,
Operations, and Maintenance Manual.
2. Open the front hood of the coating system.
3. Manually move the dispense head to the front of the coating system.
4. Install the configured needle assembly.
5. If required, remove the old needle assembly and separate from the fluid body assembly.
6. Insert the fluid needle into the needle nut.
7. Tighten the needle nut onto the fluid body assembly by hand.
WARNING!
The needle nut must be tightened to prevent leakage. Do not use a wrench or
pliers to tighten as damage may occur.
8. Close the front hood of the coating system.
9. Setup the SC-450, see 3.7 SC-450 EasyCoat Configuration.
Item Description
1 Assy, Fluid Body, SS (Item 16)
2 DL Needle Kit (Item 21)
3 Iwashita Needle Kit (Item 22)
Figure 3-5 Installing the Fluid Needle (all configurations shown)
2
1
3
SC-450 PreciseCoat Conformal Coating Jet Installation and Configuration
© 2024 Nordson Corporation 13
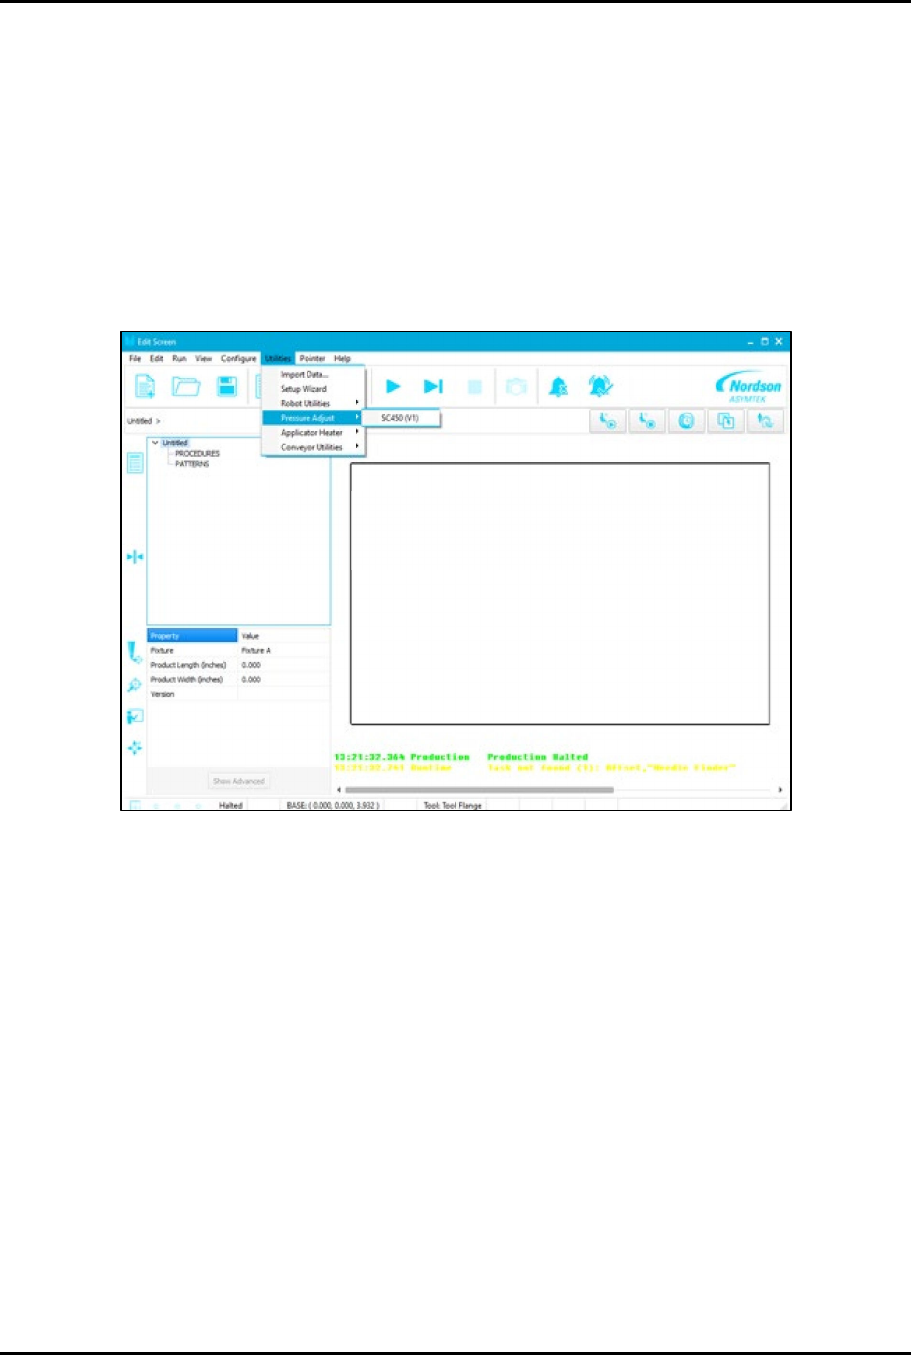
3.7 SC-450 EasyCoat Configuration
To configure EasyCoat for the SC-450:
1. Configure the EasyCoat software for the SC-450. Refer to the EasyCoat User Guide or
EasyCoat Help for software configuration.
2. Position the SC-450 at the purge cup by running the appropriate macro or moving the
SC-450 to the front of the machine.
3. Click on Edit > Edit Mode from the EasyCoat Operator Screen to open the Edit Screen.
4. From the EasyCoat Edit Screen, select Utilities > Pressure Adjust > SC450 (Figure 3-7).
Figure 3-6 Utilities - Pressure Adjust