SC_450 PreciseCoat Conformal Coating Jet_Rev_04.pdf - 第30页
SC-450 PreciseCoat C onformal C oating J et Maintenance and Service 24 © 2024 Nordson Corporation 5.6 Removing the SC-45 0 Tools and Materi als Needed: • Metric Al l en Wr ench Set • S hipp in g Kit ( Item 23 ) • Torque …
SC-450 PreciseCoat Conformal Coating Jet Maintenance and Service
© 2024 Nordson Corporation 23
4. Clean the fluid needle with the appropriate solvent depending on fluid used and inspect
thoroughly for damage before reusing.
WARNING!
Use an Nordson nozzle brush to scrub the needle. Do not use a steel brush or
any other type of brush that will damage the needle tip.
?
NOTE
If the fluid needle orifices are blocked, insert a probe or broach into the orifice against
the direction of fluid flow. If this problem persists, immerse the needle nut in an
appropriate solvent and use an ultrasonic cleaner.
5. Install the fluid needle, see 3.6 Installing the Fluid Needle.
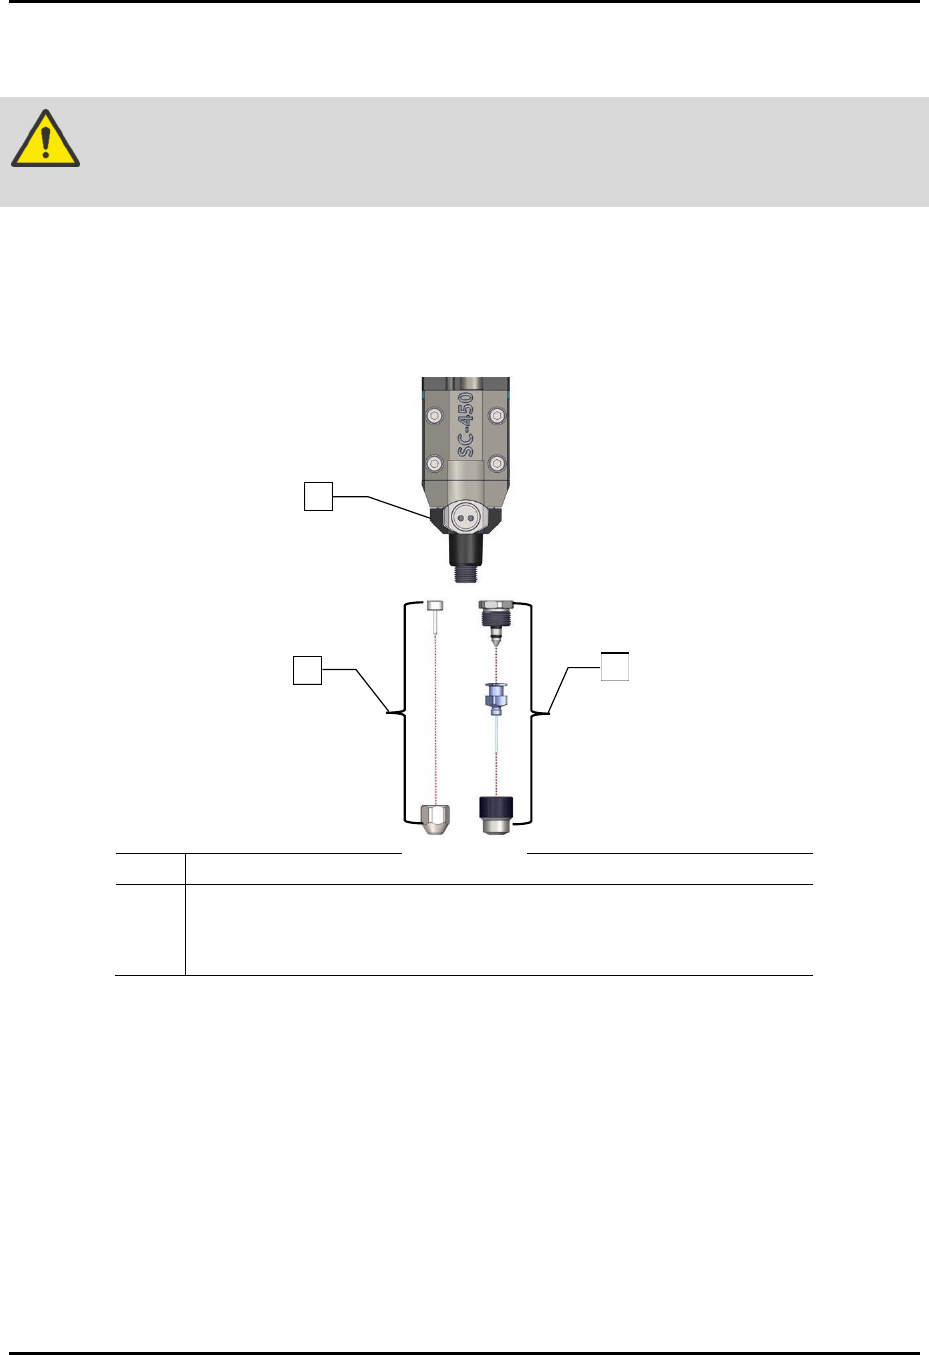
Item Description
1 Assy, Fluid Body, SS (Item 16)
2 DL Needle Kit (Item 21)
3 Iwashita Needle Kit (Item 22)
Figure 5-1 Removing the Needle Assembly (all configurations shown)
2
1
3
SC-450 PreciseCoat Conformal Coating Jet Maintenance and Service
24 © 2024 Nordson Corporation
5.6 Removing the SC-450
Tools and Materials Needed:
•
Metric Allen Wrench Set
•
S
hipping
Kit
(
Item 23
)
• Torque Wrench (0-50 in-lbs)
WARNING!
Ensure the fluid system is completely depressurized prior to loosening any fittings
in the fluid path. Failure to do so may cause serious injury to personnel.
WARNING!
Protect the solenoid valve from contact with coating material or solvents.
Contamination could cause solenoid valve failure.
5.6.1 Depressurizing the SC-450
To depressurize the SC-450:
1. Remove fluid needle, see 5.5.1 Cleaning and Replacing the Fluid Needle.
2. Flush the fluid system with an appropriate solvent. Refer to the applicable coating system
Installation, Operations, and Maintenance Manual.
?
NOTE
If a solvent is used to flush the system, make sure the fluid lines are clean and
dry before resuming operations.
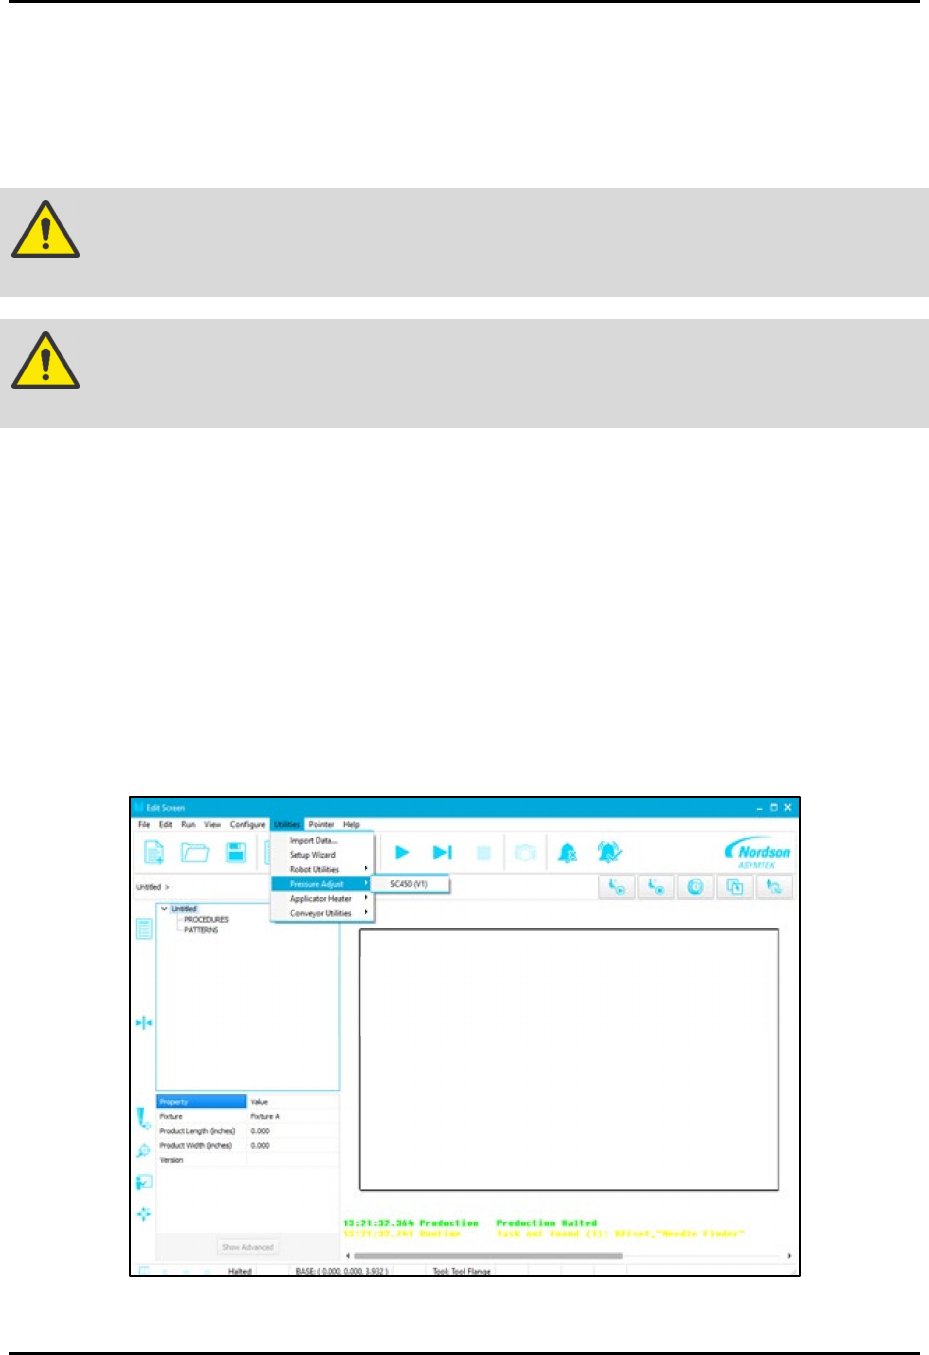
3. Click on Edit > Edit Mode from the EasyCoat Operator Screen to open the Edit Screen.
4. From the EasyCoat Edit Screen, select Utilities > Pressure Adjust > SC-450 (Figure 5-2).
Figure 5-2 Utilities - Pressure Adjust Menu
SC-450 PreciseCoat Conformal Coating Jet Maintenance and Service
© 2024 Nordson Corporation 25
5. Depressurize the fluid system using the fluid pressure switch located at the back of the
coating system. Refer to the applicable coating system Installation, Operations, and
Maintenance Manual.
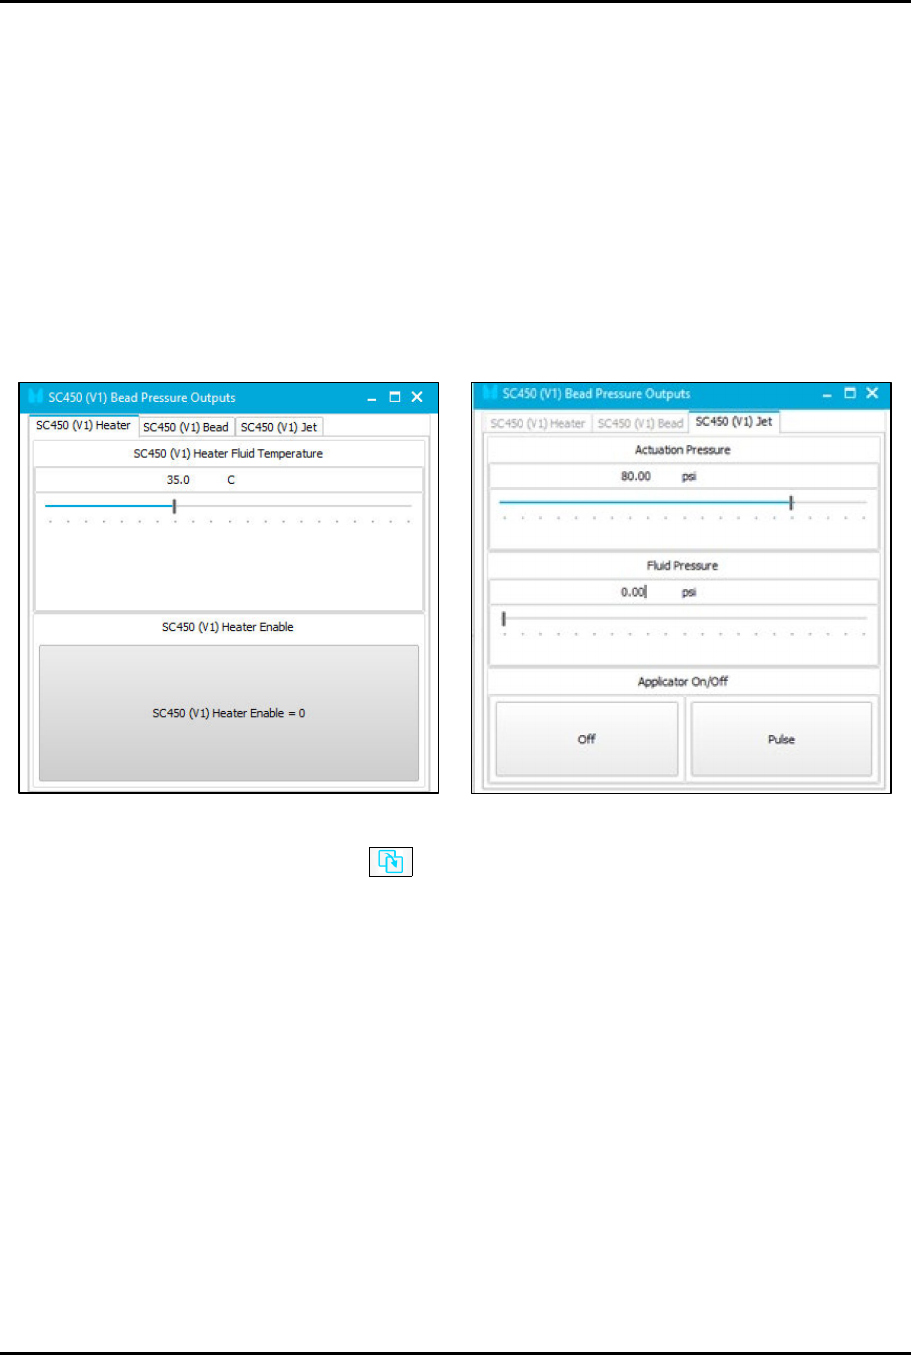
6. Disable the SC450 Heater on the SC450 Heater tab (Figure 5-3).
7. Slide the fluid pressure bar to the left to reduce the SC-450 fluid pressure to zero (0) psi
prior to fluid needle inspection, removal, cleaning, or replacement.
8. Position the SC-450 at the purge cup by running the appropriate macro or manually moving
the SC-450 to the purge cup.
9. Toggle the Applicator Off button in the EasyCoat software to turn off the pressure.
> No fluid should dispense. If fluid does dispense, continue to dispense until all residual
pressure is relieved.
Figure 5-3 Pressure Outputs
10. Use the Go To Front button to move the SC-450 to the front center of the dispensing
area.
11. Open the front hood of the conformal coating system.
12. Lay towels or a cup under the SC-450 to collect fluid spills.
13. Disconnect the pneumatic, electrical, and fluid connections, see 5.6.2 Disconnecting the
Pneumatic, Electrical, and Fluid Connections.