SC_450 PreciseCoat Conformal Coating Jet_Rev_04.pdf - 第33页
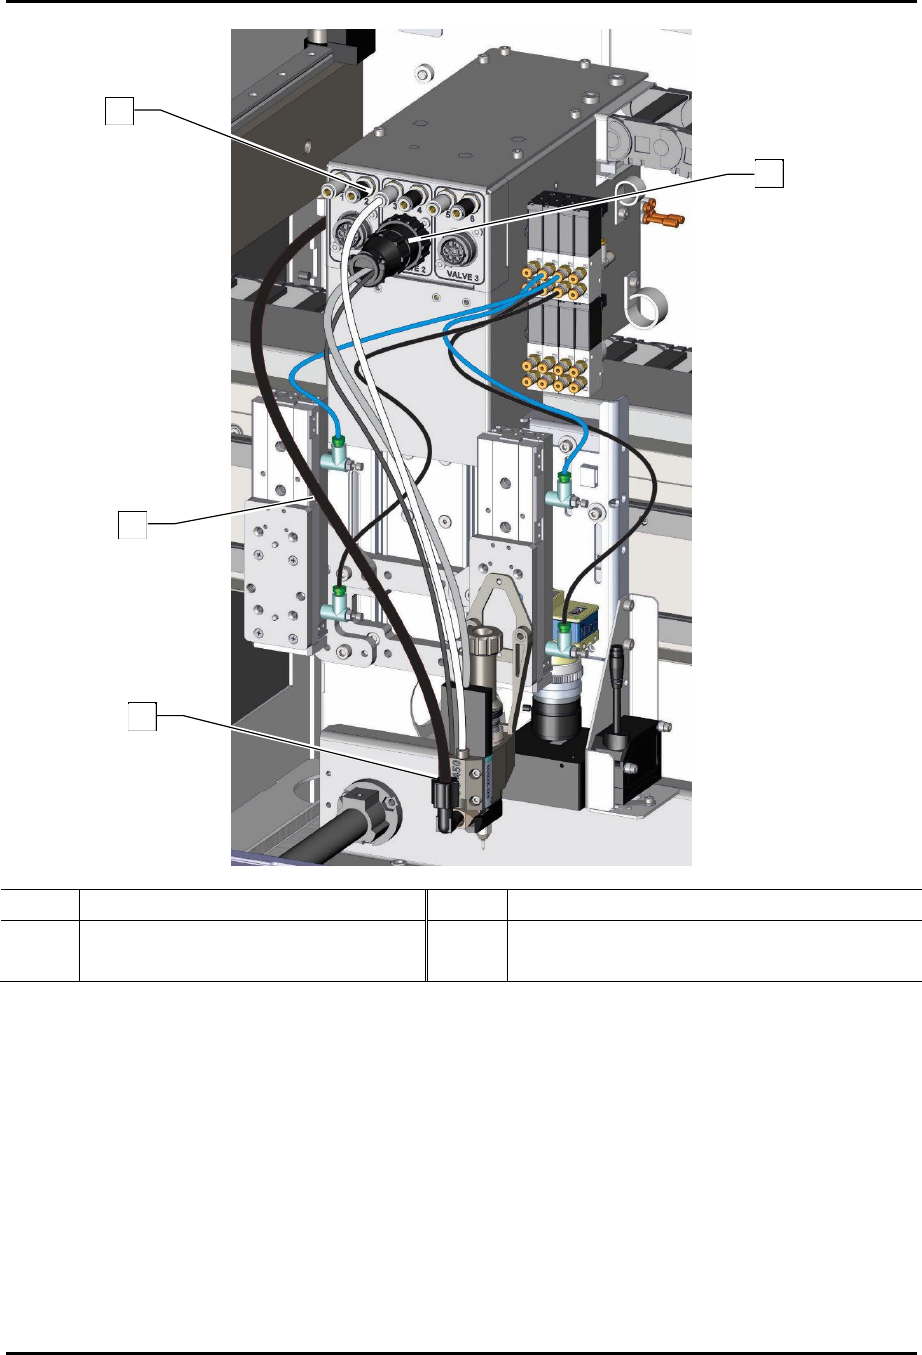
SC-450 PreciseCoat C onformal C oating J et Maintenance and Service © 2024 Nordson Corporation 27 Item Description Item Description 1 Valve A ir Connection 3 Fluid Fitting (Elbo w) 2 Fluid Line 4 Valve 2 El ectrical Conn…

SC-450 PreciseCoat Conformal Coating Jet Maintenance and Service
26 © 2024 Nordson Corporation
5.6.2 Disconnecting the Pneumatic, Electrical, and Fluid Connections
WARNING!
Protect the solenoid valve and other non-wetted parts from contact with fluid. Do
not immerse in solvent.
To disconnect the pneumatic, electrical, and fluid connections (Figure 5-4):
1. Depressurize the SC-450, see 5.6.1 Depressurizing the SC-450.
2. Perform a service shutdown. Refer to the applicable coating system Installation,
Operations, and Maintenance Manual.
3. For the SL-940:
a. Disconnect the valve solenoid cable from the SC-450 to the V2 position.
b. Disconnect fluid line (red tubing) from the fluid fitting and place the fluid line over the
purge cup for residual fluid.
?
NOTE
If only the SC-450 is to be removed, seal the fluid system immediately using the
appropriate cap or plug. Plugging the fluid lines prevents fluid curing due to air
exposure.
c. Disconnect Valve air from the Valve air connection on the dispense head.
4. For the SL-1040:
a. Disconnect the valve solenoid cable from the SC-450 to the valve connection on the
dispense head.
b. Disconnect fluid line (black tubing) from the fluid fitting and place the fluid line over the
purge cup for residual fluid.
?
NOTE
If only the SC-450 is to be removed, seal the fluid system immediately using the
appropriate cap or plug. Plugging the fluid lines prevents fluid curing due to air
exposure.
c. Disconnect Valve air from the Valve air connection on the dispense head.
SC-450 PreciseCoat Conformal Coating Jet Maintenance and Service
© 2024 Nordson Corporation 27
Item Description Item Description
1 Valve Air Connection 3 Fluid Fitting (Elbow)
2 Fluid Line 4 Valve 2 Electrical Connection
Figure 5-4 Disconnecting the Pneumatic and Fluid Connections
(Valve 2 Configuration Shown on SL-1040)
2
1
3
4

SC-450 PreciseCoat Conformal Coating Jet Maintenance and Service
28 © 2024 Nordson Corporation
5.6.3 Removing the SC-450 from the Mounting Bracket
To remove the SC-450 from the mounting bracket:
1. Depressurize the SC-450, see 5.6.1 Depressurizing the SC-450.
2. Disconnect the pneumatics, electrical, and fluid connections, see 5.6.2 Disconnecting the
Pneumatic, Electrical, and Fluid Connections.
3. If the fixed bracket is installed, remove two (2) screws securing the mounting bracket to the
applicator bracket. If the four position tilt and rotate bracket is installed, remove two (2) set
screws securing the applicator to the applicator bracket (Figure 5-5).
4. Remove the SC-450 from the applicator bracket.
Fixed Option
Four Position Tilt and Rotate Option
Item Description
1 Triple Applicator Bracket
2 Four Position Tilt and Rotate Bracket
3 Set Screws (2)
4 SC-450
5 Screws (2)
Figure 5-5 Removing the SC-450
1
4
5
2
3
4