OM-1273-004_w.pdf - 第148页
4-19 AJK-ML T-ID 5. Consumables and Important Servicing Parts 0706-002 5. Consumables and Important Servicing Parts 5.1 List of Consumables Listed below are the parts that may be consumed within one year . Contact our ma…
4-18
AJK-MLT-ID
4. Maintenance
0706-002
4. Maintenance
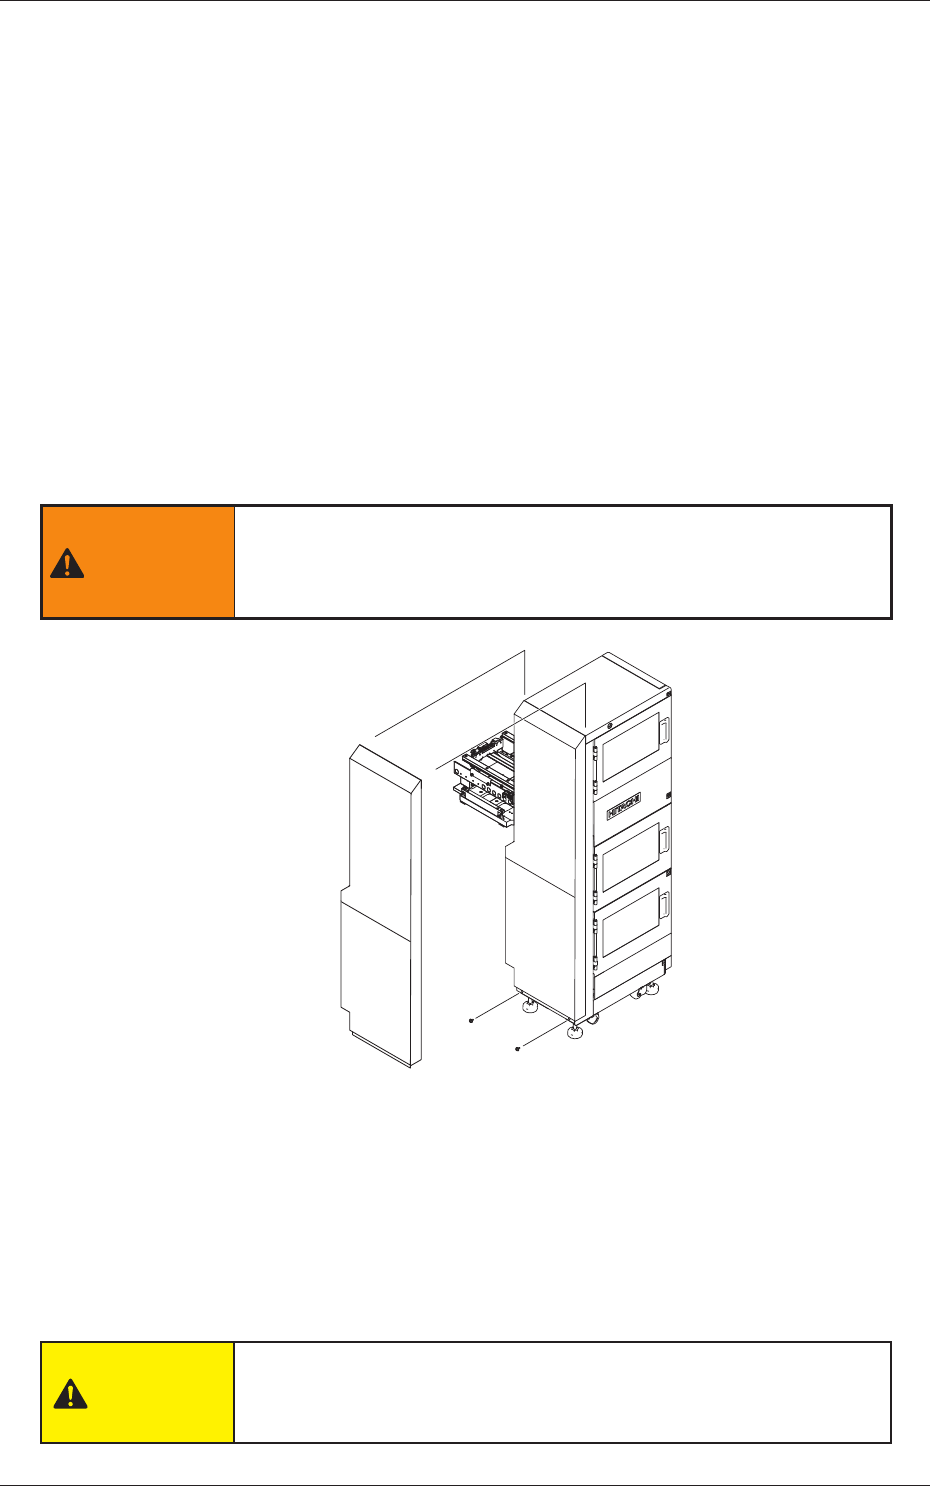
4.1 Detachment and Attachment of Maintenance Cover
4.1.1 Detachment of Maintenance Cover
(1) Zero the multi-layer tray feeder.
(2) Open the "TRAY UNIT" window and move the elevator to the place
where the grease can easily be supplied. (Operation Sequence: [MAINT]
Button on Main Menu Bar
→
[UNIT ADJ] Button on "MAINT"
Submenu Bar
→
[TRAY UNIT] Button on "UNIT ADJ" Submenu Bar
→
"TRAY UNIT" Window)
(3) Turn off the power.
(4) Remove two setscrews with a cross-head screwdriver.
WARNING
Before detaching the maintenance cover, be sure to turn off the
power breaker and lock it with a padlock.
Detach the maintenance cover.
Remove two setscrews.
Fig. D12
(5) Slide the maintenance cover upward to detach.
4.1.2 Attachment of Maintenance Cover
To attach the maintenance cover, follow the reverse procedure of the
detachment.
CAUTION
After the maintenance work, be sure to attach the cover back in
place.
4-19
AJK-MLT-ID
5. Consumables and Important Servicing Parts
0706-002
5. Consumables and Important Servicing Parts
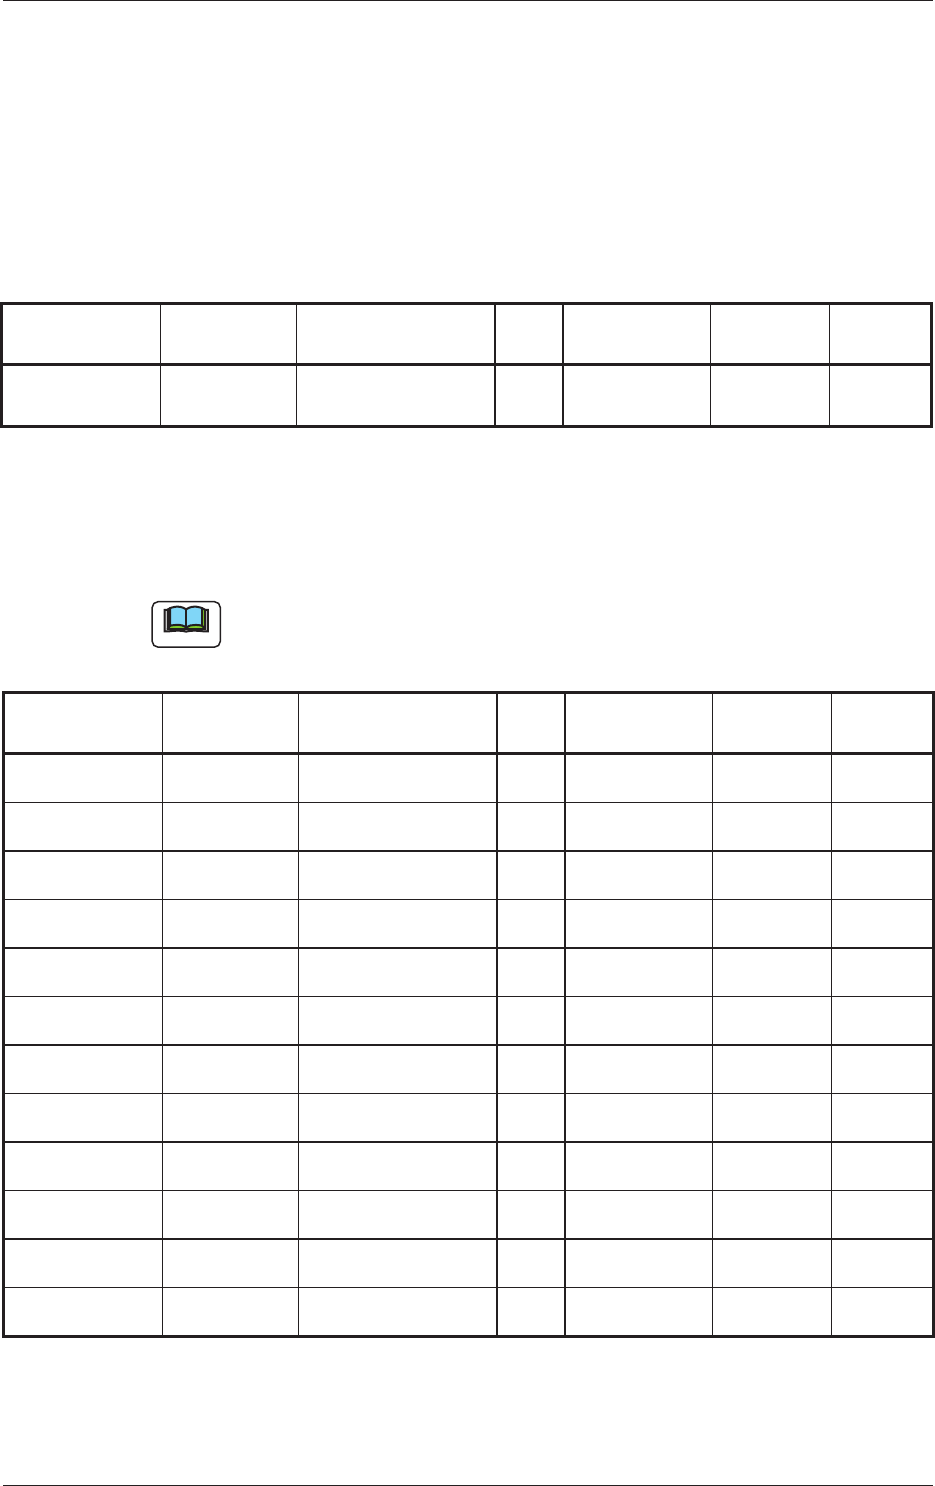
5.1 List of Consumables
Listed below are the parts that may be consumed within one year.
Contact our marketing department or sales agency whenever you need to
purchase some of these parts.
Table D6
Name Part No. Part Name Q'ty
Recommended
Q'ty/Year
Exploded
View
Remarks
Pallet 630 136 0140 ASSY, PLATE
(MP-G100)
5.2 List of Important Servicing Parts
Listed below are the parts for which maintenance work is required in several
years. The list below is provided for your reference.
.OTE
Since replacement work of important servicing parts requires highly
sophisticated technique, consult our service personnel for details.
Table D7
Name Part No. Part Name Q'ty
Recommended
Q'ty/Year
Exploded
View
Remarks
Elevator 630 136 3455 BALL SCREW 1
-
ER-1
EL-1
Elevator 630 129 7842 GUIDE, LINEAR 1
-
ER-1
EL-1
Traverse 630 128 2947 GUIDE, LINEAR 1
-
TR-3
TL-3
Traverse 630 129 2601 GUIDE, LINEAR 1
-
TR-2
TL-2
Photoelectric
Sensor
630 072 5773 SENSOR, PELEC 1
-
ER-2
EL-2
Photoelectric
Sensor
630 101 3794 SENSOR, PELEC 2
-
ER-2
EL-2
Photoelectric
Sensorr
630 116 5882 SENSOR, PELEC 4
-
ER-5, ER-7
EL-5, EL-7
Photoelectric
Sensor
630 089 2079 SENSOR, PELEC 2
-
TR-2
TL-2
Photoelectric
Sensor
630 089 2086 SENSOR, PELEC(SLIT) 2
-
TR-2
TL-2
Photoelectric
Sensor
630 129 2243 SENSOR, PELEC 1
-
TR-3
TL-3
Magazine MG-G115
-
Magazine MG-G110
-

4-20
AJK-MLT-ID
6. Troubleshooting
6.1 Power Operation Impossible for Multi-Layer Tray Feeder
Table D8
Symptom
The elevator shaft cannot be powered.
Cause
(Cause 1) The main machine is not powered.
(Cause 2) The safety door is not closed.
Remedy
(Remedy 1) Turn on the power switch of the main machine.
(Remedy 2) Close the safety door.
6.2 Pickup Errors
Table D9
Symptom
The elevator shaft cannot be powered.
Cause
(Cause 1) The pickup vacuum pressure is not proper.
(Cause 2) The vacuum nozzle is not proper.
(Cause 3) The component pickup position is not normal.
(Cause 4) There is a problem in the transition of the pallet.
(Cause 5)
The tray is not xed normally.
(Cause 6) The pallet is warped.
(Cause 7) The anti-warpage plate for the pallet on the traverse is worn out.
Remedy
(Remedy 1) Check the vacuum pump and tubes.
(Remedy 2) Use a proper vacuum nozzle for the component.
(Remedy 3) Conrm that correct parameters are set as offsets for the traverse axis, tray offsets
in the pallet, tray matrix dimensions, and the height data for tray components.
(Remedy 4) Check the elevator offset.
(Remedy 5)
Fix the tray normally.
(Remedy 6)
Check the atness of the pallet and how the rails on both sides are worn out.
(Remedy 7) Place the pallet on the chute and check the clearance.
6. Troubleshooting
0706-002