Horizon UserManualV6.pdf - 第373页
18. Select Proceed (F1). Proceed Select Another The ProFlow unit is placed in contact with the screen. 19. Open the front printhead cover. Recharging 1. Ensure that the ProFlow pressure mechanism is in the raised positio…
11. Select Exit (F8).
Exit
12. Select Yes (F1).
Yes
Remove
Cover
The message ‘The ProFlow unit will be placed in the REAR envelope’ is
displayed.
13. If the ProFlow unit is required to be placed in another envelope continue with
Step 14. If the ProFlow unit is required to be placed in the machine preferred
envelope go to Step 18.
NOTE
The ProFlow unit needs to be in the rear envelope to replenish the ProFlow
transfer head.
14. Select Select Another (F8).
Proceed
Select
Another
The following window is displayed:
15. Use the Next or Previous keys (F4 or F5) to highlight Front.
Use
Next Previous
Exit
16. Select Use (F1).
Use
Next Previous Exit
17. Select Exit (F8).
Use Next Previous
Exit
9.72 User Manual Software Version 6
CONSUMABLE REPLENISHMENTS
PROFLOW
Preferred Envelope
REAR
FRONT
18. Select Proceed (F1).
Proceed
Select
Another
The ProFlow unit is placed in contact with the screen.
19. Open the front printhead cover.
Recharging
1.
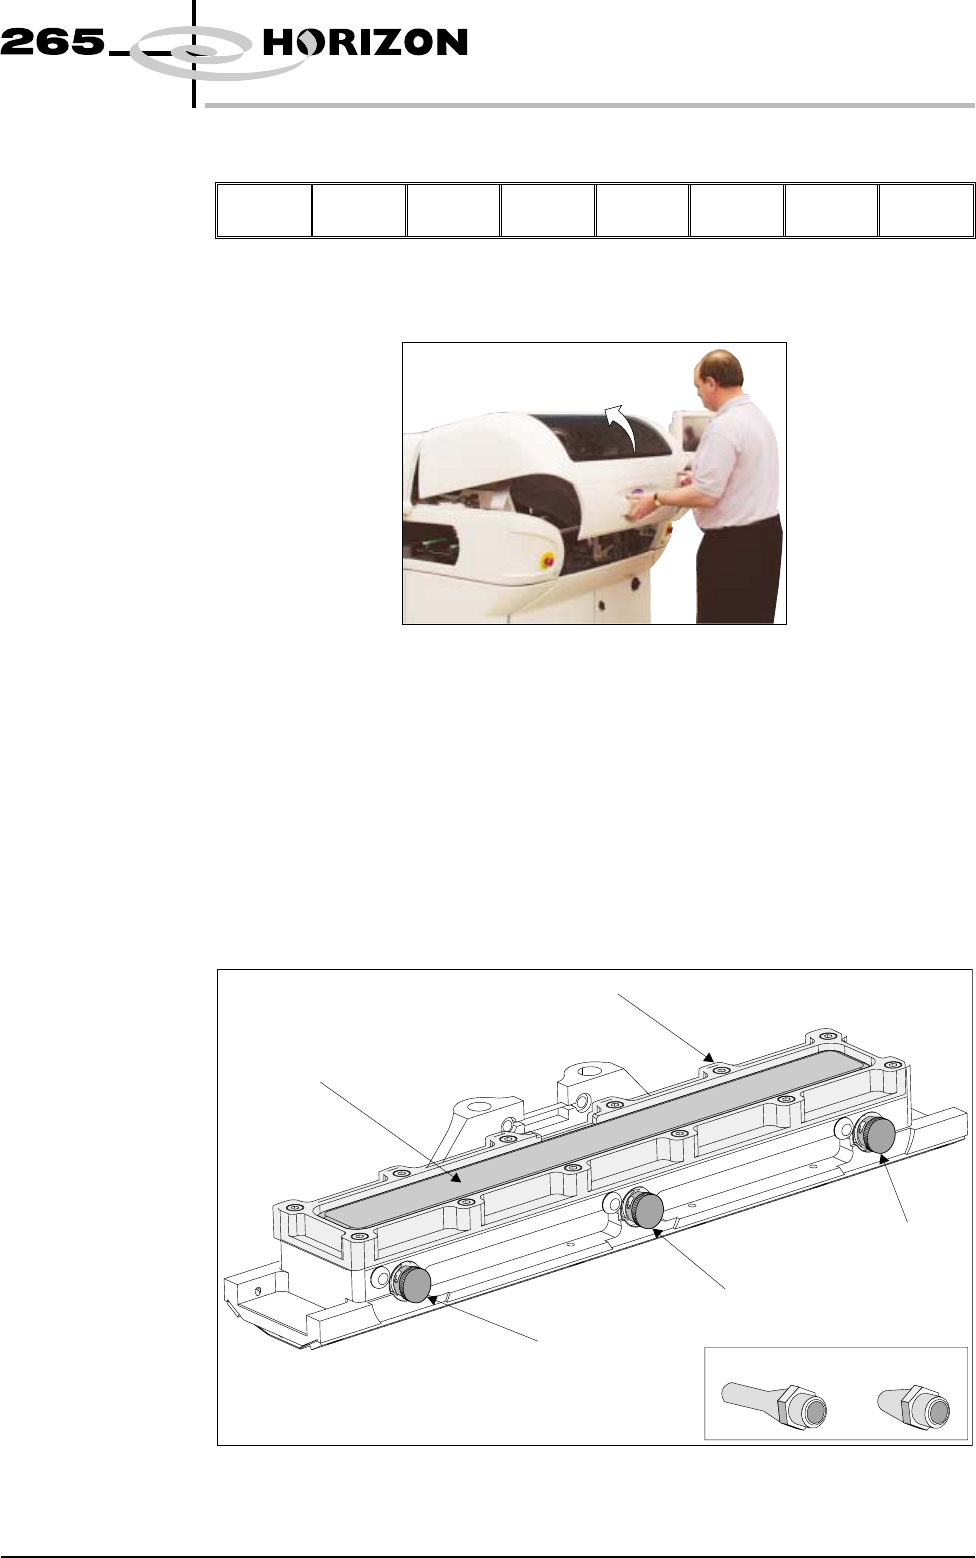
Ensure that the ProFlow pressure mechanism is in the raised position (to
expose transfer head diaphragm).
2. Remove the centre filling port bayonet cap.
NOTE
The ITC transfer head has one central filling port only.
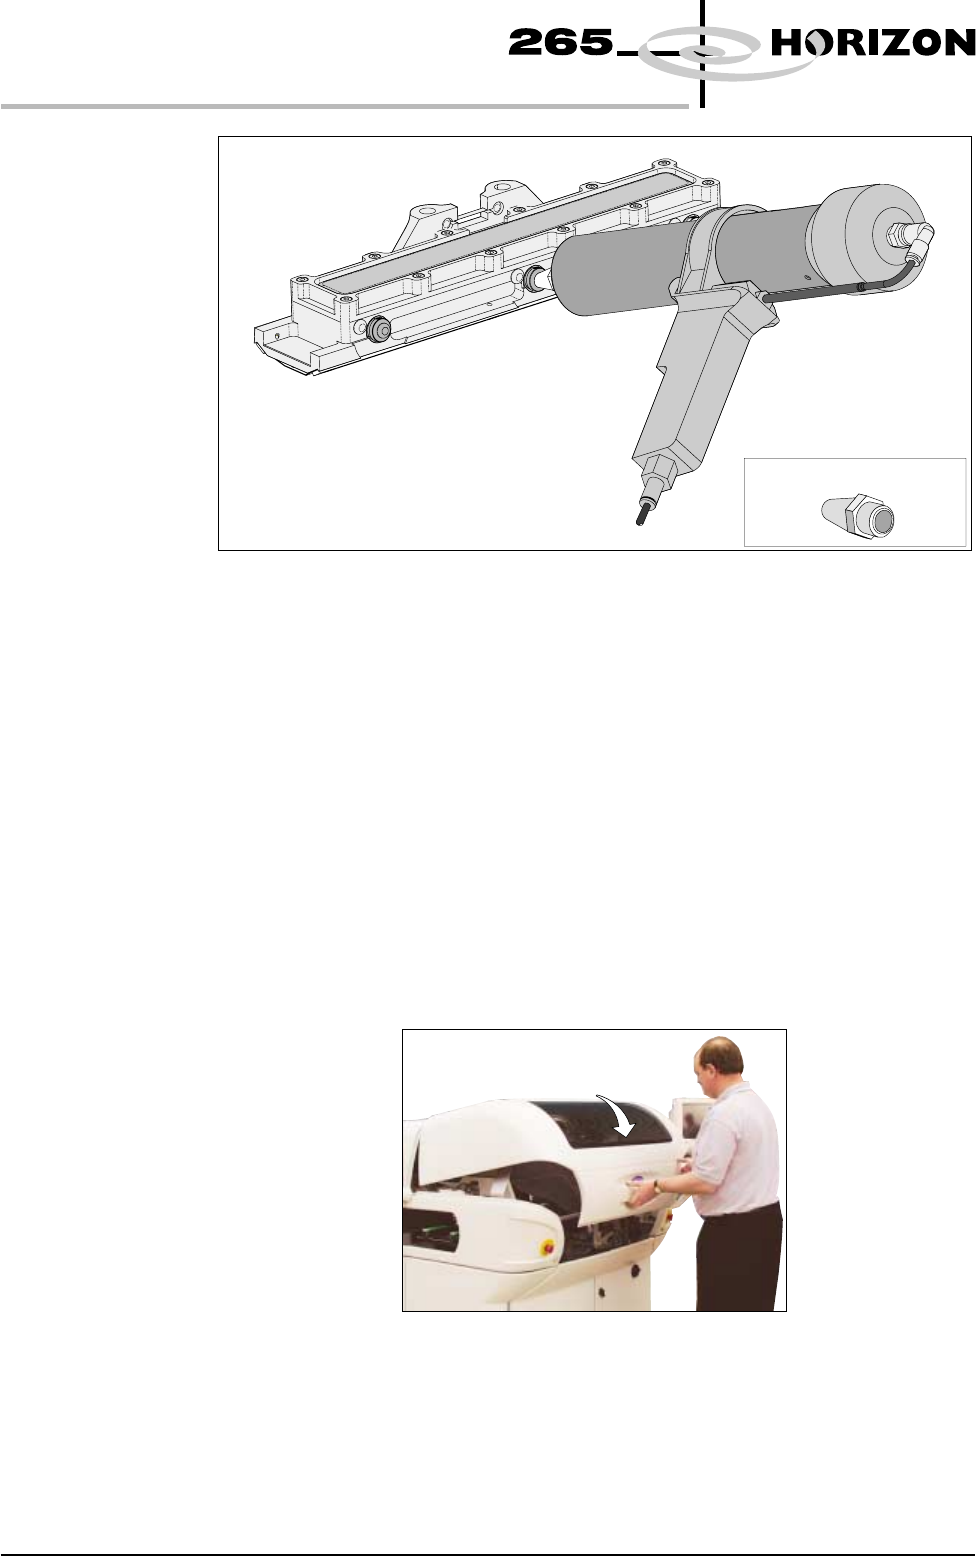
3. Using either a general purpose mastic gun or the optional pneumatic paste
gun (with a standard paste cartridge loaded). Push the nozzle of the gun into
the centre filling port of the ProFlow transfer head (see figure below).
Software Version 6 User Manual 9.73
CONSUMABLE REPLENISHMENTS
PROFLOW
Filling Port
Bayonet Cap
Diaphragm
Diaphragm Retainer
Recharging Nozzles
Filling Port
Bayonet Cap
Filling Port
Bayonet Cap
4. Fill the diaphragm until it starts to balloon, this can be spread sideways by
massaging the diaphragm with the fingers.
5. Alternatively, fill using all three filling ports for even distribution.
NOTE
Ensure that only one port is opened at a time.
6. Do not overfill. If this occurs any excess will seep out between the wipers
and the screen.
NOTE
Clean any excess seepage before commencing print operations.
7. Ensure that the threaded areas around the filling ports are thoroughly clean
before commencing print operation.
8. Refit the port bayonet caps.
9. Close the front printhead cover.
9.74 User Manual Software Version 6
CONSUMABLE REPLENISHMENTS
PROFLOW
Short Recharging Nozzle