444CEMM2(CM201).pdf - 第36页
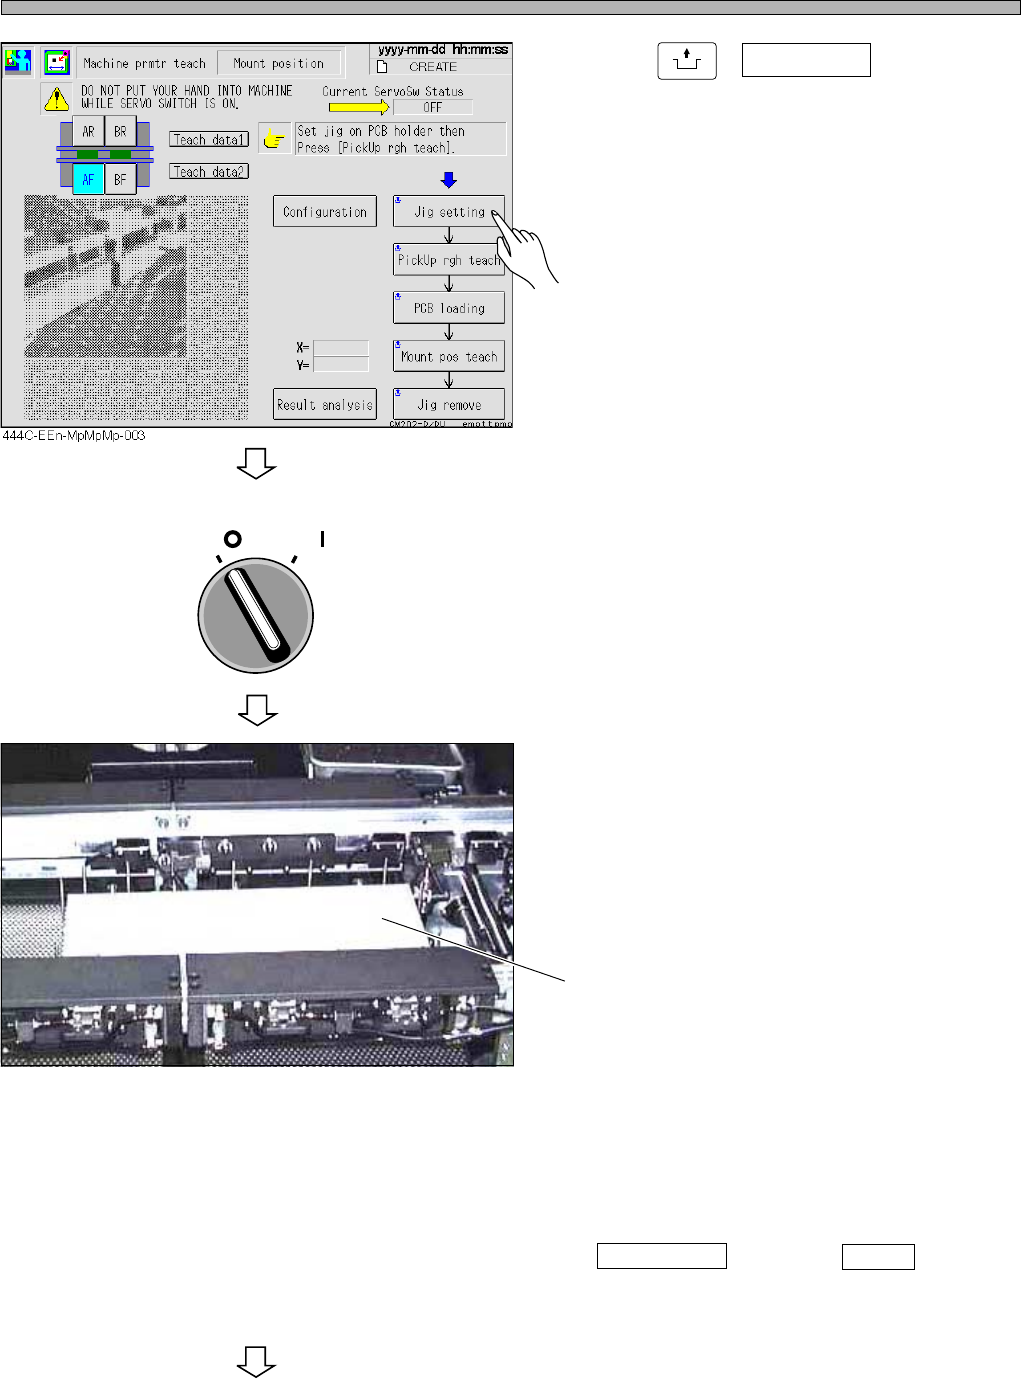
Page 2-36 3. Press UNLOCK + Jig setting . • The head moves to the jig setting position, and then the indication of the servo switch changes to OFF automatically . 4. T urn OFF the servo switch. 5. Open the safety cover .…
Page 2-35
MACHINE PARAMETER
2
2
2
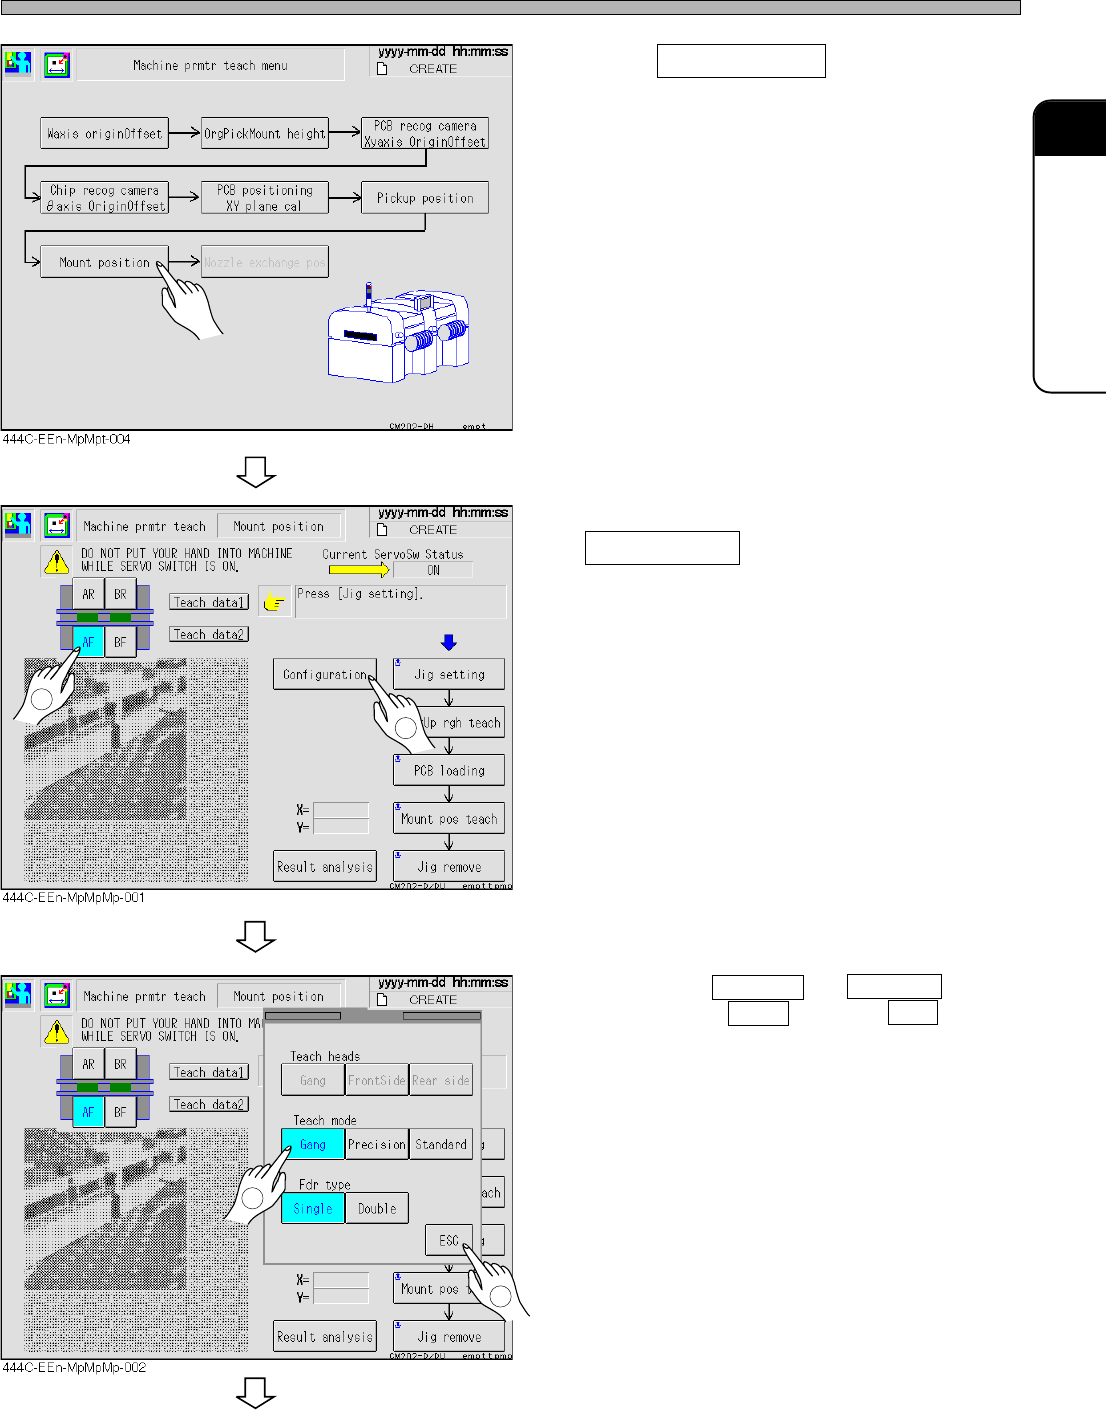
1. Press Mount position .
• The indication of the servo switch changes to
OFF.
2. Select a stage, and press
Configuration to check.
∗ To carry out Standard and Precision continu-
ously, choose Gang and press ESC .
Procedures of Machine Parameter Teaching
To the next page
2
1
2
1
444C-E-MMA02-A04-01
Page 2-36
3. Press
UNLOCK
+ Jig setting .
• The head moves to the jig setting position, and
then the indication of the servo switch changes
to OFF automatically.
4. Turn OFF the servo switch.
5. Open the safety cover.
6. Put illumination on the support
blocks.
∗ See to it that it is located directly under the
white acrylic plate, while imagining the trans-
ported one.
7. Attach the feeder with 1005R chips to
the No.7 slot on the feeder base.
∗ If there are not 8-mm single feeders, press
Configuration and choose Double for the
feeder type.
Procedures of Machine Parameter Teaching
444C-E-MMA02-A04-01
To the next page
444C-480P
Illumination
OFF ( )
ON ( )
SERVO
Page 2-37
MACHINE PARAMETER
2
2
2
Procedures of Machine Parameter Teaching
444C-E-MMA02-A04-01
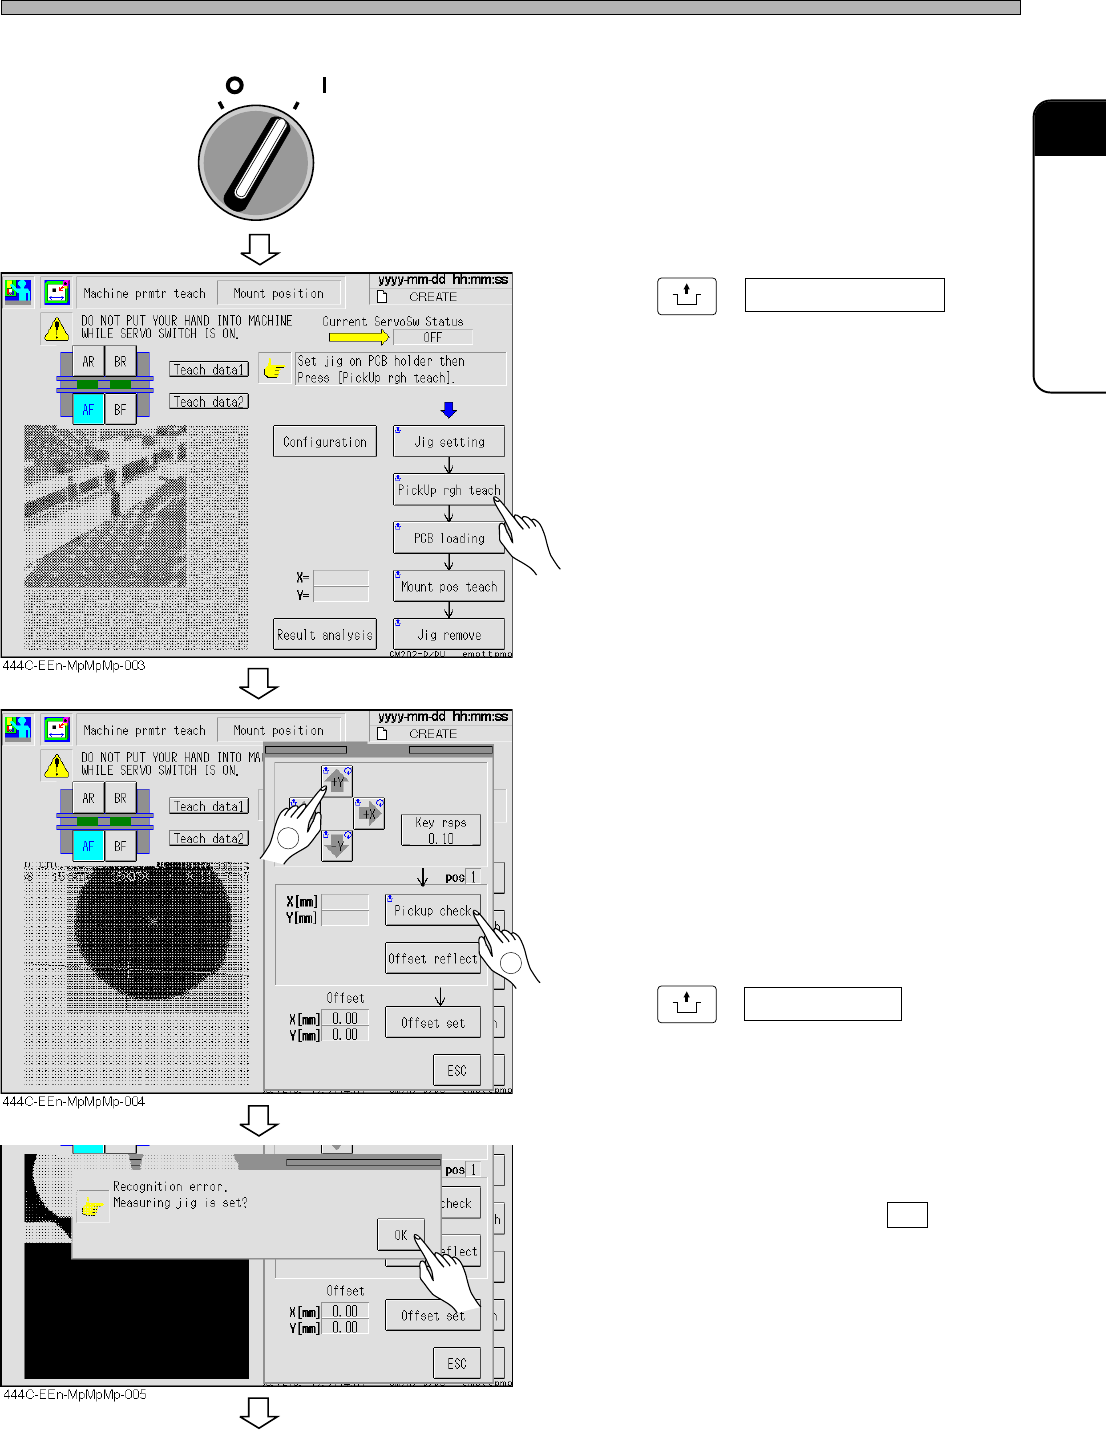
8. Close the safety cover.
9. Turn ON the servo switch.
10. Press
UNLOCK
+ PickUp rgh teach .
11. If the nozzle tip has not aligned with
the pick-up position, press arrow
keys and a key rate button.
• Align them changing the key rate in 0.10 steps.
• The increments and decrements appear in the
offset X and the Y field.
12. Press
UNLOCK
+ Pickup check .
∗ In case of failure, an error message appears.
∗ Visually recheck the chip, press OK , then
return to step 11.
To the next page
2
1
OFF ( )
ON ( )
SERVO