444CEMM2(CM201).pdf - 第38页
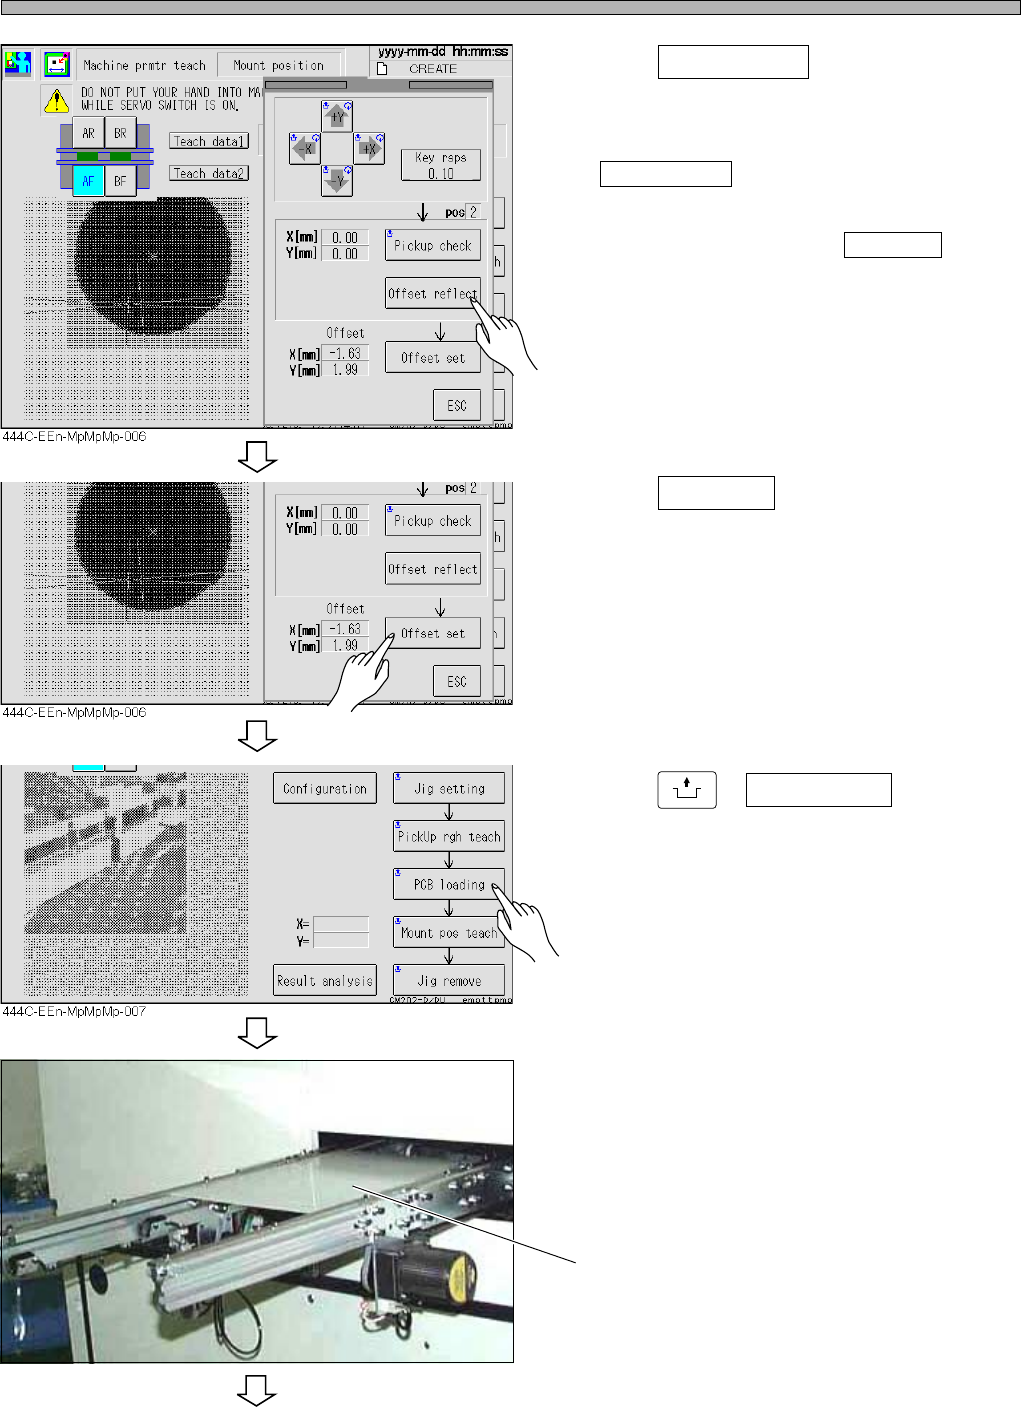
Page 2-38 Procedures of Machine Parameter T eaching 444C-E-MMA02-A04-01 13. Press Offset reflect , then return to step 11 . • The values in the X and the Y field at the left of Pickup check change to 0. ∗ If you frequent…
Page 2-37
MACHINE PARAMETER
2
2
2
Procedures of Machine Parameter Teaching
444C-E-MMA02-A04-01
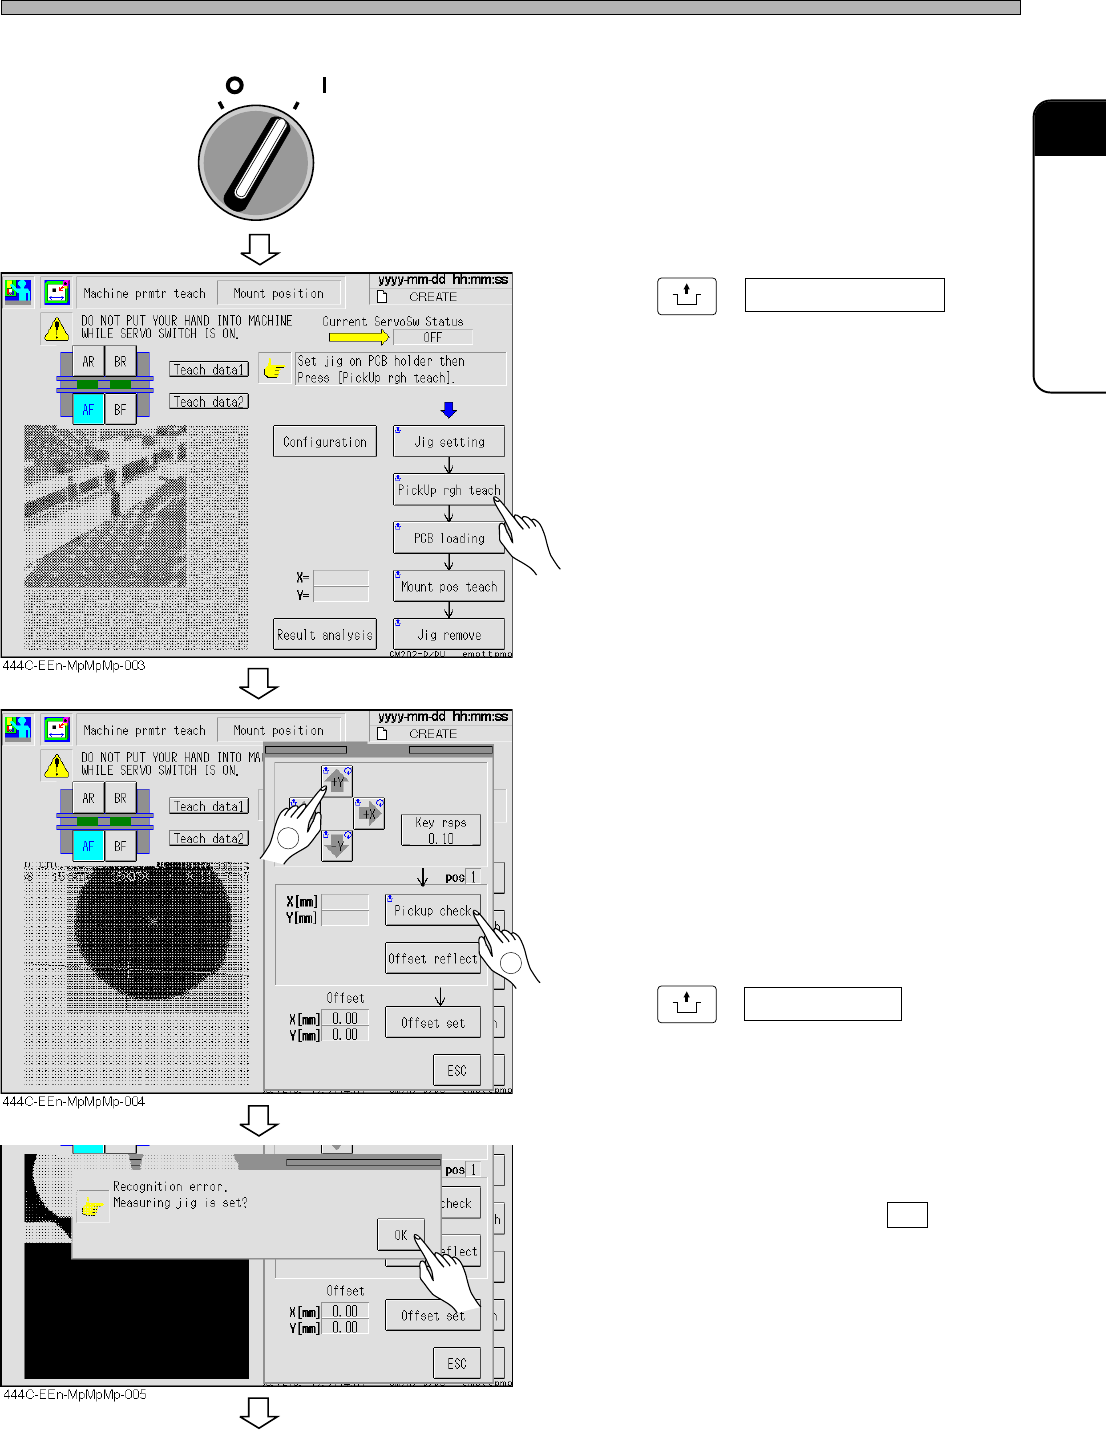
8. Close the safety cover.
9. Turn ON the servo switch.
10. Press
UNLOCK
+ PickUp rgh teach .
11. If the nozzle tip has not aligned with
the pick-up position, press arrow
keys and a key rate button.
• Align them changing the key rate in 0.10 steps.
• The increments and decrements appear in the
offset X and the Y field.
12. Press
UNLOCK
+ Pickup check .
∗ In case of failure, an error message appears.
∗ Visually recheck the chip, press OK , then
return to step 11.
To the next page
2
1
OFF ( )
ON ( )
SERVO
Page 2-38
Procedures of Machine Parameter Teaching
444C-E-MMA02-A04-01
13. Press Offset reflect , then return to
step 11.
• The values in the X and the Y field at the left of
Pickup check change to 0.
∗ If you frequently achieve success without
pressing arrow keys, press Offset set to
register.
14. Press Offset set .
• pos2 is indicated.
15. Return to step 11, and complete the
teaching up to pos6.
16. Press
UNLOCK
+ PCB loading .
17. Place the white acrylic plate whose
top on which a double-faced tape is
affixed, onto the conveyor entrance.
• Peel the paper off the double-faced tape.
444C-479P
White acrylic plate
To the next page
Page 2-39
MACHINE PARAMETER
2
2
2
Procedures of Machine Parameter Teaching
444C-E-MMA02-A04-01
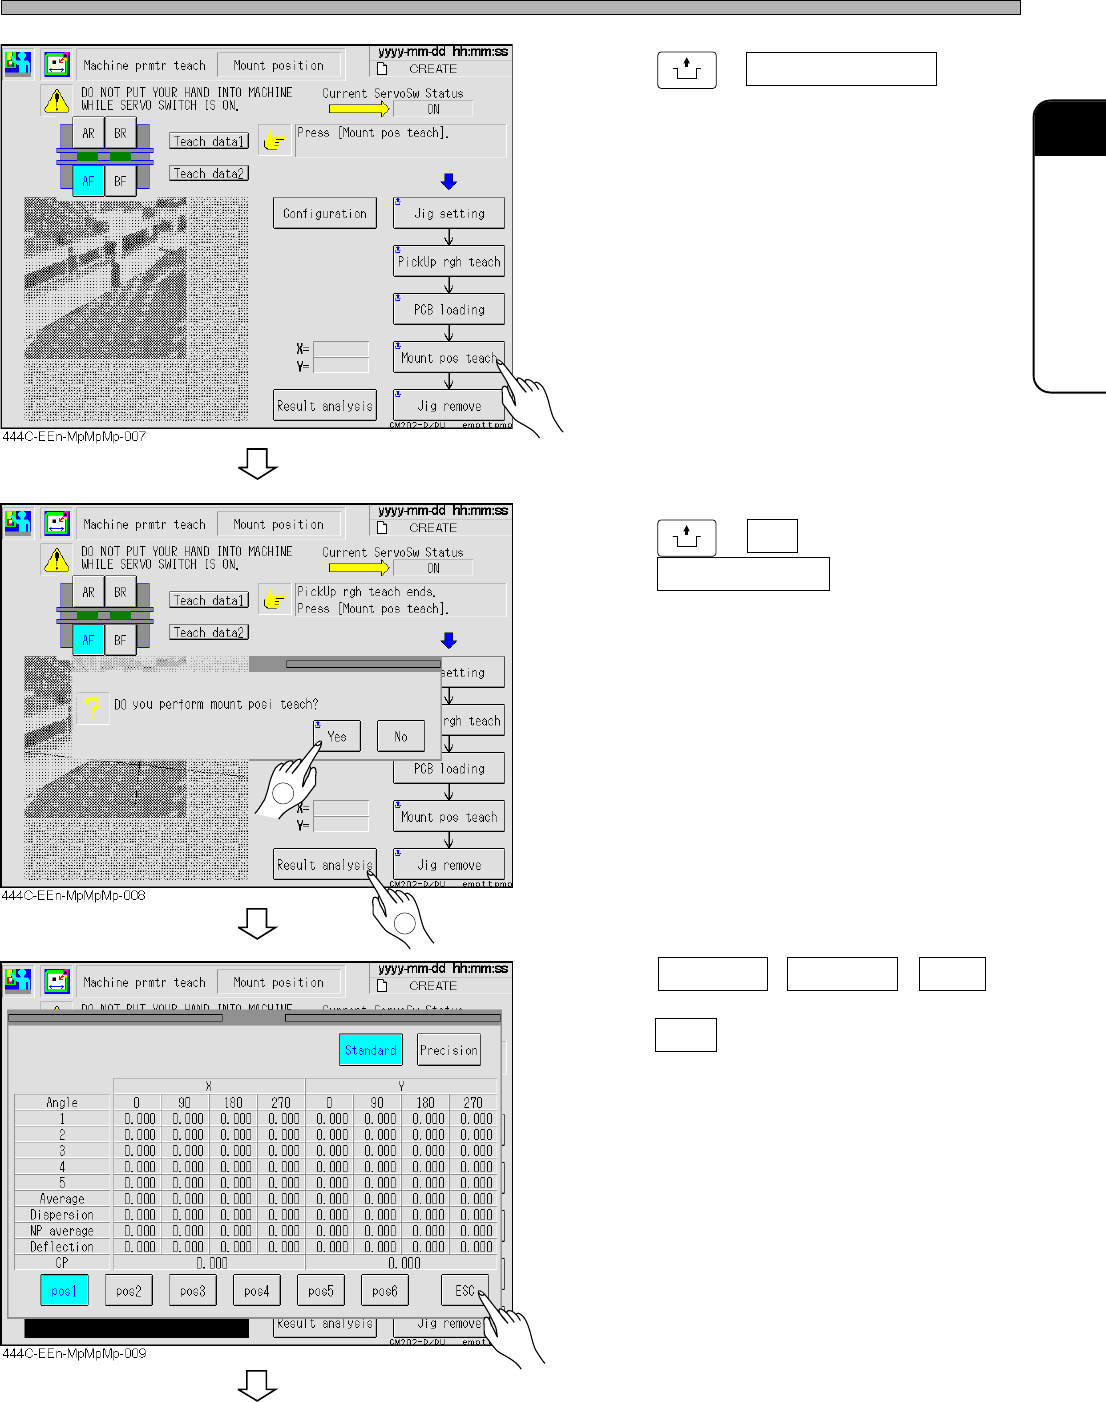
18. Press
UNLOCK
+ Mount pos teach .
19. Press
UNLOCK
+ Yes ; after completion,
press Result analysis .
20. Press Standard , Precision , pos2 ,
and the others to check, and then
press ESC .
To the next page
2
1