User Manual SIPLACE Head Care Station -.pdf - 第62页
5 Working with the HCS 5.2 Head verification process 62 User Manual SIPLACE Head Care Station 10/2017 5.2.3 Starting the HCS software ► On the desktop, double-click the TB Start icon to start the verification software: ð…
5 Working with the HCS
5.2 Head verification process
User Manual SIPLACE Head Care Station 10/2017 61
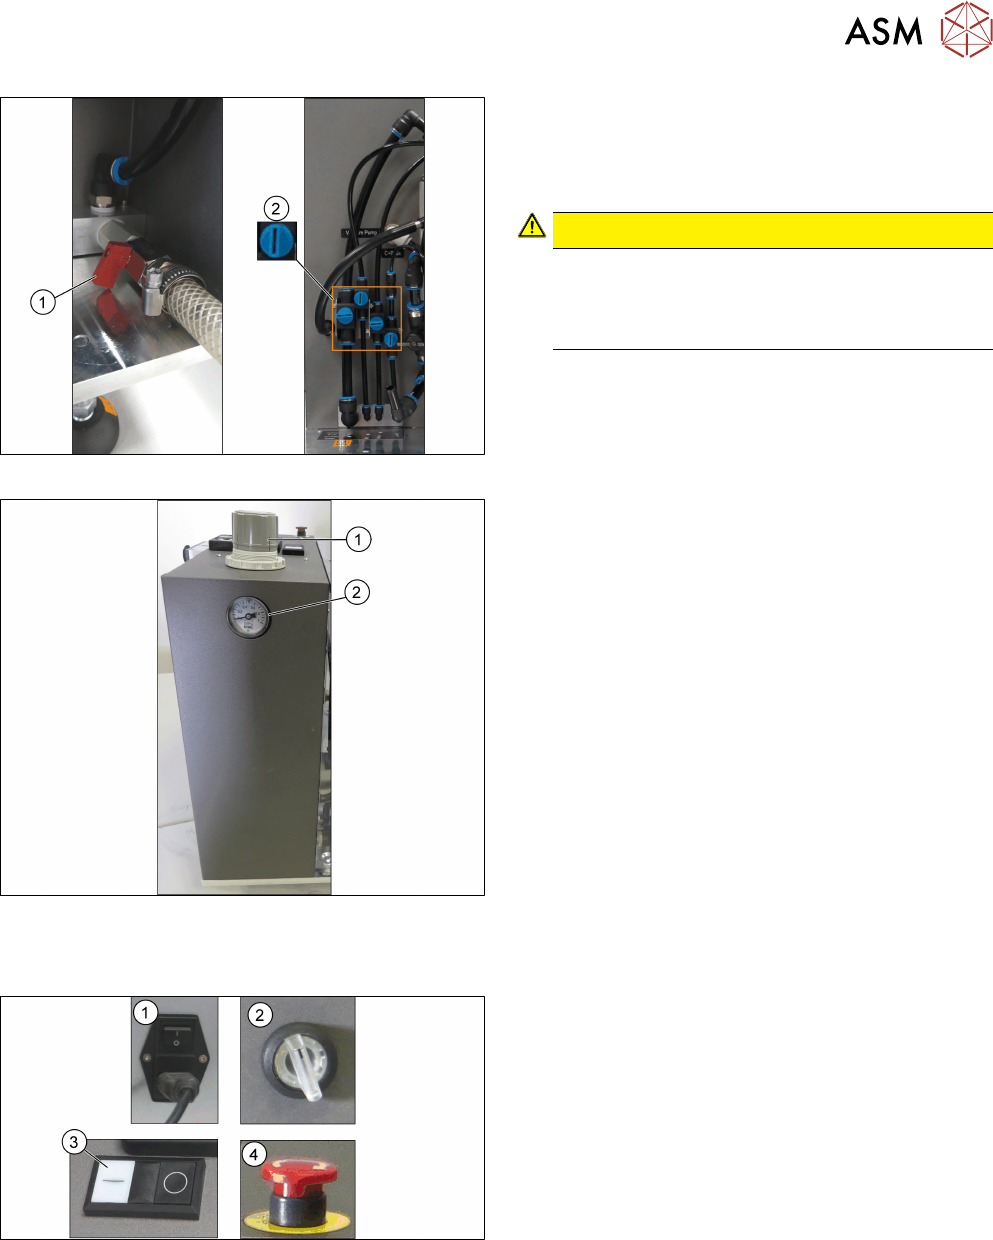
Fig.62: Opening the valves
► Open the main valve for the compressed air sup-
ply(1) at the back of the head unit.
► Open the respective valves(2) for the com-
pressed air supply to the head.
CAUTION!
Risk of injury due to loose pneumatic hoses!
Always ensure the valves of the pneumatic con-
nections for the heads are closed before switch-
ing on the main valve for compressed air.
.
For information on the correct pneumatic connections,
see 3.1.6.2 "Pneumatic connections for the
heads" [}41].
Fig.63: Adjustment wheel and manometer
► Pull off the cap(1) of the adjustment wheel.
► Turn the adjustment wheel until the mano-
meter(2) shows 4.8 bar.
5.2.2 Switching on the HCS
Fig.64: HCS switches and buttons
► Switch on the main switch(1) on the control box.
► Switch on the HCS power switch(2) on the right
side of the head unit to power on the head unit.
► Ensure that the EMERGENCY OFF button(4) is
released.
► Press the Start button(3) on top of the head unit.
► Wait until the head is initialized.
ð Green LEDs at the intermediate distributor
board light up and for C&P heads, the LEDs
at the DPs flash when the head is initialized.
5 Working with the HCS
5.2 Head verification process
62 User Manual SIPLACE Head Care Station 10/2017
5.2.3 Starting the HCS software
► On the desktop, double-click the TB Start icon to start the verification software:
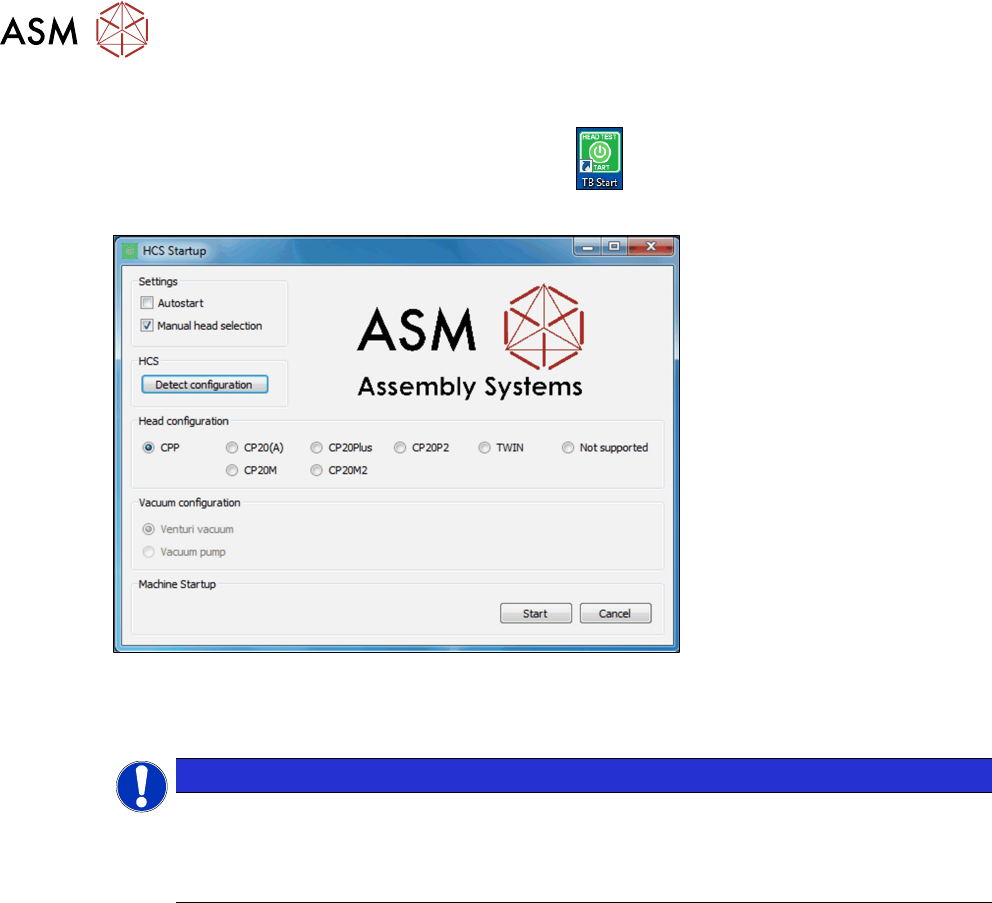
ð The HCS Startup screen is displayed:
Fig.65: HCS Startup screen
If the head was initialized correctly, the head is automatically detected and selected under Head-
configuration.
NOTICE
No head detected
If the head initialization failed, no head can be detected. Manual head selection is selec-
ted
under Settings. Not supported is selected under Head configuration.
Autostart option
If the Autostart option is enabled, the software starts automatically within seconds. See 5.2.3.1
"Test Bench Start screen" [}63].
Manual head selection
If the Manual head selection option is enabled, heads need to be selected manually before start-
ing the SIPLACE Test Bench.
5 Working with the HCS
5.2 Head verification process
User Manual SIPLACE Head Care Station 10/2017 63
5.2.3.1 Test Bench Start screen
When the SIPLACE software is started, the following screen is displayed:
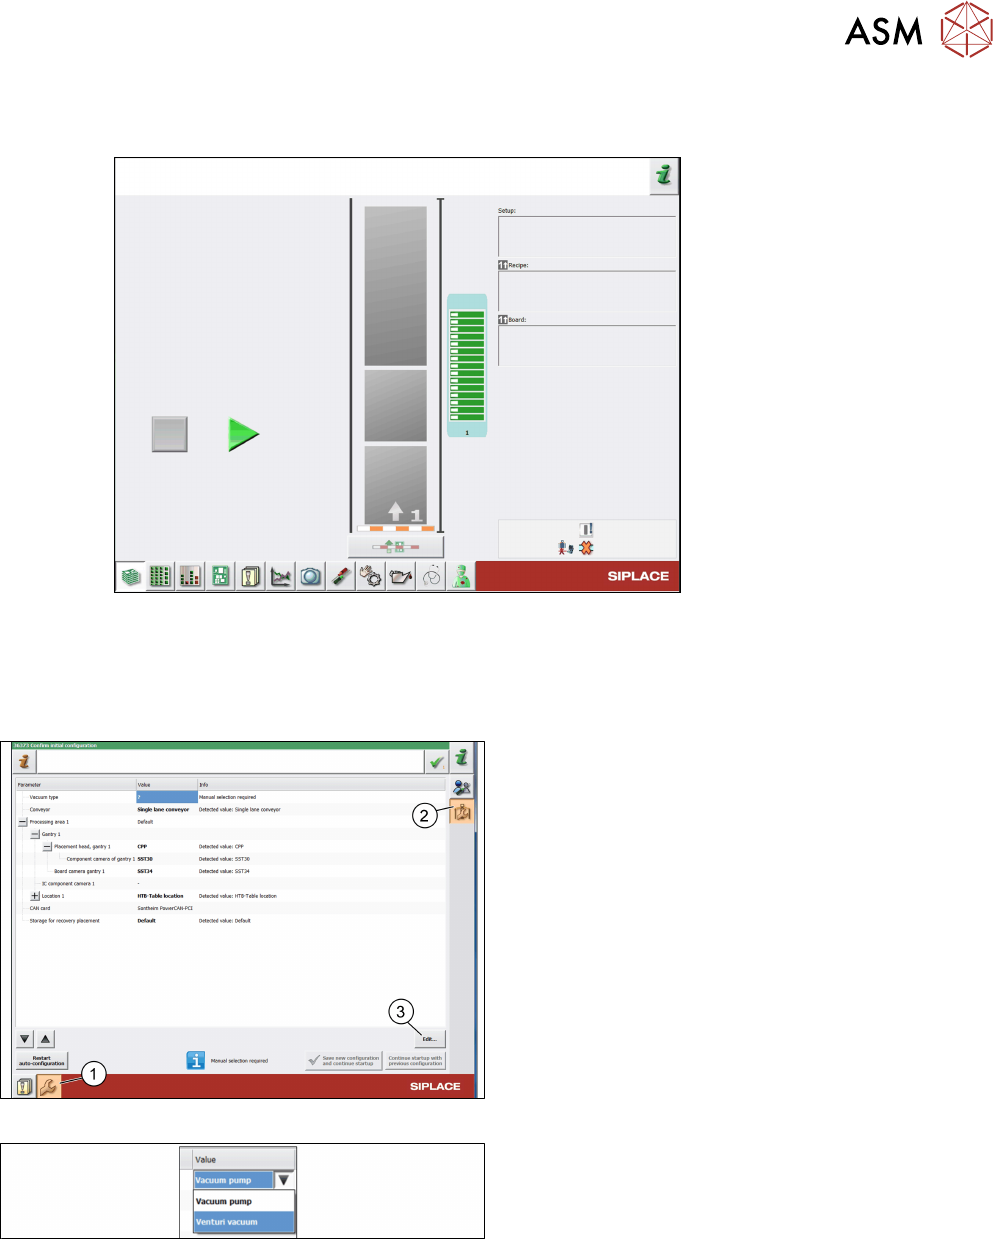
Fig.66: Test Bench Start screen
5.2.3.2 First start of software
The vacuum system and the CAN-Bus setup might not be automatically detected. If this is the
case, both need to be configured manually.
Fig.67: Machine configuration
► Log on as machine service. 5.2.4 "Changing the
user role" [}64]
► Click the Automatically update and configure
the machine icon(1).
► Click the Confirm automatically detected
machine configuration like camera type, con-
veyor type… icon(2).
► Click Edit…(3).
Fig.68: Vacuum type selection
► Select the Vacuum type.
► Wrong vacuum values
The selection applies the vacuum limits to be
used for the verification. If the vacuum type does
not match the connected vacuum supply, wrong
results will be provided.
► Click Save new configuration and continue
startup.