Workcell-Installation-Guidelines-Troubleshooting-Maintenance-REV-F.pdf - 第42页
Workcell Installation and General Guidelines Revision F / Janu ary 2021 Page 42 of 59 Note: It is n ot necessary to configure th e Connec tion Type f or all controller m odels. 8. Select the “ Next” button. 9. Select the…
Workcell Installation and General Guidelines
Revision F / January 2021
Page 41 of 59
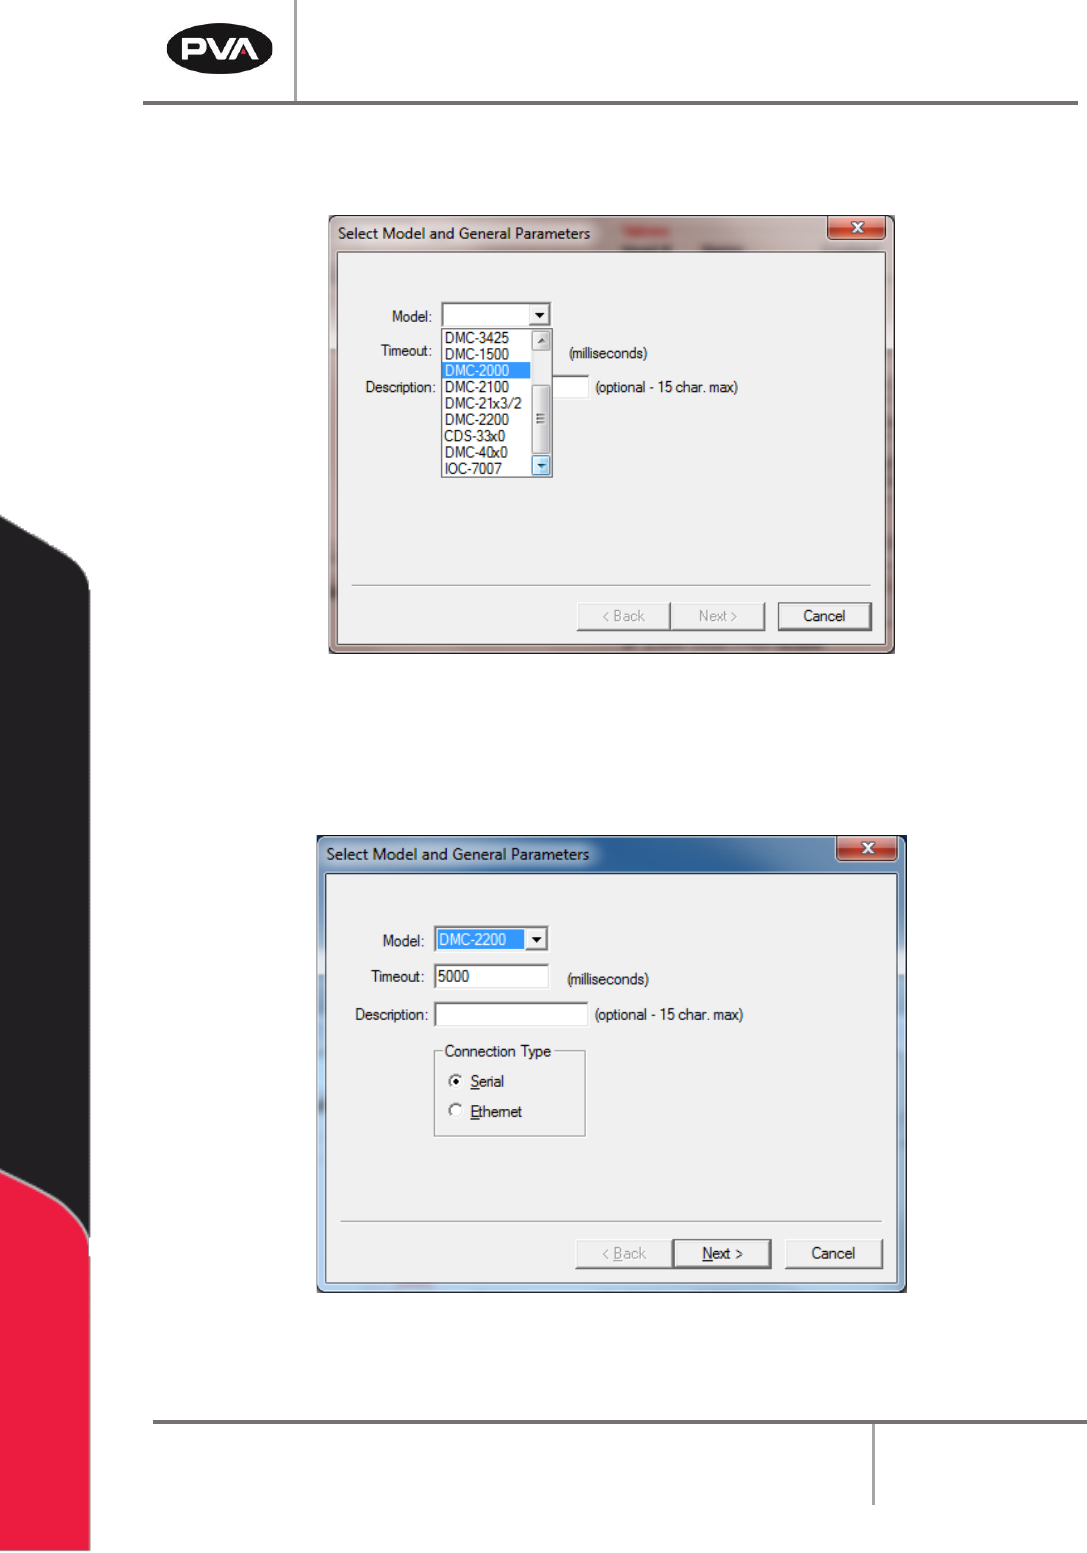
5. Select the controller model installed in the workcell from the Model dropdown box.
Select DMC4000 for Delta class systems and DMC2000 for all other systems.
Figure 25: Controller Models
6. Use the default Timeout for all controllers.
7. Select “Serial” for Connection Type.
Figure 26: Connection Type
Workcell Installation and General Guidelines
Revision F / January 2021
Page 42 of 59
Note: It is not necessary to configure the Connection Type for all controller models.
8. Select the “Next” button.
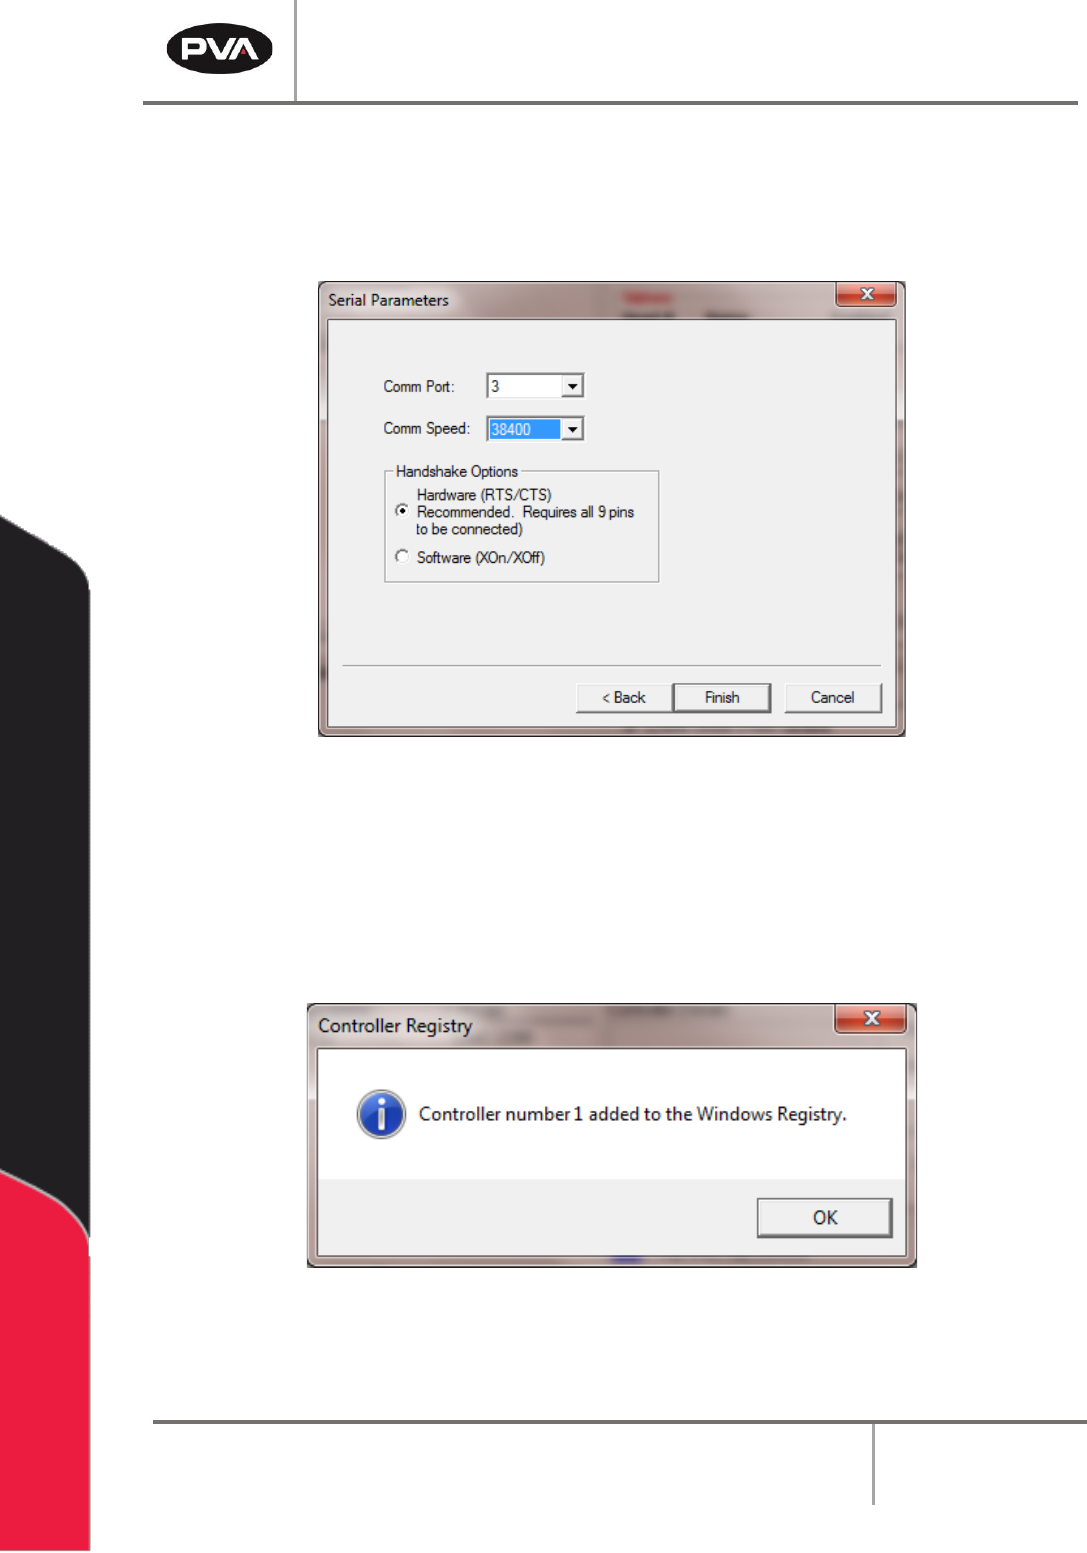
9. Select the “Comm Port” (communication port) that the PC uses.
Figure 27: Serial Parameters
10. The Comm Speed in this box should match the comm speed set on the controller.
This is set to 19200 or 38400 by PVA.
11. Select “Hardware” under Handshaking Options.
12. Select “Finish”.
Figure 28: Controller Added
13. Select “OK” in the Controller Registry dialog box after the controller is added.

Workcell Installation and General Guidelines
Revision F / January 2021
Page 43 of 59
14. To make changes, highlight the controller and select “Edit Controller Properties”.
15. Multiple control handles can be added.
16. To delete control handles, select the control handle and select “Delete”.
17. Select “Close” when you are finished.
Figure 29: Edit Registry
18. Select the “Change Controller” button in the Machine Parameters window to
change the controller that PathMaster® uses with the workcell.
19. Select the controller to be used.
Figure 30: Change Controller
20. Select the “OK” button.