SA_3214_en.pdf - 第11页
11 1 1 2 2 6 7 3 4 5 3 Operation Fig. 7 Mounting applicator to printer ! Attention! Initiation,adjustmentsandchangingofpartsistobeperformedbyqualiedservicepersonalonly . Initiation/Service Manual Appli…
10 10
3 Operation
y
x
z
3.1 Standard Operation
Check all external connections.
Load the material. Ensure that the locking system is closed "Operator's Manual" of the printer.
Open the shutoff valve.
!
Attention!
Ensure that the pad is not covered by a label when switching on the printer-applicator system, or the
vacuum sensor may be calibrated incorrectly.
Switch on the printer.
i
Note!
In case the pad is outside the starting position at the moment of switching on the air pressure the procedure
will be interrupted and an error message will be displayed.
By pushing the pause button on the printer the error is acknowledged and the pad will move back to its
starting position.
The Applicator is ready for work.
Press the feed key of the printer.
A synchronization feed is initiated and the processed labels need to be removed manually. After a few seconds
the printer carries out a short backfeed to position the front edge of the next label at the start of the printing line.
i
Note!
This synchronizing also has to be carried out when the print job has been interrupted with the cancel key.
Synchronizing is not necessary when the print head was not lifted between print jobs. This also applies if
the printer was powered off between print jobs.
Start a print job.
Start the labelling process via PLC interface.
Error messages that occur during the labelling process are shown in the display of the printer 4 Error Messages.
3.2 Cleaning
!
Attention!
Never use solvent and abrasive.
1
Clean the outside surfaces with multi purpose cleaner.
Remove dust particles and leftover label pieces with a soft
brush and/or vacuum cleaner.
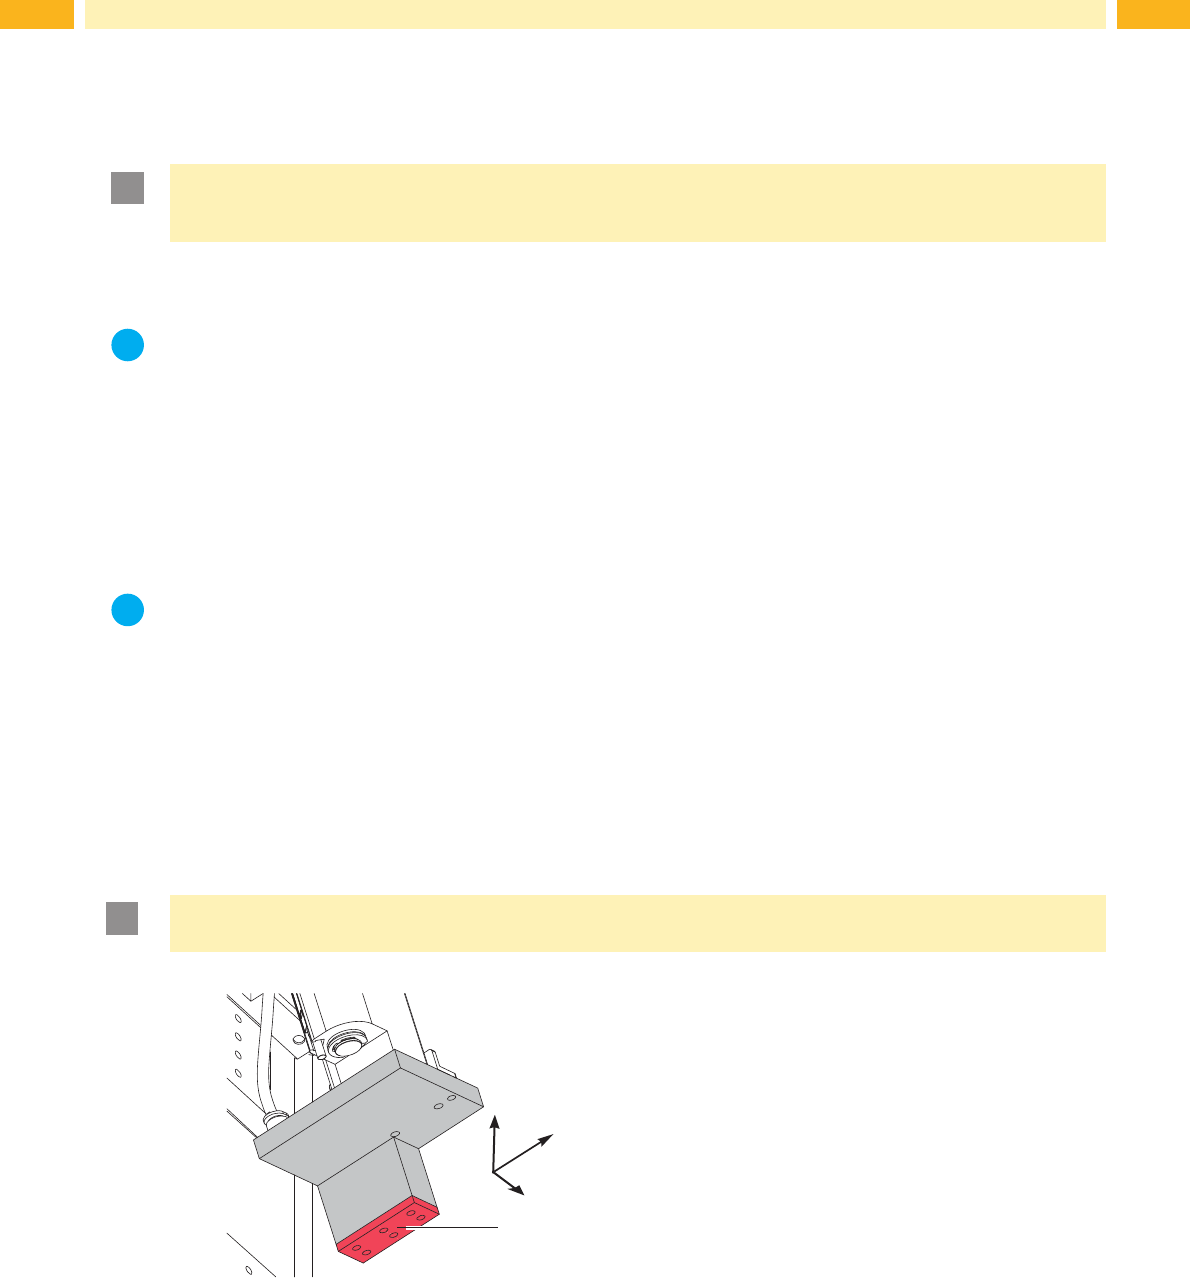
The slide foil (1) requires regular cleaning as the most dirt
is deposited here.
Fig. 6 Cleaning pad with slide foil
11
1
1
2
2
6
7
3
4
5
3 Operation
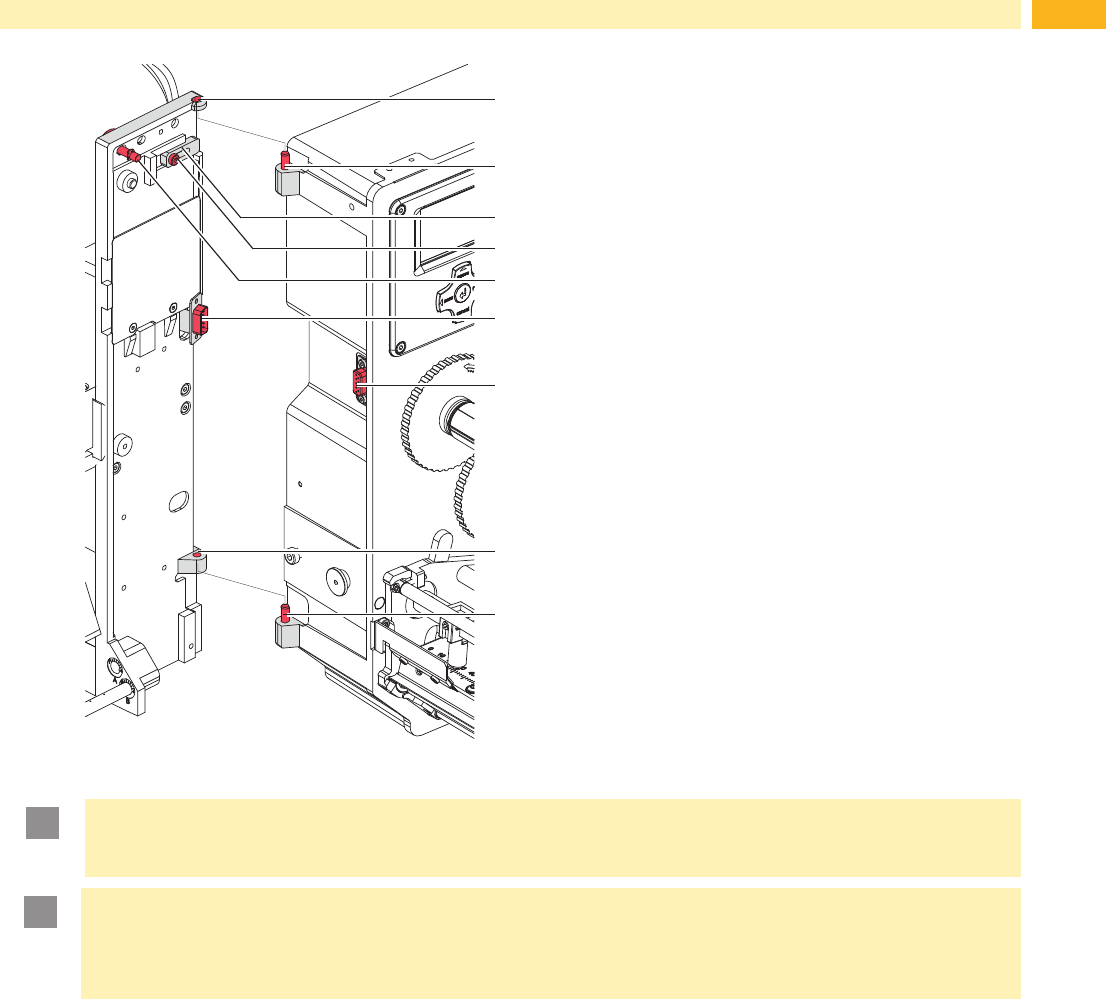
Fig. 7 Mounting applicator to printer
!
Attention!
Initiation,adjustmentsandchangingofpartsistobeperformedbyqualiedservicepersonalonly.
Initiation/Service Manual Applicators
!
Attention!
Disconnect the printer from the power supply before mounting the applicator!
Ensure that the printer is positioned stably and securely.
Connect the compressed air only after mounting the applicator to the printer!
To clean the applicator and printer it is sometimes necessary to turn away or even dismount the applicator from the
printer.
Take care not to adjust the setting screws, throttle valves or other alignment elements. This will enable use of the
applicator directly after cleaning.
Pivot away/dismount the applicator
1. To turn away the applicator loosen thumbscrew (5) and swing the applicator aside.
2. Disconnect SUB-D 15 male connector (6) from the female connector (7) of the printer.
3. Loosen screw (4) and slide the locking plate (3) off.
4. Lift the applicator off the hinges.
Mount the applicator
1. Mount the applicator to the printer via the female hinges (1) to the printer via the male hinges (2).
2. Connect SUB-D 15 male connector (6) to the female connector (7) of the printer.
3. To secure the applicator from slipping out of hinges loosen screw (4) and move the locking plate (3) under the
hinges and tighten screw (4).
4. Swing the applicator to the printer and tighten the thumbscrew (5).

12 12
4 Error Messages
4.1 Error Messages of the Printer
For detailed information about printer errors (e.g. 'Paper out', 'Ribbon out', etc.) Operator's manual of the printer
Error treatment:
Clear the error results
Press the feed key to synchronize the label feed, remove the peeled labels manually
Press the pause key to quit the error state.
After error correction, the printing of the label causing the error will be repeated.
4.2 Error Messages of the Applicator
The following table contains an overview of error messages and their possible causes. It also suggests methods to
resolve the problem:
Error Message Possible Cause
Air pressure ins.
Compressed air is switched off
Pressure to low < 4 bar
Pressure to high > 6 bar
Label not depos.
Label has not been placed onto the product; after the pad has moved back the label is
still on the pad.
Lower position
Pad is not in start position when the printer was switched on.
Pad has not reached the labelling position within 2s after the movement of the pad was
started
Padhasundenedleavingthestartposition.
Process Error
Process of labeling was interrupted via the I/O interface of the printer with the XSTP
signal.
Re. sensor blk.
There has been no change in state at the upper sensor at the cylinder between the start
of the labelling process and the signal from the labelling position sensor.
Vac. plate empty
Label has not been picked up properly by the pad; or label fell off the pad before it could
be placed onto the product.
Upper position
Pad has not reached the starting position within 2s after the pad has left the labelling
position; or pad has left the starting position unauthorized
Table 2 Error messages of the applicator
Error treatment:
Clear the error results
Press the pause key to quit the error state.
i
Note!
In fault check adjustments and settings with help of the Service Manual.
!
Warning!
The pad will immediately be moved in the starting position!
Dangerofcrushinghandsandngersbythemovingpad!
Do not reach into the zone of the moving pad and keep long hair, loose clothes, and jewelry away.
After error correction, the print of the label causing the error cannot be repeated without re-start of the print job.
Except at the error " Vac. plate empty" . In this case, the latest label will print again after quit the error with the
pause key and then press the Enter button
.
Intheapplicationmode"Apply/Print"sendthesignal"Printrstlabel"orpressthebutton to send a printed
label to the pad.