SA_3214_en.pdf - 第15页
15 6 Installation 6.1 Factory Defaults i Note! Theapplicatorisbythefactoryadjustedafterdefaultvaluesinastandardconguration. Attitudesafter thesevaluesguaranteeasmoothoperationwithsameconguration…
14 14
5 Licences
5.2 EU Declaration of Conformity
cab Produkttechnik
GmbH & Co KG
Wilhelm-Schickard-Str. 14
D-76131 Karlsruhe
Deutschland
EU Declaration of Conformity
We declare herewith that as a result of the manner in which the device designated below was designed, the type of
construction and the devices which, as a result have been brought on to the general market comply with the relevant
fundamental regulations of the EU Rules for Safety and Health. In the event of any alteration which has not been
approved by us being made to any device as designated below, this statement shall thereby be made invalid.
Device: Swing Applicator
Type: 3214
Applied EU Regulations and Norms: Applied Norms:
Directive 2014/30/EU relating to electromagnetic compatibility
• EN 55032:2012
• EN 55024:2010
• EN 61000-6-2:2005
Directive 2011/65/EU on the restriction of the use of certain
hazardous substances in electrical and electronic equipment
• EN 50581:2012
Signed for, and on behalf of the Manufacturer:
cab Produkttechnik Sömmerda
Gesellschaft für Computer-
und Automationsbausteine mbH
99610 Sömmerda
Sömmerda, 19.06.2017
Erwin Fascher
Managing Director

15
6 Installation
6.1 Factory Defaults
i
Note!
Theapplicatorisbythefactoryadjustedafterdefaultvaluesinastandardconguration.Attitudesafter
thesevaluesguaranteeasmoothoperationwithsameconguration.
i
Note!
Incaseofacustomersetupwillbetheadjustmentswiththecustomizedconguration.
It's possible that the values are different to the standard values.
Then the values in the setup protocol are valid.
The standard settings are:
- Connecting on a cab Hermes+ printer, vertical
- Used Pad: cab part No.: 5963881 54x36
cab part No.: 5963878 54x36
- Used material for ex-factory settings: cab part No.: 5556472 54x35.5
- Pressure value of the compressed air 0.45 MPa (4.5 bar)
16 16
6.2 Tools
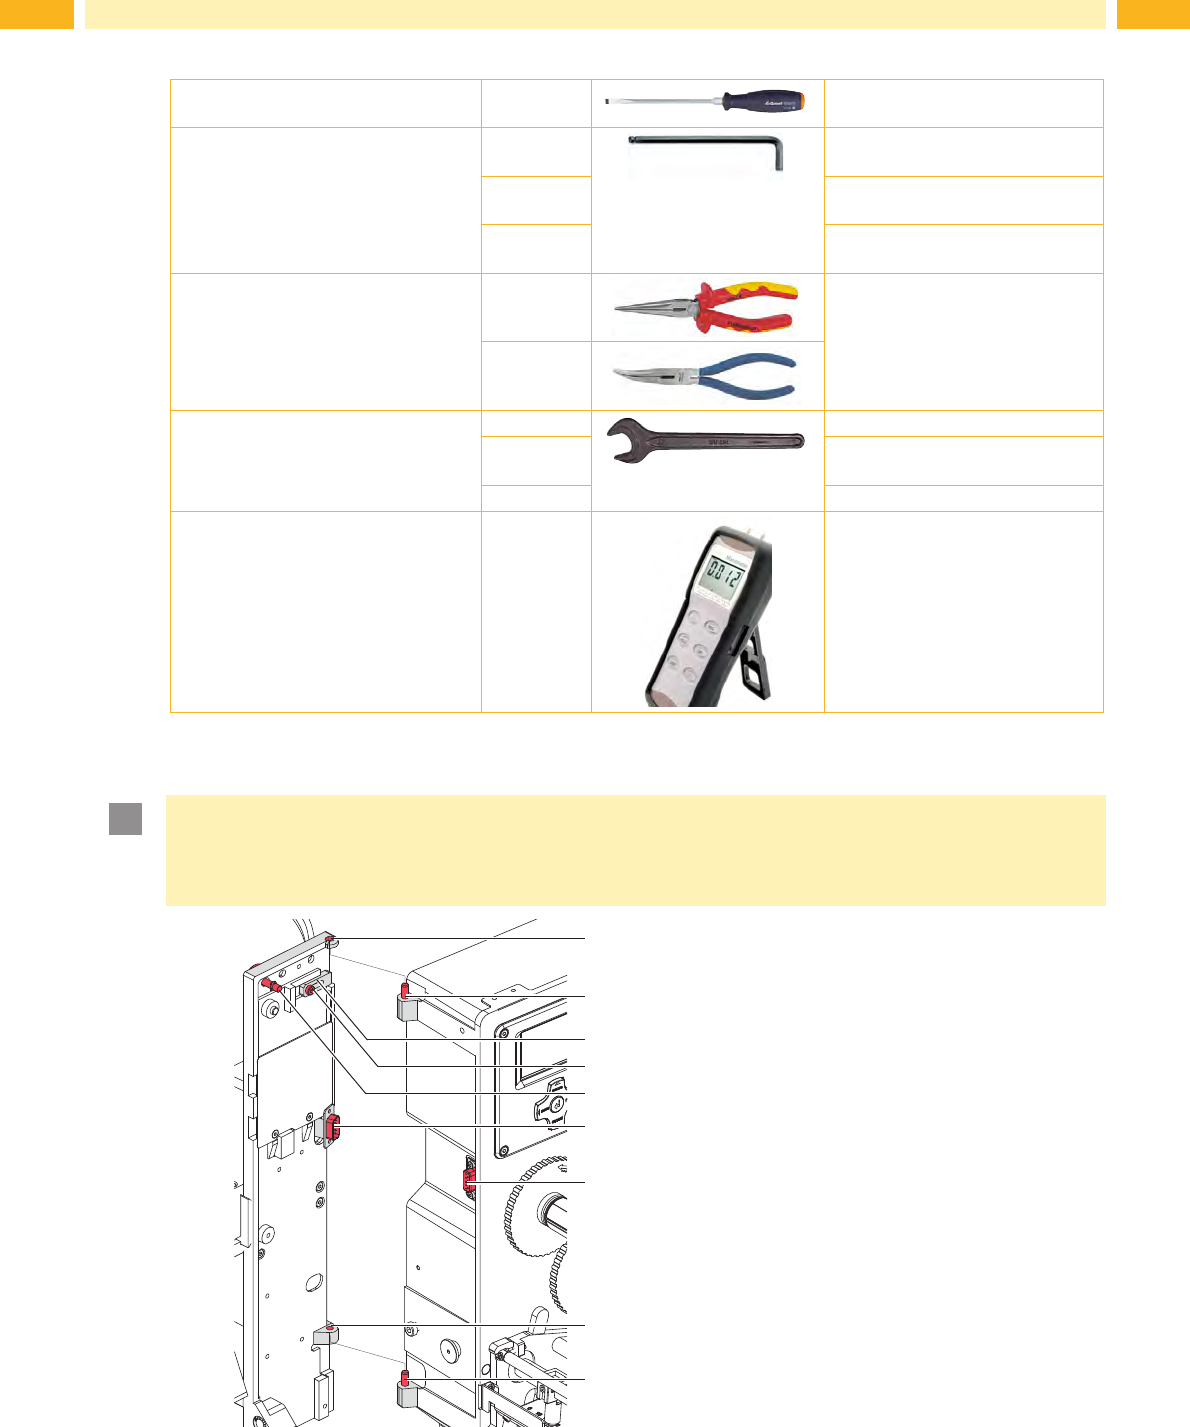
Screwdriver with parallel blade 2.5 To adjust the throttle valves and
product sensor
Hexagon key L-wrench 0.8
To adjust the sensors
(in contents of delivery)
2.5 For matched norm parts
(in contents of delivery)
4 Pad adjustments
Changing pad
Flat-round nose
straight
To mount/dismount tubes
angled
Open spanner SW 8 To change the throttle valves
SW 13 Setting the spring power on the
adapter bolt
SW20 Changing the cylinder
Manometer ± 7 bar
Air pressure control
Fig. 8 Tools
6.3 Mounting the applicator
!
Attention!
Disconnect the printer from the power supply before mounting the applicator!
Ensure a stable standing of the printer!
Connect the compressed air only after mounting the applicator to the printer!
1
1
2
2
6
7
3
4
5
1. Hang the applicator to the printer via the
female hinges (1) and the male hinges (2).
2. Connect SUB-D 15 male connector (6) to its
female counterpart (7).
3. To secure the applicator from slipping out of
hinges loosen screw (4) and move locking
plate (3) under the hinges. Tighten screw (4).
4. Swing the applicator to the printer and ensure
that the cable is not caught between the two.
5. Tighten the thumbscrew (5).
6. Raise the stopper from the transport position
to enable movement of cylinder Z.
Fig. 9 Mounting applicator to printer
6 Installation