SA_3214_en.pdf - 第31页
31 8.4 Setting the Peel Position T o optimize the transfer of the labels from the printer to the pad there are two different parameters available for adjusting the peel position. ! Attention! Firstadjusttheparameter…
30 30
8.3 CongurationParametersoftheApplicator
ThecongurationparametersoftheapplicatorcanbefoundinthemenuSetup > Machine param.
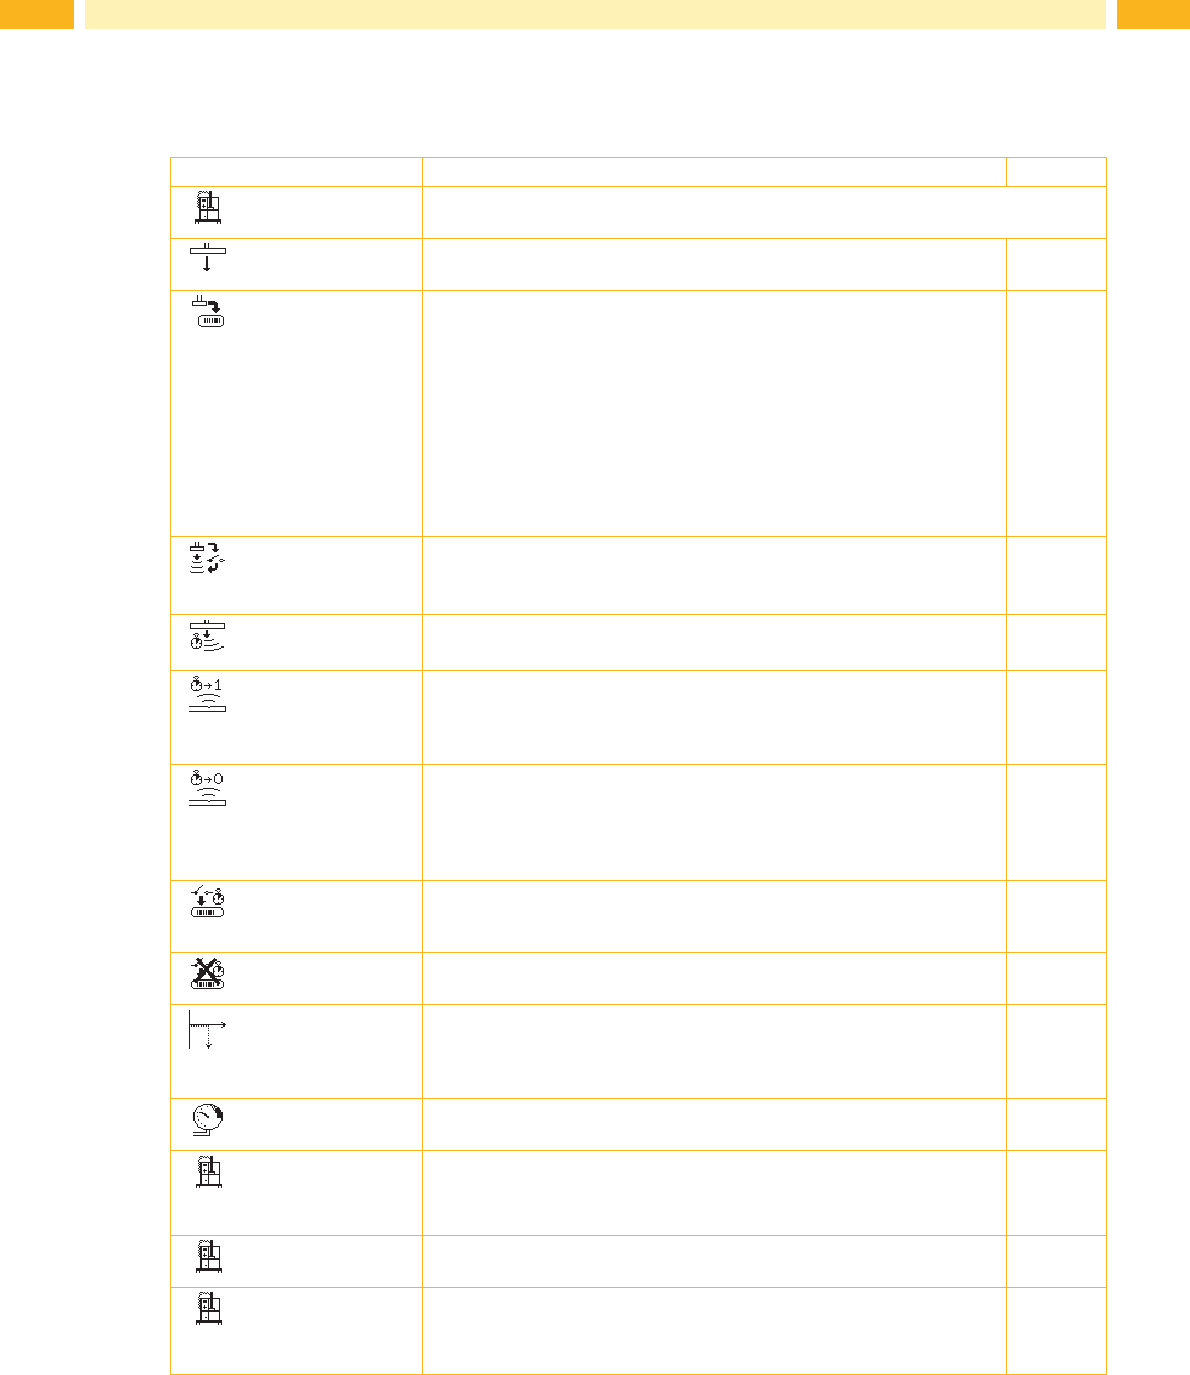
Parameter Meaning Default
Applicator
Congurationparametersoftheapplicator
> Mode of
oper.
Setting the operation mode Stamp on, Roll on, Blow on
Stamp
on
> Mode of
appl.
Setting the application mode Print-Apply / Apply-Print
Print-Apply:
An external start signal initiates the printing of a label followed by the
application thereof. When the cycle is complete the pad waits in the
starting position without a label.
Apply-Print:
Anextrasignalstartstheprintingoftherstlabelandtransfersthisto
the pad. The external signal causes the label to be applied followed by
the printing of the next label. After a cycle is complete the waits in the
labeling position with a printed label.
Print-
Apply
> Waiting
position
only in mode of oper. Blow on and mode of appl. Apply-Print
up: Pad waits in the start position for the start signal
down: Pad waits in the labelling position for the start signal
up
> Blow time
only in mode of oper. Blow on
Switch-on time (max. 2.5 s) of the supporting air for the label transfer
0 ms
> Support
delay on
Switch on the time delay (max. 2.5 s) of the supporting air after the
printing has started. The delay reduces turbulence of the front end of
the label during the transfer from the dispensing edge to the pad and
thus faults during this transfer.
0 ms
> Support del.
off
Setting the switch-off delay (max. 2.5 s) for the supporting air between
the end of label forwarding and switching on the supporting air. The
delay can be useful to separate the rear edge of the label from the
liner to avoid faulty transfers and to improve the accuracy of label
positioning.
270 ms
> Delay time
Delay (max. 2.5 s) between start signal and the start of an labelling
cycle.
Allows e.g. the use of product sensors within conveyors systems.
0 ms
> Lock time
All start signals received within the lock time are ignored to prevent
duplications.
0 ms
> Peel
position
Shift the position of the dispensed label relative to the dispense edge.
In the software an extra peel offset value is available. The offset
values from “Peel position“ and from the software are added together
when executed. "Setting the Peel Position".
0.0 mm
> Vacuum
control
Setting the label transfer check from printer to pad and from pad to
product by the vacuum sensor.
On
> Hand-over up
Take over the label directly from the dispense edge via contact between
pad and dispense edge.
Function not available for applicator types: 4014/4016,4314/4316.
Off
> Cleaning
blow
Activate/Deactivate - air pressure pulses to clean the pad after every
application.
On
> Vacuum delay
On - The vacuum will be switched on after end of the label
transportation.
Out - The vacuum will switched on with the start of the label
transport.
Out
Table 4 CongurationparameteroftheApplicator
8 Conguration

31
8.4 Setting the Peel Position
To optimize the transfer of the labels from the printer to the pad there are two different parameters available for
adjusting the peel position.
!
Attention!
Firstadjusttheparameter"PeelPosition"intheprinterconguration.
Then adjust the additional peel-off offset in the software.
This course of action is particularly important when loading new material, restarting the device and error
treatment.
Parameter"PeelPosition"intheprinterconguration
Check the basic setting in the printer setup. Perform labelling cycles by alternately pressing the feed key and the
pre-dispense key 6.3 Test Mode without Print Job.
Adjust the "Peel Position" in such a way, that the blank labels are peeled off completely from the liner
4.3CongurationParametersoftheApplicator.
Peel-off offset in the software
Check the settings in the software. Perform labelling cycles by repeatedly pressing the Enter button .
6.4 Test Mode with Print Job.
Adjust the peel-off offset in such a way, that the printed labels are peeled off completely from the liner
Programming manual or software documentation.
8.5 Activation of Peel-off Mode
i
Note!
For labelling operation activate the peel-off mode in the software.
For direct programming use the P command Programming manual.
8 Conguration
32 32
9 Operation
9.1 Test Mode without Print Job
!
Warning!
The pad will be moved to the starting position immediately!
Dangerofinjurytohandsandngersbythemovingpad!
Do not reach into the zone of the moving pad and keep long hair, loose clothes, and jewelry away.
2
1
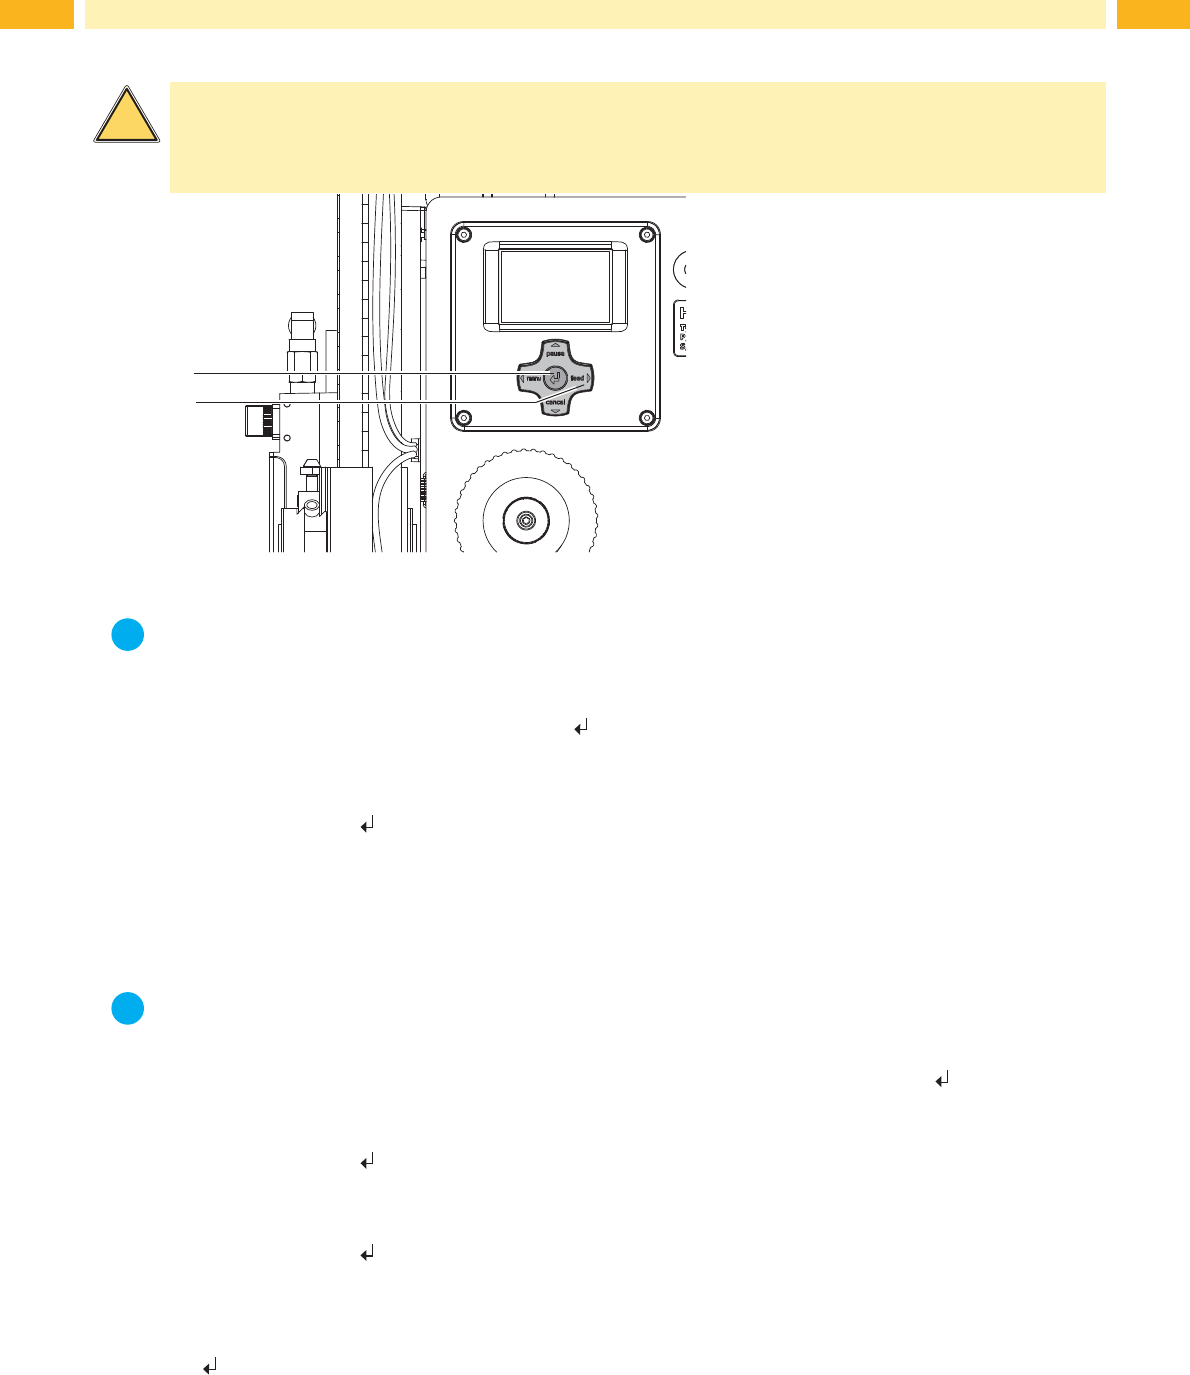
Fig. 28 Test mode via Enter key
i
Note!
Pleaseusethetestmodetoadjusttheparameter"Peelposition"intheprinterconguration.
The whole labelling process can be simulated without the need for a print job, or a connection to a computer, by alter-
nately pressing the feed (2) key and the Enter key
(1):
Press the feed key (2).
A blank label is fed. The vacuum of the pad as well as the supporting air (blow tube) are switched on. After the
label has been picked up by the pad, the supporting air is switched off.
Press the Enter key (1).
The pad is moved to the labelling position. A sensor signals when the labelling position is reached. The vacuum is
switched off and the label is placed onto the product. Then the pad is moved back into the starting position.
9.2 Test Mode with Print Job
i
Note!
Please use the test mode to adjust the peel-off offset in the software.
This method allows the checking of the labelling process with real print data using the Enter key
(1).
Send a print job.
The test mode is executed in two half cycles:
Press the Enter key (1).
Half cycle 1
A label is printed. The vacuum of the pad as well as the supporting air (blow tube) are switched on. After the label
has been picked up by the pad the supporting air is switched off.
Press the Enter key (1) again.
Half cycle 2
The pad is moved to the labelling position. A sensor signals when the labelling position is reached. The vacuum is
switched off and the label is placed onto the product. Then the pad is moved back into the starting position.
Ifthelabelismanuallyremovedfromthepadafterthersthalfcycle,thehalfcycle1willberepeatedwhentheEnter
key key is pressed again.