00196433-02_AI_Vakuumpumpe_X-Serie_70XDE+EN.pdf - 第104页
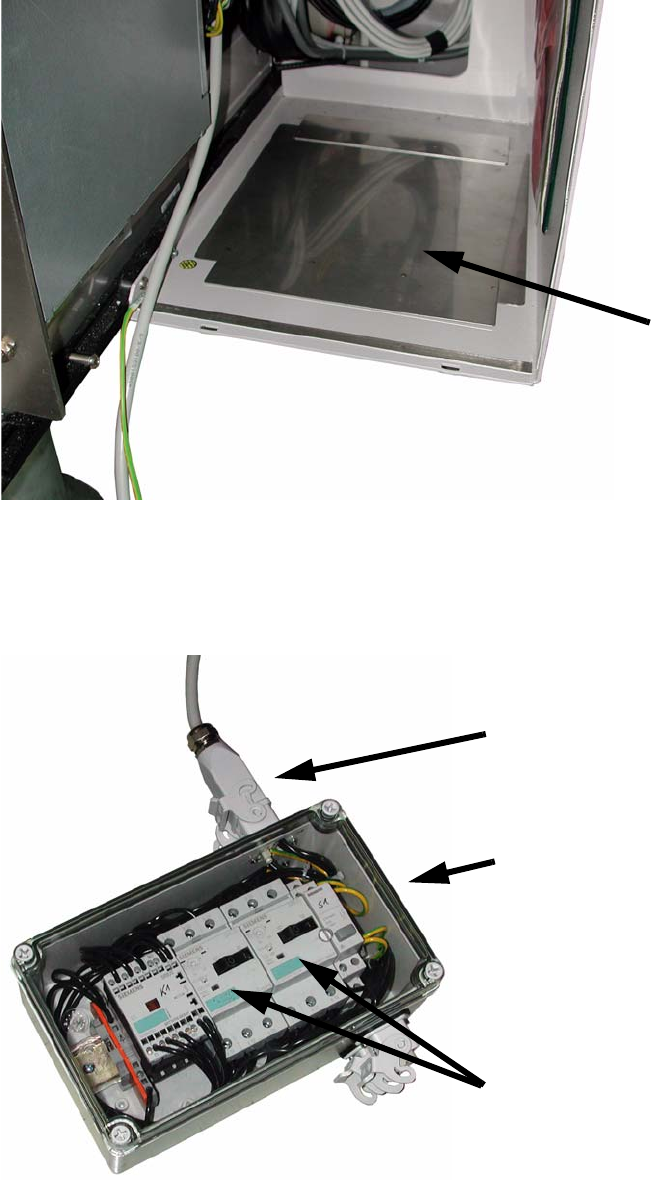
Assembly instructions: Vacuum pump for SIPLACE X-se ries 04/2009 Edition 104 : Use double-sided adhesive t ape to stick the plat e onto the recess in the extension kit at loca - tion 2 so that you can place the control u…
X16ra2
Assembly instructions: Vacuum pump for SIPLACE X-series
04/2009 Edition
103
2
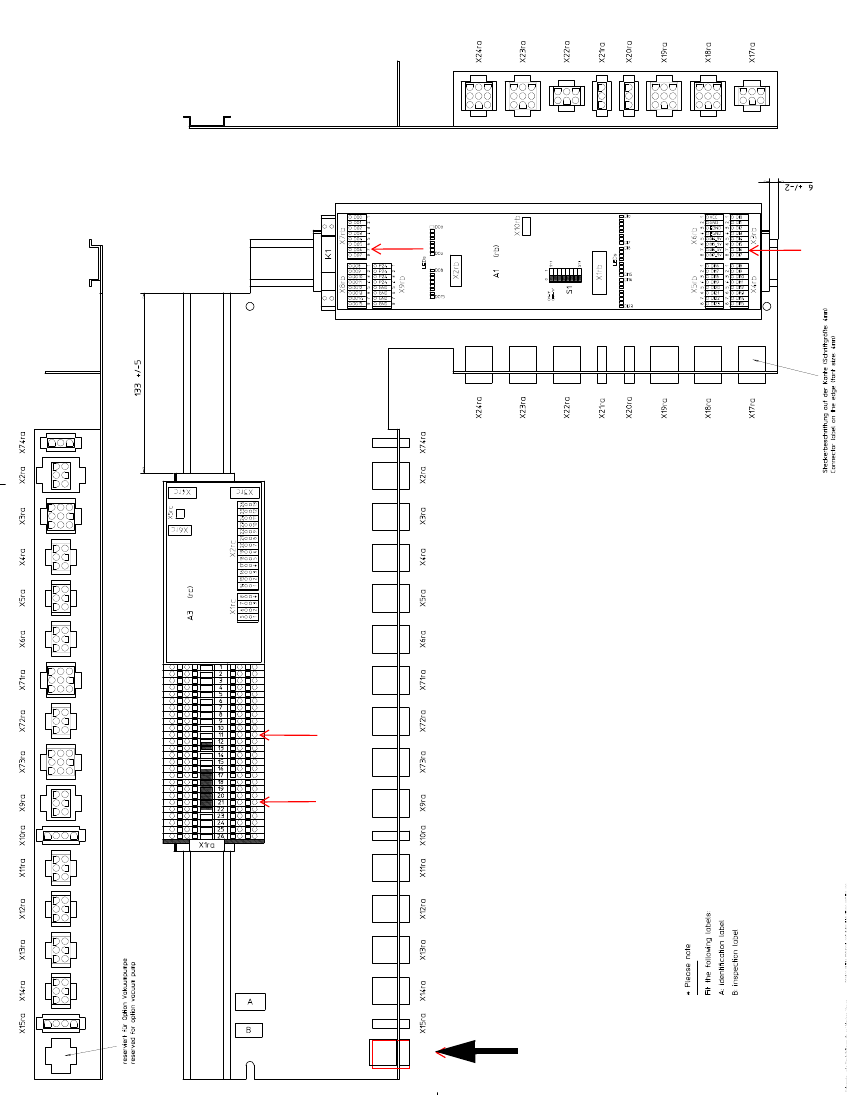
Fig. 2.8 - 21 Sub-distributor (03046226-xx)
2
2
Assembly instructions: Vacuum pump for SIPLACE X-series
04/2009 Edition
104
: Use double-sided adhesive tape to stick the plate onto the recess in the extension kit at loca-
tion 2 so that you can place the control unit for the vacuum pump on it.
Plate
2
2
: Connect the cable that you previously pulled through the machine frame to X3 on the control
unit.
Plug in control cable at X3
Vacuum pump connection unit, com-
plete (item no. 03071318-xx)
Motor contactor
2
Assembly instructions: Vacuum pump for SIPLACE X-series
04/2009 Edition
105
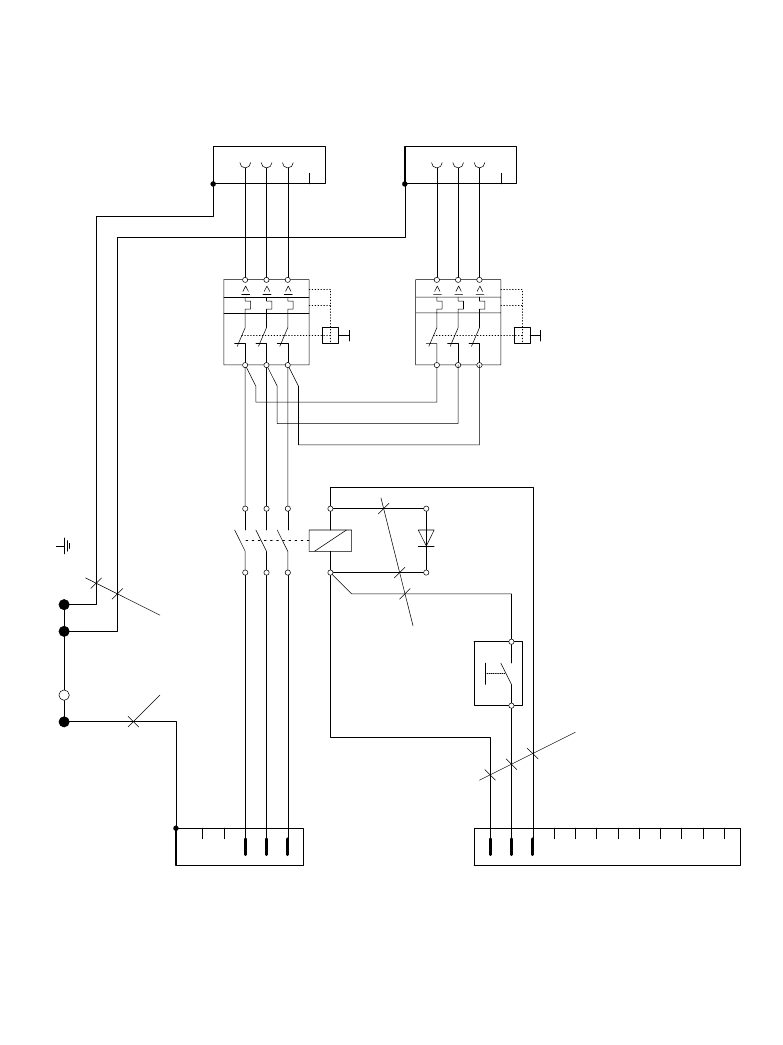
: Check that the vacuum pump for connection unit, complete (item no. 03071318-xx) is rated for
the correct supply voltage.
For an 110/200 V 60Hz main power supply, the two motor contactors Q1 and Q2, which are
3RV10 2.
8-4A 3-pole power circuit-breakers (item no. 03072163-xx), are replaced with 3RV10
4.5 - 6.3 A 3-pole power circuit-breakers (item no. 03075731-xx).
X 3 q r
X 5 q r
2
1
4
3
Q 2
Q 1
1
3
5
2
4
6
1
3
5
2
4
6
a
P E
X 2 q r
X 1 q s _ 1
b c d
1 2
S 1
B K ( U L ) , 0 , 7 5 m m ²
G N Y E ( U L ) , 1 , 5 m m ²
U n s p e c i f i e d c o n d u c t o r c o l o r i n g a n d c r o s s s e c t i o n : B K ( U L ) , 1 , 5 m m ²
U
V
W
C t r l V a c u u m p u m p O N
2 4 V
G N D
V a c u u m p u m p
V a c u u m p u m p
X 4 q r
2
1
4
3
4
3
2
5
1
R 1
1
3
5
A 1
K 1
2
4
6
A 2
B K ( U L ) ,
0 , 7 5 m m ²
2
2
4
3
6
5
8
2
1 0
9
1 2
1 1
7
1
2
Fig. 2.8 - 22 Vacuum pump connection unit, complete (item no. 03071318-xx)