00196433-02_AI_Vakuumpumpe_X-Serie_70XDE+EN.pdf - 第85页
Assembly instructions: Vacuum pump for SIPLACE X-series 04/2009 Edition 85 : Attach the vacuum ho ses to the two vacuum tubes “V acuum connection 1 + 2” as shown in Fig. 2.8 - 12 . : Push the two tubes into the “Dis trib…
Assembly instructions: Vacuum pump for SIPLACE X-series
04/2009 Edition
84
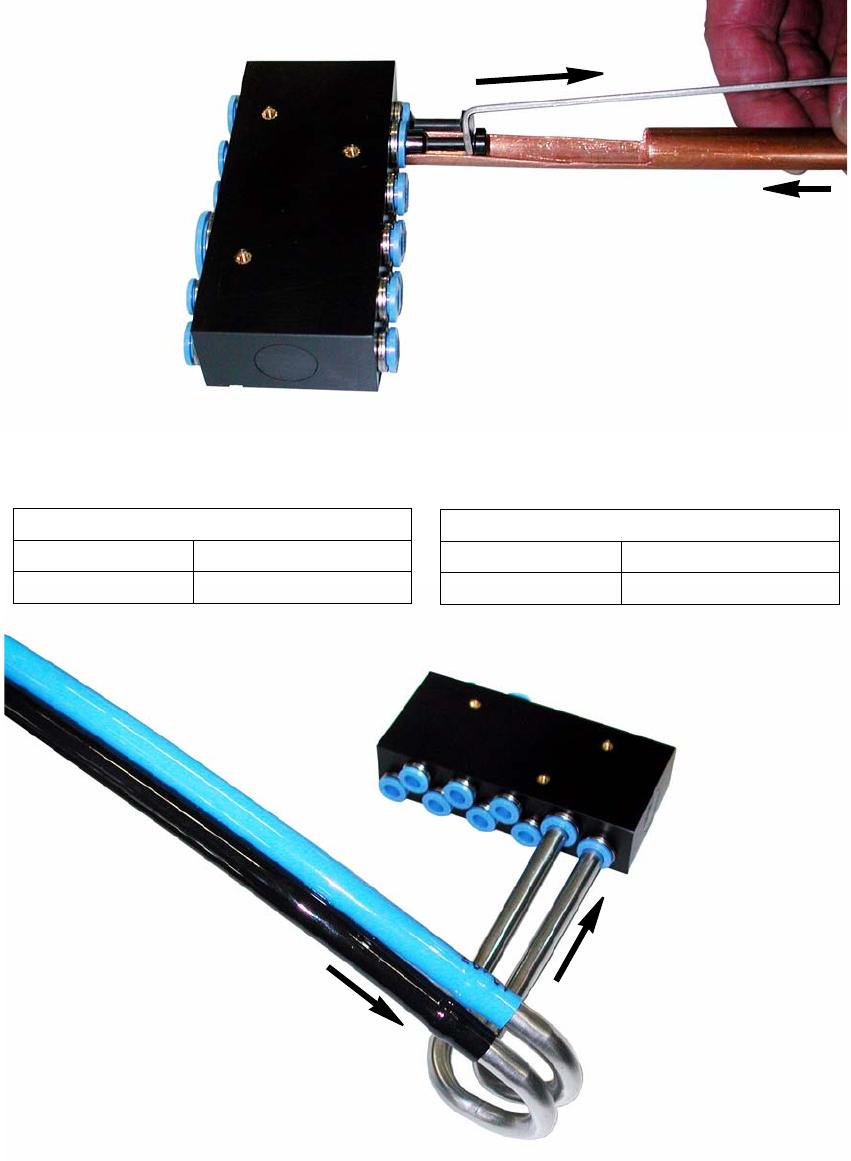
: Remove the two blanking plugs from the “distributor, placement head vacuum” on both gantries
using the release tool for Q8 (see Fig. 2.8 - 11)
Fig. 2.8 - 11 Release tool for hard-to-access connections
X2/X3/X4/X4I gantry 1/3
Tube 1
Item no.: 03075307-xx
Tube 2
Item no.: 03075308-xx
X4I gantry 2/4
Tube 1, rotated
Item no.: 03074600-xx
Tube 2, rotated
Item no.: 03074604-xx
Fig. 2.8 - 12 Distributor for placement head (removed for greater clarity)
Assembly instructions: Vacuum pump for SIPLACE X-series
04/2009 Edition
85
: Attach the vacuum hoses to the two vacuum tubes “Vacuum connection 1 + 2” as shown in Fig.
2.8 - 12.
: Push the two tubes into the “Distrib
utor, placement head vacuum” ( Fig. 2.8 - 12).
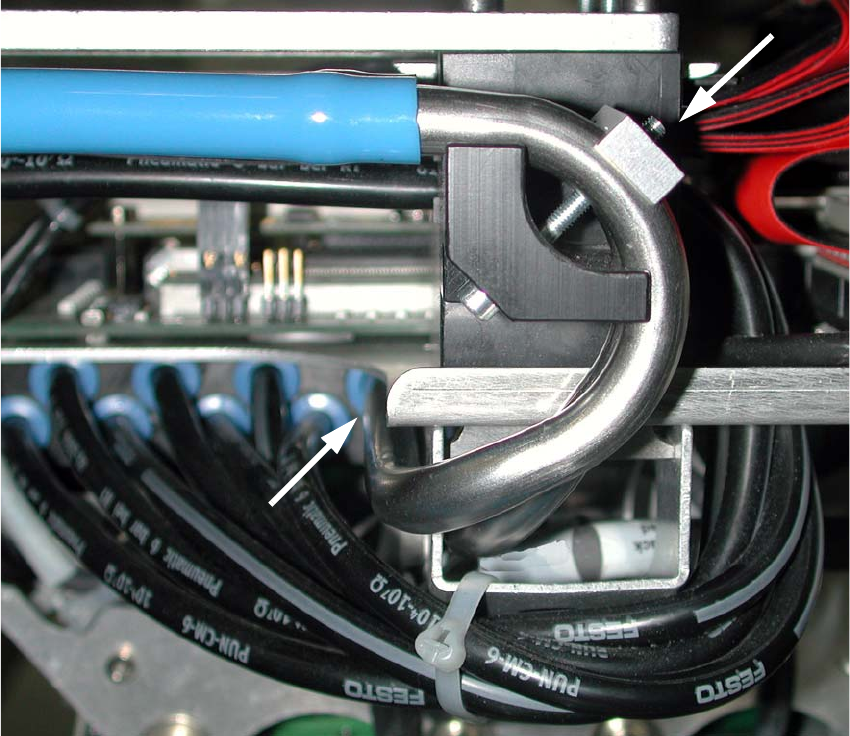
Fig. 2.8 - 13 Swan neck inserted and fixed in place
2
2
2
2
2
2
2
2
2
Assembly instructions: Vacuum pump for SIPLACE X-series
04/2009 Edition
86
: Fix the vacuum tubes “Vacuum connection 1 + 2” as shown in Fig. 2.8 - 13 using the clamp
(03032860-), one M3x30 mm screw and a washer.
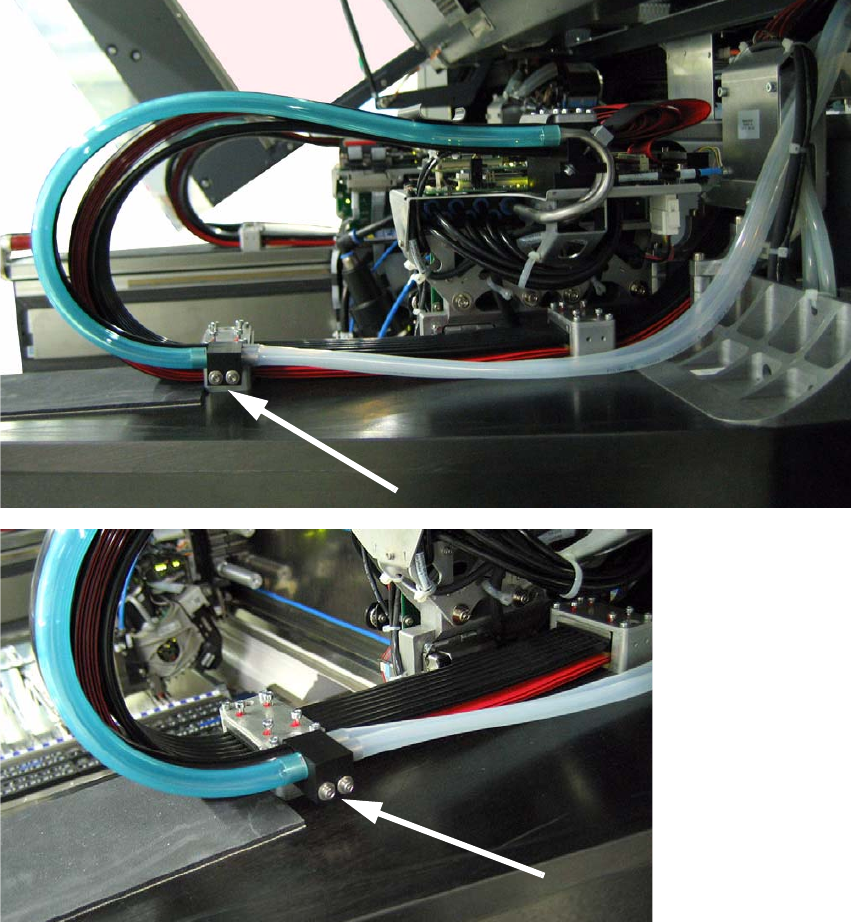
Fig. 2.8 - 14 Running the vacuum hose, gantry 1+3
: Fix the “Duo hose connection” (03038107-) using M3x16 mm screws (see Fig. 2.8 - 14).
: Run the two “Duo hoses” (two-color) parallel to the existing cable and hose carrier.
2
2
2