STM1-S_SDV_Maintenance(Eng_Ver1).pdf - 第29页
Chap ter 2 Inspe ction It ems fo r Main t e nanc e Multi -Func tional Placer ST M1-S M ain ten an ce Ha nd bo ok 2-8 Monthly Inspections (2/2) Inspection It ems for Maint enanc e
Chapter 2
Inspection Items for Maintenance
Multi-Functional Placer
STM1-S Maintenance Handbook
2-7
Monthly Inspections (2/2)
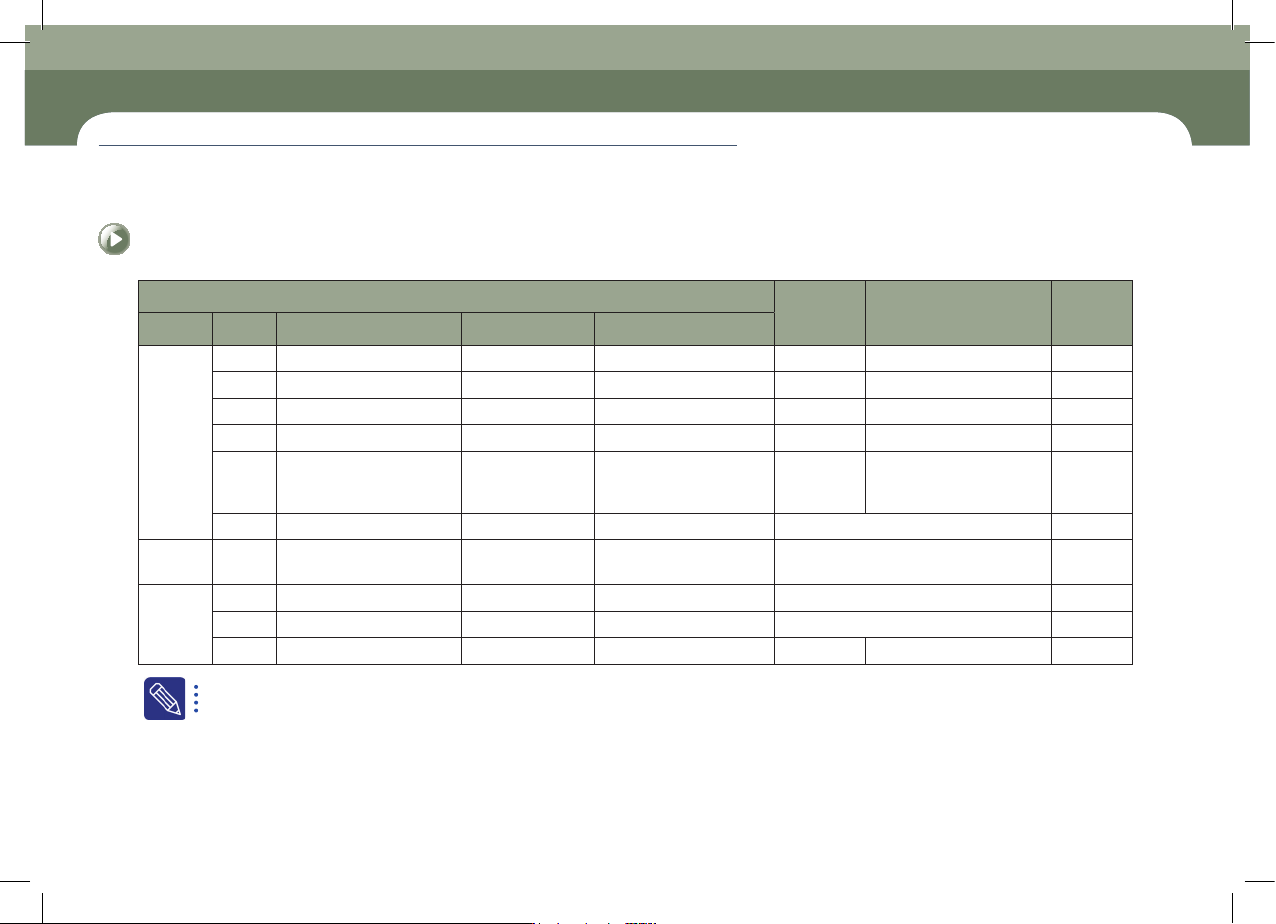
Check-up List
Replacement
Time
Reference
Time
required
Period No Inspection Item Measures Tools
Monthly
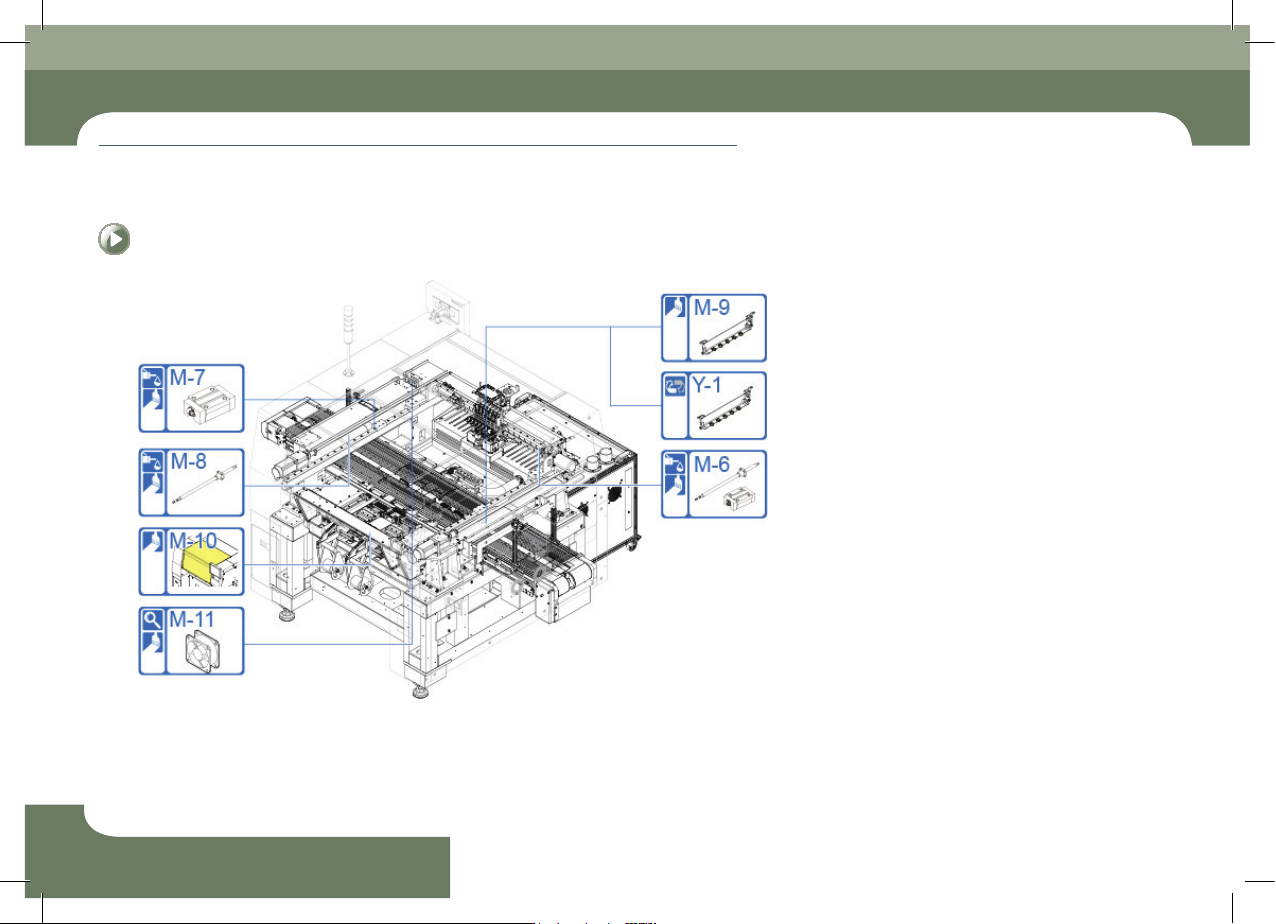
M-6 X Frame LM Guide, Ball Screw
Clean and Lubrication
Lubricator, cloth AFE (THK) Lubrication period: 4 months 60 Minutes
M-7 Y Frame LM Guide
Clean and Lubrication
Lubricator, cloth AFE (THK) Lubrication period: 2 months 60 Minutes
M-8 Y Frame Ball Screw
Clean and Lubrication
Lubricator, cloth AFE (THK) Lubrication period: 2 months 20 Minutes
M-9 Ionizer Nozzle Cleaning
Air gun, cotton swab
Inspection period: 1 months 10 Minutes
M-10 Cover Cleaning
Utra-fine fiber cloth, Alcohol
(
Heavy Duty Staticide #2005,
#2001)
Inspection period: 1 months 15 Minutes
M-11 Y Cable Duct Cooling Fan Inspection and clean Vacuum cleaner
If it is found to have been damaged replace it. 15 Minutes
Yaer Y-1 Ionizer Nozzle
Inspection and
replace
Ionizer Nozzle Corresponding
fixture
If it is found to have been damaged replace it. 15 Minutes
ETC
E-1 Fuse Replace (+) driver
If it is found to have been damaged replace it. 15 Minutes
E-2 Ring blower fuse Replace (+) driver
If it is found to have been damaged replace it. 15 Minutes
E-3 Ring blower inverter Setup
15 Minutes
Setting the replacement period for parts
ㆍ Based on the regulated use environment.
ㆍ If the use environment is poor, the intervals for part inspection and replacement can be shortened.
ㆍ In the above table, C/S means our designated C/S company (STS) or our overseas local agents.
Monthly Inspections (2/2)
Chapter 2
Inspection Items for Maintenance
Multi-Functional Placer
STM1-S Maintenance Handbook
2-8
Monthly Inspections (2/2)
Inspection Items for Maintenance
STM1-S Maintenance Handbook
3-1
Chapter 3
Daily Inspection
Multi-Functional Placer
Checking and cleaning the nozzle
Chapter 3
Daily Inspection
Prevent PCB defect due to nozzle clogging and breaking
Tool for Maintenance
Recommended cleaning liquid(Ethyl Alcohol), air gun, lubricant for nozzle, spray
straw, bore through-pin, air sprayer, ultrasonic cleaner
Measures
Step 1.
Move the X Frame to front by referring to "Forward
movement of the X-frame" on page 1-3.
Step 2.
Press the 'STOP' and 'RESET' buttons in order after
pressing the 'EMG' button on the OP panel to stop
operation.
For more details, refer to "How to perform emergency stop" on page
1-2.
Step 3.
Remove the head assembly and ANC nozzles manually
Caution
Remember the ANC nozzle arrangement before removing them
manually. After cleaning, arrange the nozzles on the ANC as they
were before cleaning and lubricating.
Step 4.
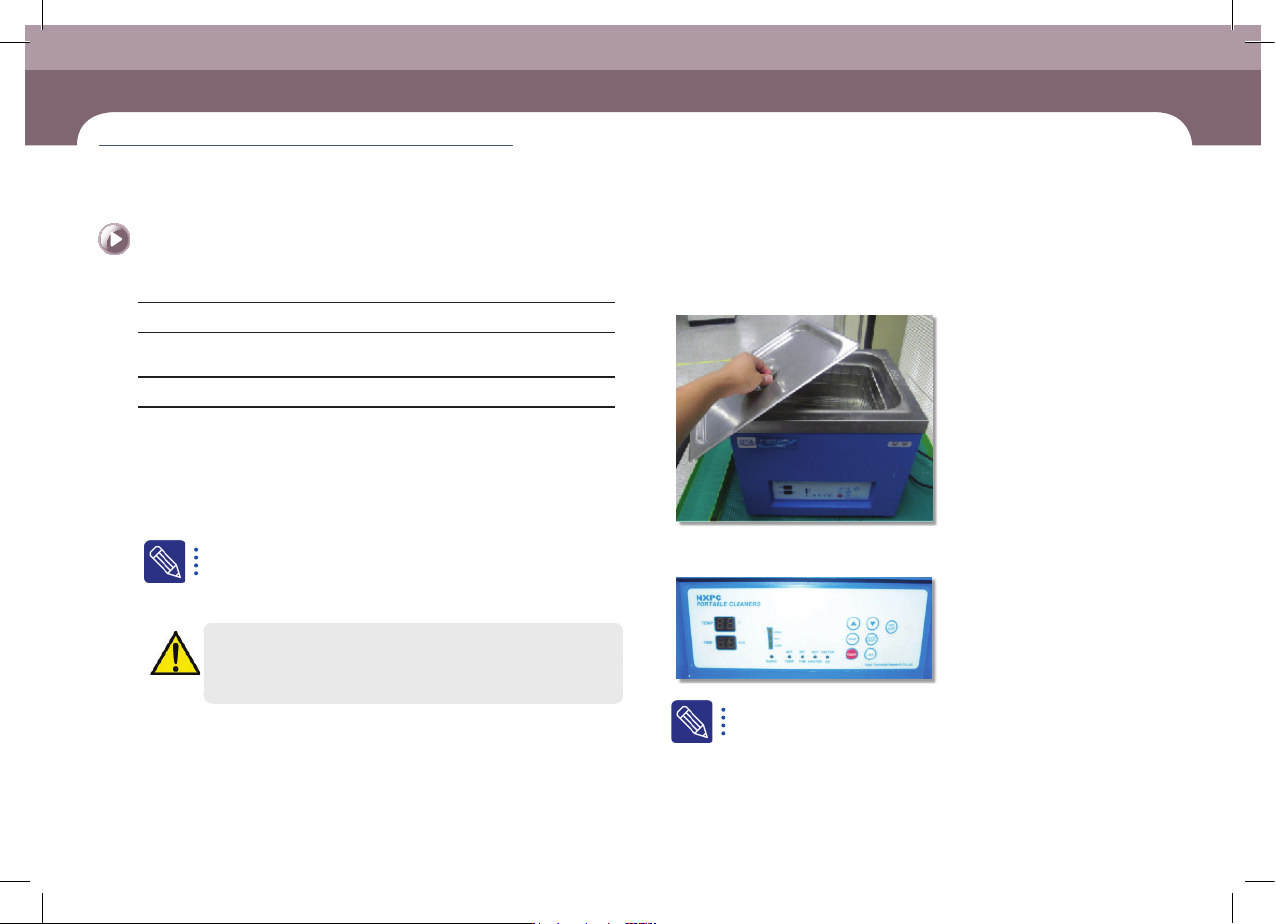
Open the cover of the ultrasonic cleaner.
Step 5.
Set the time of the ultrasonic cleaner. (For normal usage,
clean for 3~5minutes)
The type of ultrasonic cleaner and its setting method may be different
from those shown in the picture.
Step 6.
Insert the nozzles in the hole.
Checking and cleaning the nozzle
(Time required: 10min / No. D-1)