STM1-S_SDV_Maintenance(Eng_Ver1).pdf - 第57页
Mon thly Inspe ction Chap ter 5 Multi -Func tional Placer ST M1-S M ain ten an ce Ha nd bo ok 5-6 Checking and replacing the cover cooling fan filter Monthly Inspe ction Checki ng and r eplaci ng the cover cooling fan fi…
Monthly Inspection
Chapter 5
Multi-Functional Placer
STM1-S Maintenance Handbook
5-5
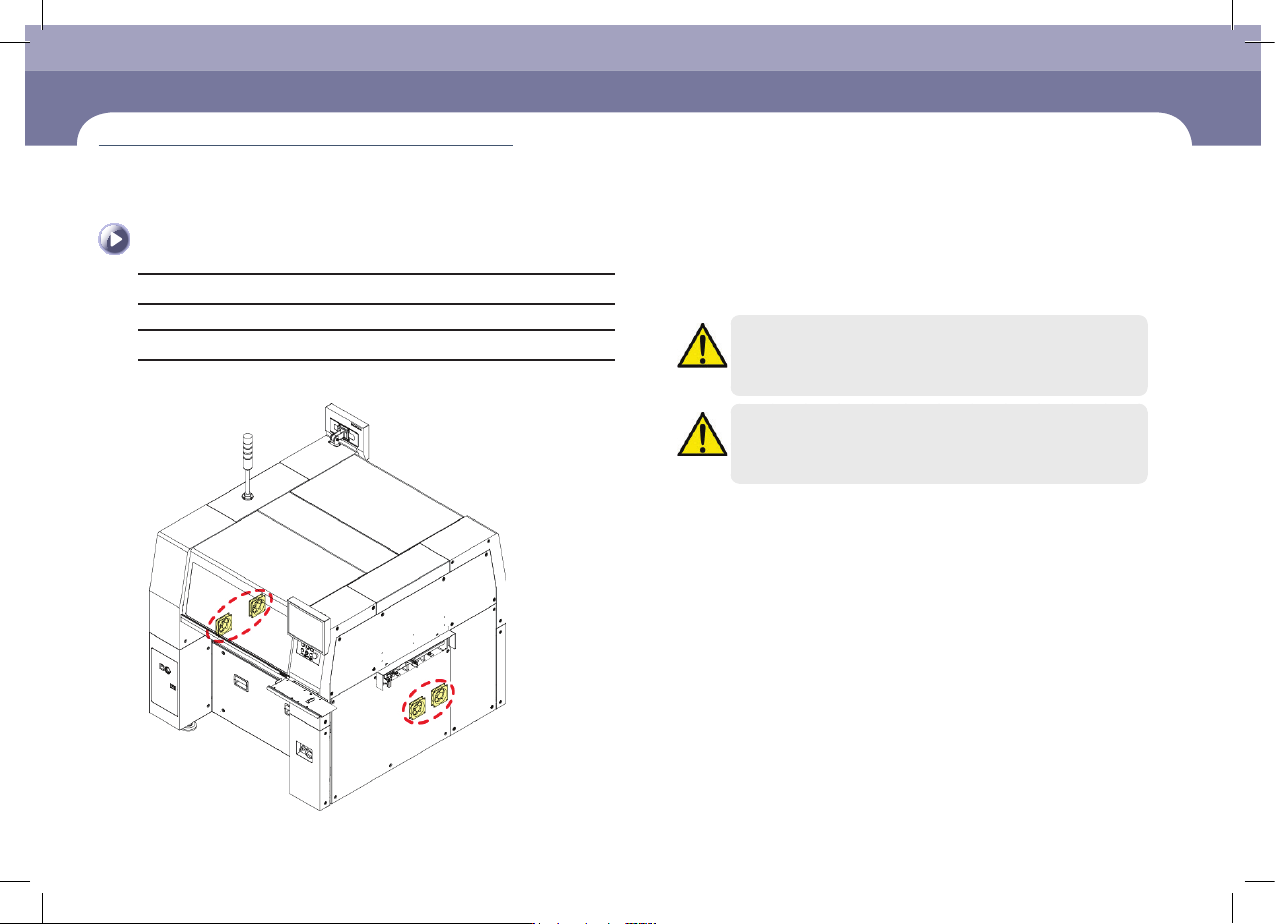
Checking and cleaning cover cooling fan
Checking and cleaning cover cooling fan
Tool for Maintenance
Vacuum cleaner, screwdriver(+)
Measures
Step 1.
In the case of a label feeder, tape does not have to be
removed.
Caution
When the main switch is turned on, since the cooling fan operates,
user's hand may get injured. Careless touching of the cable, etc.
may cause electric shock. Therefore, special care is need.
Caution
The cooling fan replaement work accomanies a danger.
Therefore, contact out C/S company (STS) or local agent.
(Time required: 10min / No. M-3)
Monthly Inspection
Chapter 5
Multi-Functional Placer
STM1-S Maintenance Handbook
5-6
Checking and replacing the cover cooling fan filter
Monthly Inspection
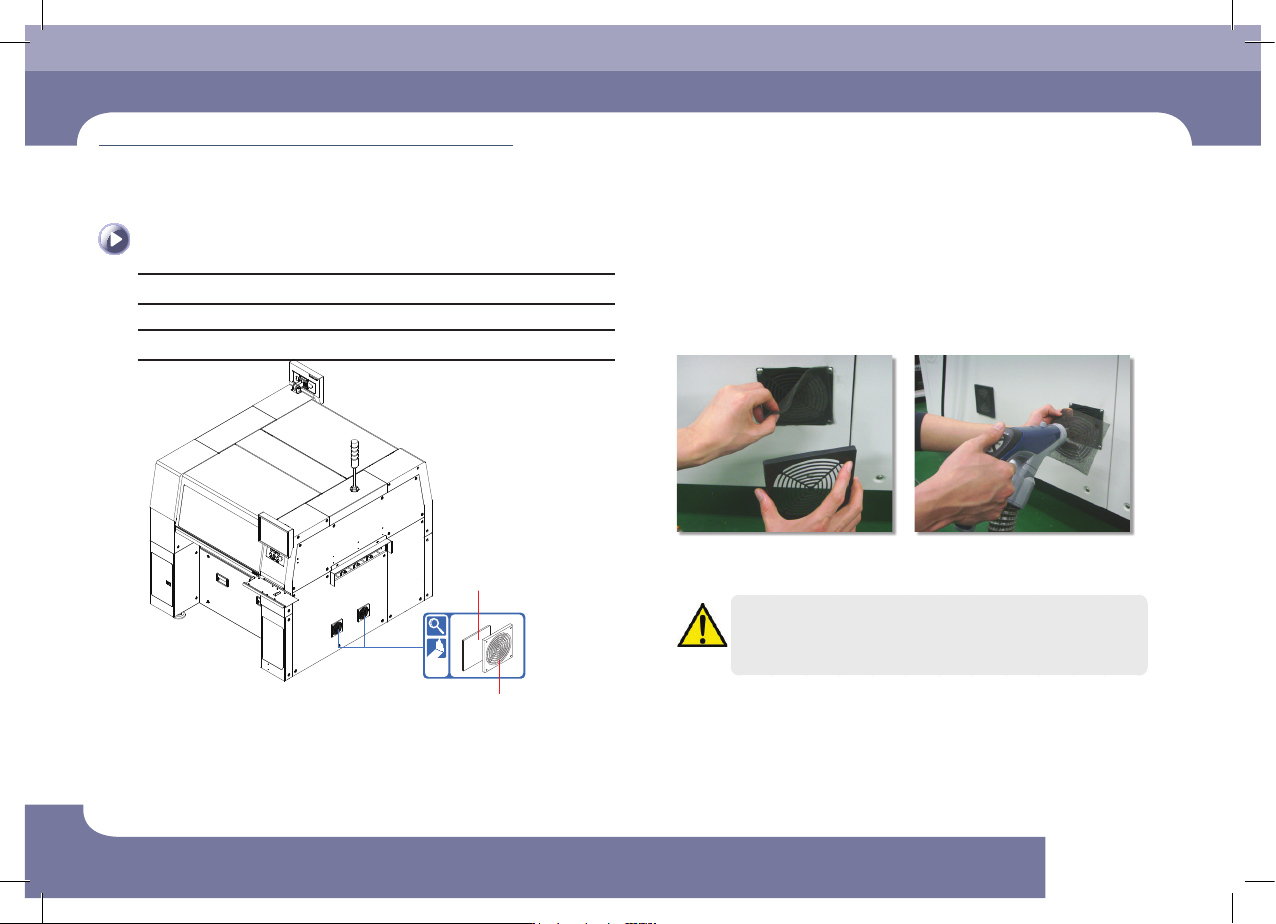
Checking and replacing the cover cooling fan filter
Tool for Maintenance
Vacuum cleaner,
Measures
Cooling Fan Filter
Cooling Fan Filter Cover
Step 1.
Remove the filter in the order as shown in the following
figure and clean it. (If the filter is damaged, replace it.)
ㆍ Separate the cooling fan cover
ㆍ Separate the filter
ㆍ Clean the filter using a vacuum
cleaner
Caution
Washing the cooling fan filter with water may cause damage to the
filter by making it harden.
Step 2.
Release the emergency stop as described in "Releasing
'Emergency Stop' mode" on page 1-6 and perform the
operation again.
(Time required: 15min / No. M-4)
Monthly Inspection
Chapter 5
Multi-Functional Placer
STM1-S Maintenance Handbook
5-7
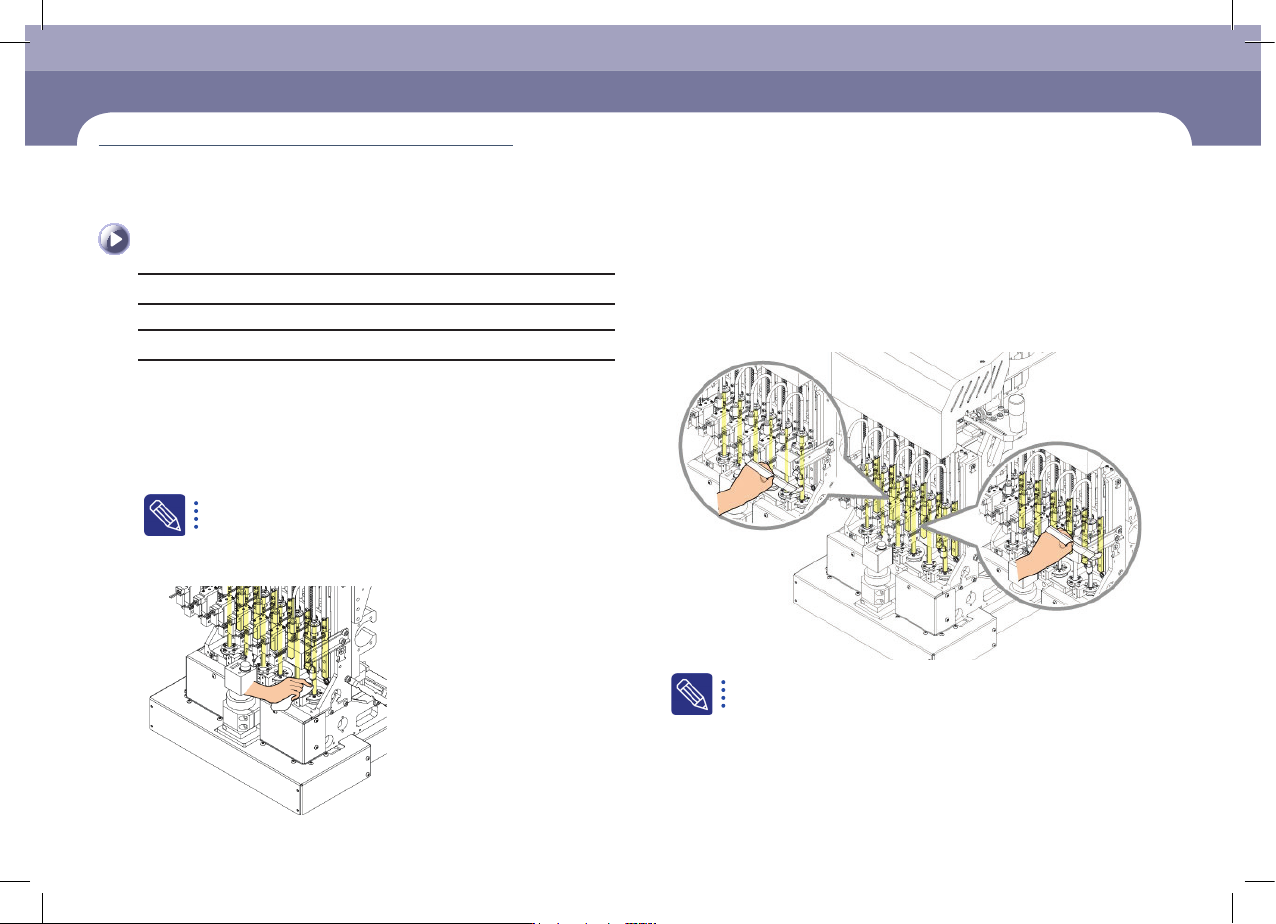
Cleaning and apply grease the Head LM Guide, Ball Spline
Tool for Maintenance
Ultra-fine fiber cloth, Flat Brush, GREASE: AFE-CA
Measures
Step 1.
Move the X Frame to front by referring to "Forward
movement of the X-frame" on page 1-3.
Step 2.
Press the 'STOP' and 'RESET' buttons in order after
pressing the 'EMG' button on the OP panel to stop
operation.
For more details, refer to "How to perform emergency stop" on page
1-2.
Step 3.
Clean the LM guide rail and mirror CAM and ball spline
using an ultra fine fiber cloth.
Step 4.
Apply grease to the LM guide rail and mirror CAM and
ball spline using a flat brush.
Grease application capacity for each spindle: 5 to 10g
Step 5.
Release the emergency stop as described in "Releasing
'Emergency Stop' mode" on page 1-6 and perform the
operation again.
Cleaning and apply grease the Head LM Guide, Ball
Spline
(Time required: 30min / No. M-5)