PPS Pro version 8.2.pdf - 第137页
4022 591 98 247 User Manual 05.07 P PS-Pro v8.2 133 Guidelines for using PPS-Pro SCREEN 81 Optimize Cell ■ The CAD data is converted from PPS-Pro t o Ge mLine optimizer/g ener ator . 3.4.14.2 Single PCB Optimization 1. S…

User Manual 4022 591 98247
132 PPS-Pro v8.2 05.07
Guidelines for using PPS-Pro
3.4.14 Optimize Manually
Manual optimization is used when you want to make special arrangements
during optimization. The most common application is when multistick or tray
feeders are used. An other example is to use the static component set-up as a
pre-assignment, or you might want to use one of the many special optimi
-
zation settings offered by GemLine PPS (with automatic optimization
‘Move+Auto distribute’ is used).
When manual optimization is set (see SCREEN 78 on page 129), after starting
the cell optimization from PPS-Pro the selected PCB’s are imported into
GemLine PPS. Then the PCB Editor is started.
The PCBs in GemLine PPS are given standard names PRO70_PCB1, PRO70_PCB2
etc., (the reason for these special names is to prevent accidental deletion of
PCB’s with the same name). If you want to find out which PCB name this is in
PPS-Pro please check the ‘PCB Info’ ‘PCB Comment’ field.
3.4.14.1 Start manual optimization
Now manual optimization can be done, starting from the PPS-Pro interface.
Select the PCB and the PCB side to be optimized on the PPS-Pro select
products tab.
When you select one PCB side only, a single PCB optimization will be run.
After this section continue with chapter
3.4.14.2.
When you select more than one PCB side a combined product optimization
will be run. After this section continue with chapter
3.4.14.3.
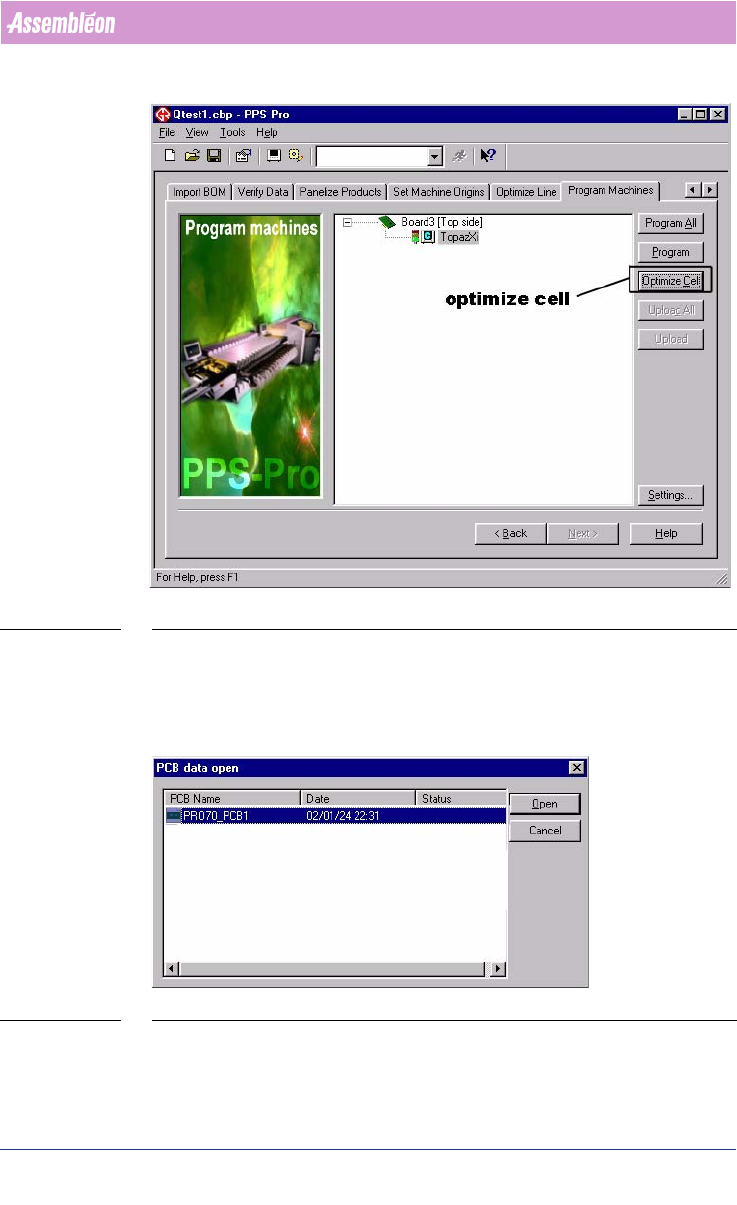
■ Click Optimize cell.
4022 591 98247 User Manual
05.07 PPS-Pro v8.2 133
Guidelines for using PPS-Pro
SCREEN 81 Optimize Cell
■ The CAD data is converted from PPS-Pro to GemLine optimizer/generator.
3.4.14.2 Single PCB Optimization
1. Select the PCB called PRO70_PCB1 (see SCREEN 82 on page 133).
SCREEN 82 PCB data open window
2. In the GemLine PPS PCB Editor, set-up the stick feeders and tray feeders to
the desired location.
User Manual 4022 591 98247
134 PPS-Pro v8.2 05.07
Guidelines for using PPS-Pro
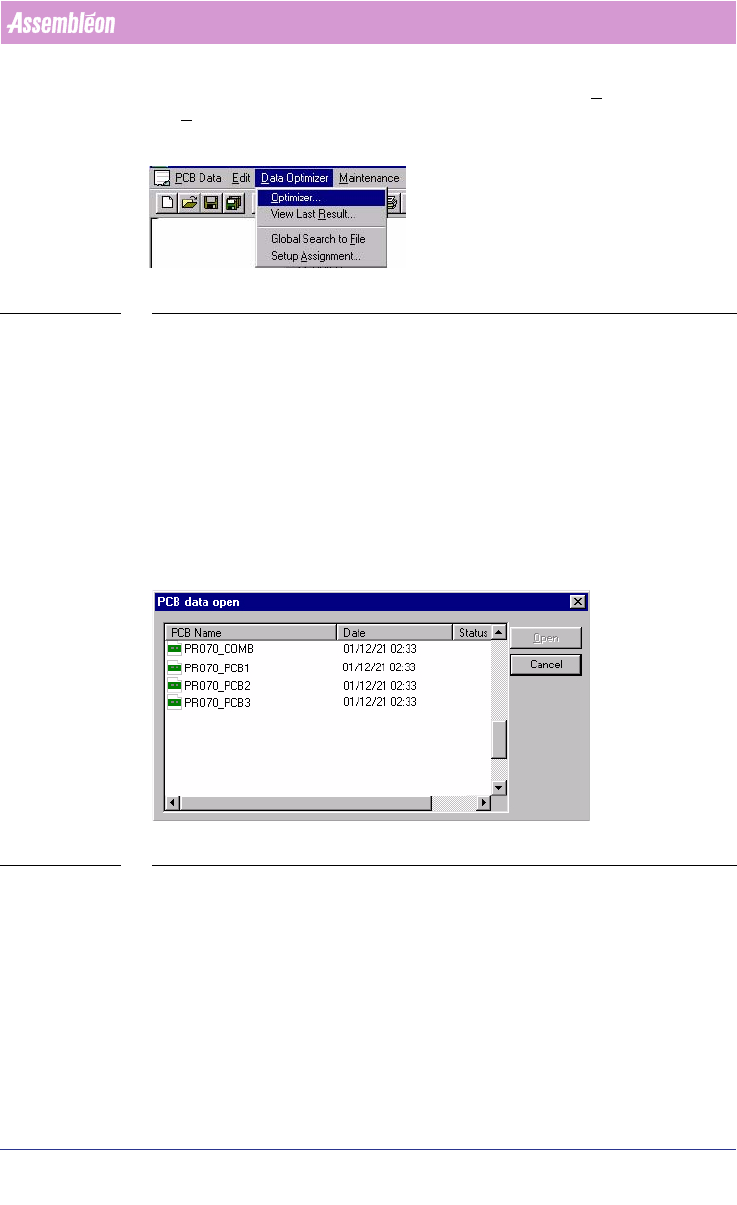
3. After finishing the pre-assigned set-up, start the Data Optimizer >
Optimizer. Select the PCB PRO70_PCB1 from the PCB Setup files.
SCREEN 83 Data optimizer
4. When needed edit this PCB setup. For example to use the static database
or to use other special settings.
5. Now optimize PRO70_PCB1.
6. After optimization save the result in the proposed file PRO70_PCB1_RES
(so PPS-Pro can find it).
7. Close the result window and close the PCB editor window.
8. The data is exported back to the PPS-Pro interface.
9. The results of the optimization process are reported back to the PPS-Pro
application. PPS-Pro will now generate all required listings.
3.4.14.3 Combined PCB Optimization
SCREEN 84 Combined PCB optimization
A combined PCB is a PCB in which all components from a number of PCB’s are
combined. This method of optimization can be used to create a common
feeder setup for all PCB’s.
Practical Example:
1. Select the PCB called PRO70_COMB, when the GemLine PPS PCB editor
starts-up.
2. In Editor, set-up the stick feeders and tray feeders to the desired location
in the combined set-up.