PPS Pro version 8.2.pdf - 第73页
4022 591 98 247 User Manual 05.07 PPS-Pro v8.2 69 PPS-Pro GUI SCREEN 46 Optimizer Failed 2.26 How to use a setup file (*.con) The Ma chine Setup file (.con) d escribes ho w the ma chine has t o be configured to cr eate a…
User Manual 4022 591 98247
68 PPS-Pro v8.2 05.07
PPS-Pro GUI
If ‘All panel types’ is chosen then the mathematical average is calculated and
shown.
SCREEN 45 Optimizer Result
In the *.ssr file the feeder setup is shown.
The *.vnd file shows the calculated performance time in kcpn/hr and the
count for one circuit. The placement time in sec is for the PCB.
For GemLine calculations: If a PCB consists of more than one circuit the
calculated time has to be multiplied by the amount of circuits on the PCB.
If the expand feature in Pro is used, the generated *.fnd file shows only the
components of one circuit.
When the optimization is not successful an error file is created see SCREEN 46
on page 69.

4022 591 98247 User Manual
05.07 PPS-Pro v8.2 69
PPS-Pro GUI
SCREEN 46 Optimizer Failed
2.26 How to use a setup file (*.con)
The Machine Setup file (.con) describes how the machine has to be configured
to create a specific board.
2.27 Let PPS-Pro generate a setup file
The following steps can be taken to let PPS-Pro automatically generate setup
files.
1. Prepare the whole project until the line can be optimized. Click the File >
Preferences and in CIMBridge Preferences screen, click Optimizer tab and
select radio button ‘Run Time Balancer’ or ‘Line Sheduler’ from the Line
optimizer type frame.
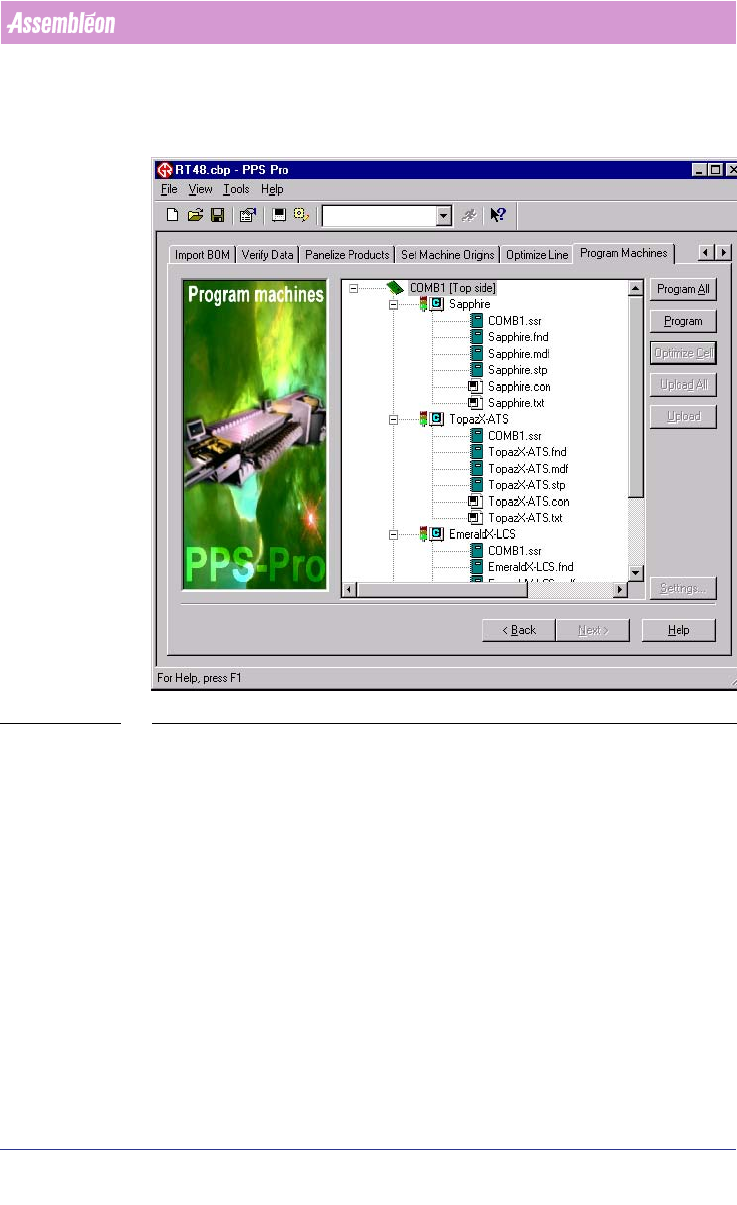
2. Go to the Program Machines tab in PPS-Pro window.

User Manual 4022 591 98247
70 PPS-Pro v8.2 05.07
PPS-Pro GUI
3. Select a machine, and click the Settings button and then the Modify
button.
4. From the Optimize combo box, choose either ‘From MDF’ or ‘From Path’.
Click the
OK button.
5. Click the Close button and then click the Program button.
6. Repeat steps 2-5 above for all machines
7. Press the Optimize Cell button.
After a successful optimization, the created setup files are automatically
written in each machine directory of the project directory. The optimizer will
over write existing setup files that are already located in those machine direc
-
tories.
NOTE: To reuse setup files (see 2.28 on page 70), place them in a directory other
than the machine directory or rename the CON file.
2.28 Use a setup file when optimizing a pcb
Setup files are always created after program machines. These files enablea you
to manually assign certain parts to certain feeders, while allowing the rest of
the parts to be assigned by the Assembléon optimizer. There are two ways to
use the setup file when an optimization is performed. This depends on the
choice that is made in the
File > Preferences... menu in the Optimizer tab.
The two choices for the ‘Line Optimizer type’ are:
1. ‘No Optimizer’.
The setup file can be selected via the Fixed Setup button in the Program
Machines tab.
2. An other selection.
The setup file can be selected via the Settings... button in the Optimize Line
tab.
After pressing one of these above mentioned buttons, the Optimize Line
Settings dialog appears
(see SCREEN 47 on page 71). The setup file can be
selected after:
■ Pressing the ... button.
■ Select the Use existing setup checkbox.