Operating Manual SIPLACE Multi-Docking Station.pdf - 第35页
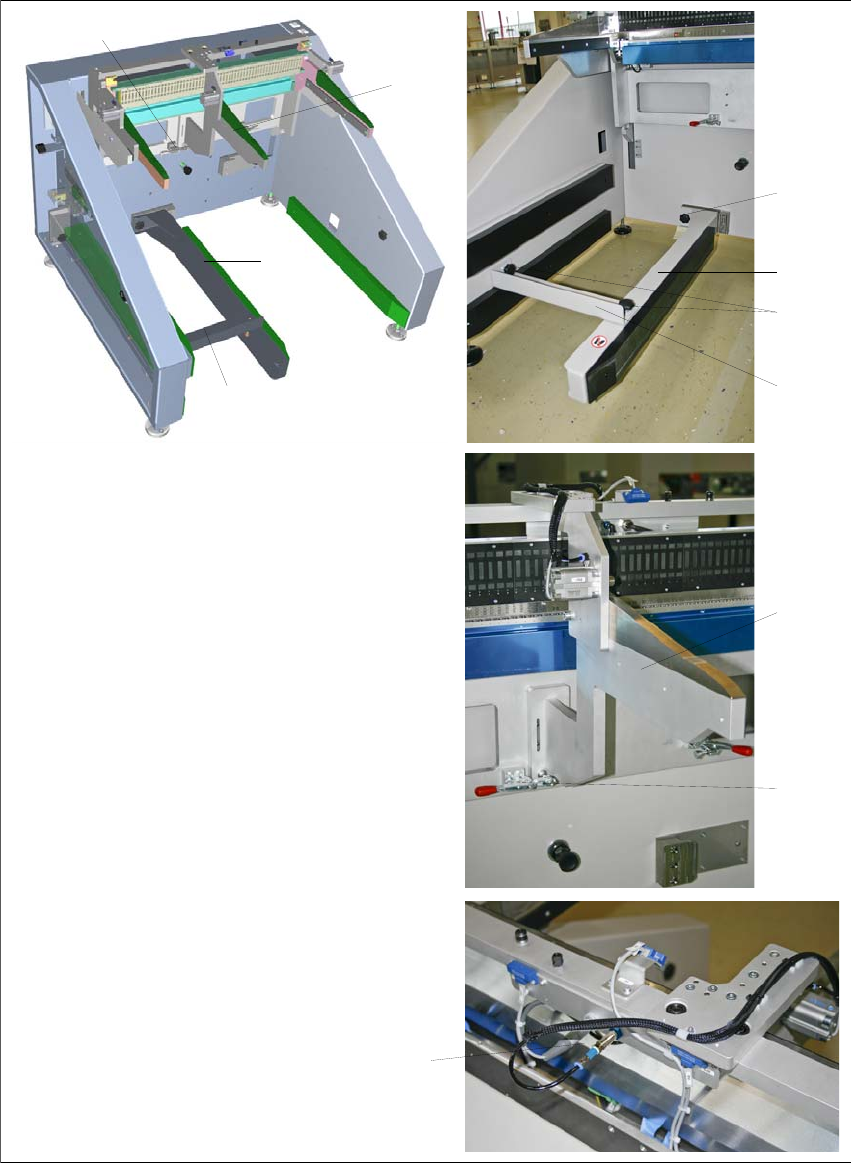
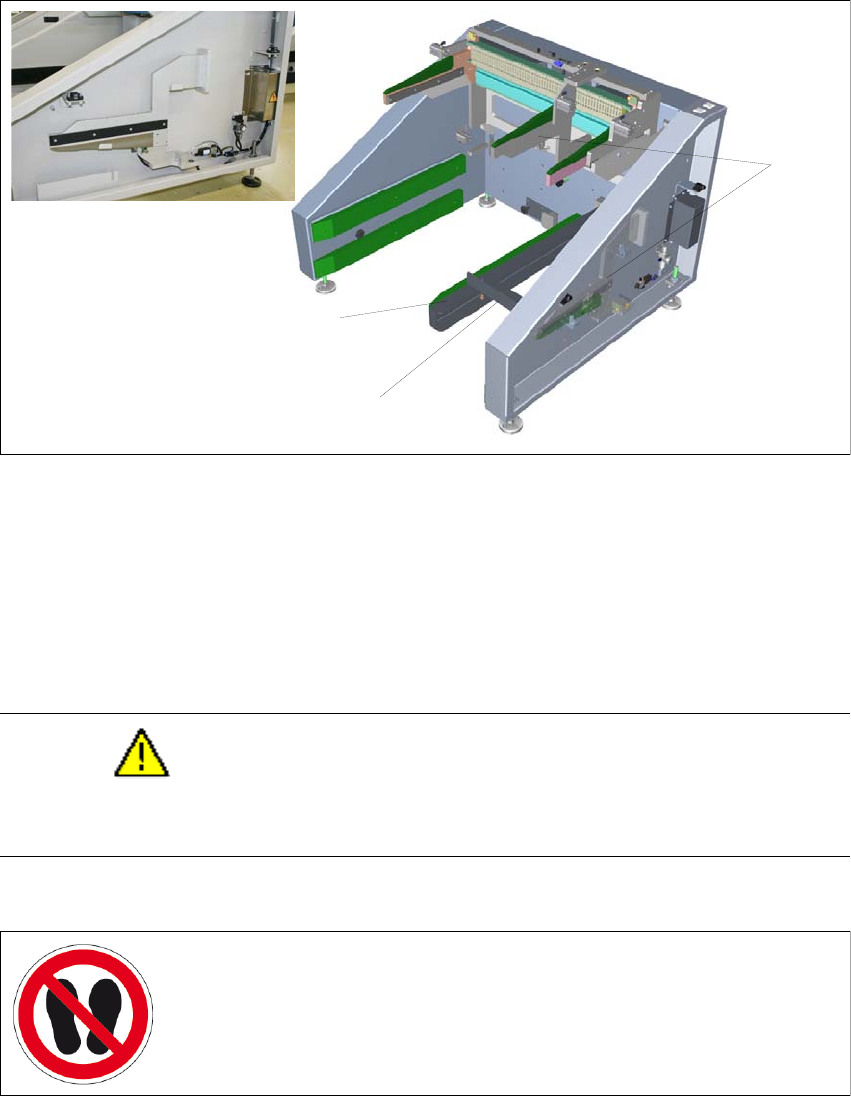
31 SIPLACE Multi-Docking-St ation 4 Operation Operating Manual 4.4 Conversion to COT 30 or COT 40 4.4.3 Adapter COT 40 – Option Fig. 4 - 8 SIPLACE Multi-Docking S tation – COT 40 (1) Guide strip (2) Angle bracket COT 40 …
4 Operation SIPLACE Multi-Docking-Station
4.4 Conversion to COT 30 or COT 40 Operating Manual
30
4.4.2.1 Conversion to COT 30
1
3
6
5
7
(1) Switch off the Multi-Docking Station
and disconnect the power cable
from the power supply.
(2) Insert the guide strip 1 into the
retainer at the bottom and tighten
the star knob screw 2.
(3) Install the angle bracket 3 as shown
and tighten the two star knob
screws 4.
(4) Open the quick clamp 5, hook in the
skid strip 6 and close the quick
clamp.
(5) Make the proper connections to the
COT 30 adapter 7.
(6) Check that all the steps have been
executed completely and correctly.
1
2
3
4
5
6
31
SIPLACE Multi-Docking-Station 4 Operation
Operating Manual 4.4 Conversion to COT 30 or COT 40
4.4.3 Adapter COT 40 – Option
Fig. 4 - 8 SIPLACE Multi-Docking Station – COT 40
(1) Guide strip
(2) Angle bracket COT 40
(3) Skid strip COT 40
The items (2) and (3) are included in the mounting accessories with part number 00176147-01.
CAUTION
Do not stand on the guide strip or apply loads from
above or below. This will damage the guide
strip and its retainer.
1
3
2
Storage space for
the COT 40
accessories.
Keep off
Label locations: On the SIPLACE Multi-Docking Station
- Guide strip, on top and bottom sides.
Number per machine: 2
4 Operation SIPLACE Multi-Docking-Station
4.4 Conversion to COT 30 or COT 40 Operating Manual
32
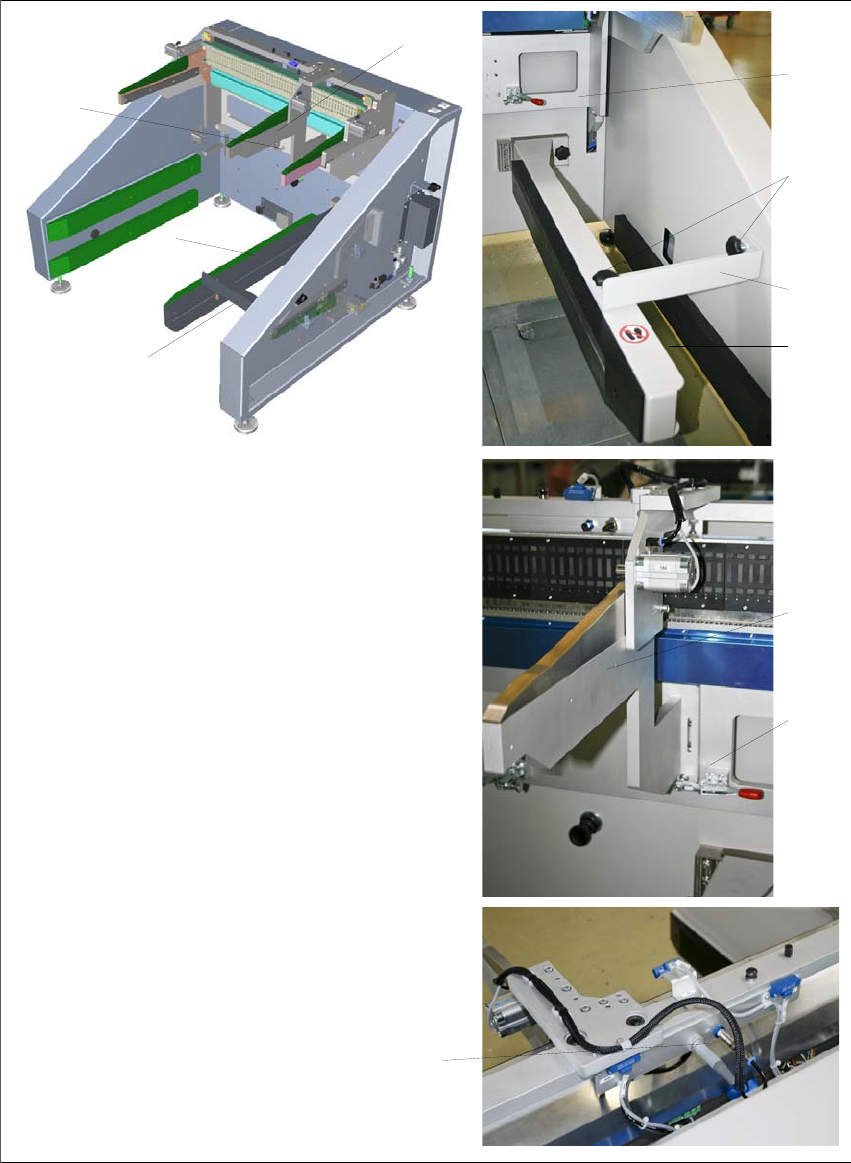
4.4.3.1 Conversion to COT 40
1
7
(1) Switch off the Multi-Docking Station
and disconnect the power cable
from the power supply.
(2) Insert the guide strip 1 into the
retainer at the bottom and tighten
the star knob screw 2.
(3) Install the angle bracket 3 as shown
and tighten the two star knob
screws 4.
(4) Open the quick clamp 5, hook in the
skid strip 6 and close the quick
clamp.
(5) Make the proper connections to the
COT 40 adapter 7.
(6) Check that all the steps have been
executed completely and correctly.
2
3
4
5
6
1
3
6
5