00197728-12_IM_SE3.11_EN.pdf - 第62页
4 Configuration Installation and Configuration Guide SIPLACE Exp lorer 4.2 Configuring the Factory Configuration Utility Edition 11/202 0 EN 62 If the connection does not func tion prope rly , you w ill see the followi…
Installation and Configuration Guide SIPLACE Explorer 4 Configuration
Edition 11/2020 EN 4.2 Configuring the Factory Configuration Utility
61
4
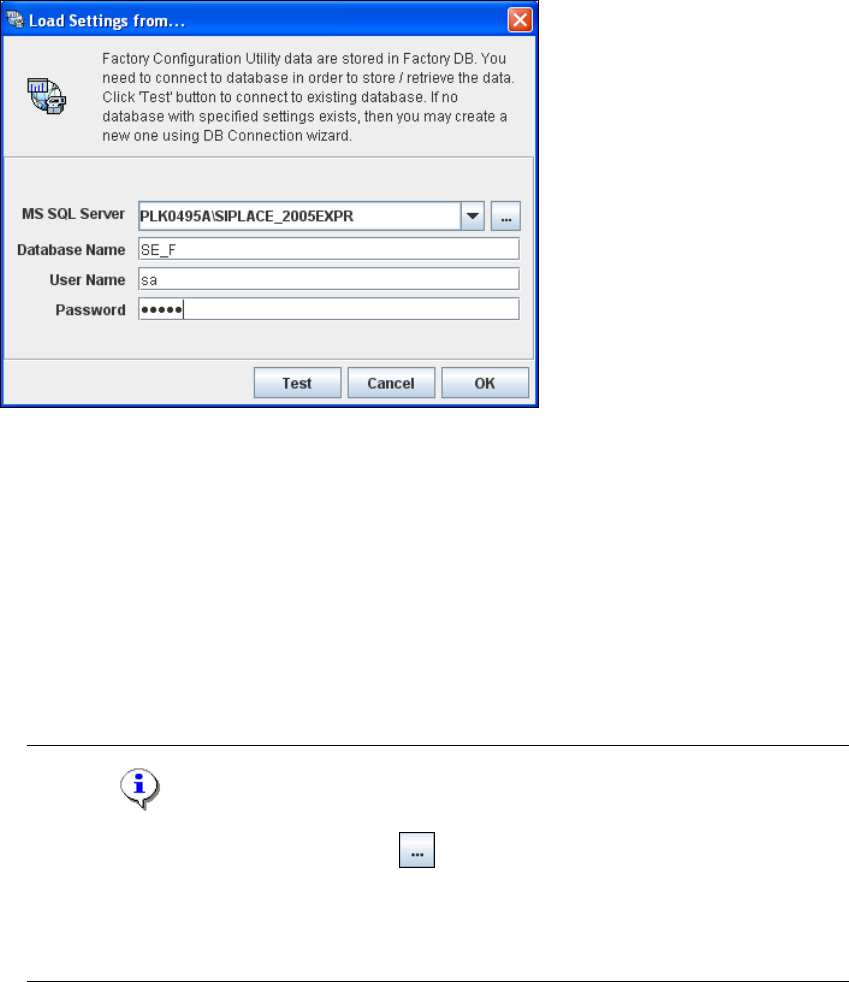
Fig. 4 - 28 Loading settings
Enter the following information:
– MS SQL Server:port number
You can add the port number to the SQL Server instance, separated by a colon, for
example: PLK0495A\SIPLACE_2005EXPR:12345.
– Database name
– Database user
– DB password
NOTE
Click on the Browse for SQL instances icon. All SQL server instances available will be
shown in the Select SQL Server instance dialog box.
If the Select SQL Server instance dialog box shows no entries, you need to specify the SQL
server instance manually in the MS SQL Server field. 4
After entering the database access parameters, we strongly recommend that you check the
connection to the database. Click Test to check whether the connection to the database can
be established.
4 Configuration Installation and Configuration Guide SIPLACE Explorer
4.2 Configuring the Factory Configuration Utility Edition 11/2020 EN
62
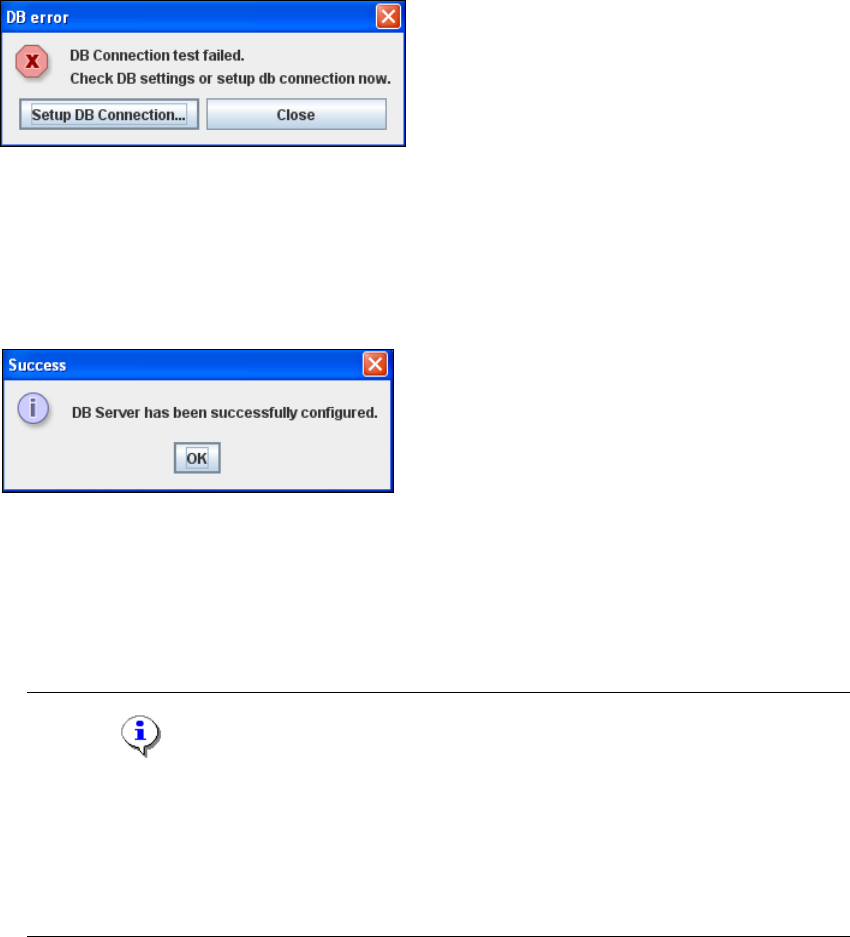
If the connection does not function properly, you will see the following information box:
4
Fig. 4 - 29 DB error
Click on the Setup DB Connection button to start the DB Connection Wizard setup
sequence and configure the SIPLACE Explorer factory database. Follow the instructions at
“Database Connection Wizard” on page 80.
If the connection functions properly, you will see the following information box:
4
Fig. 4 - 30 Success
Click OK. The system will check the database data. If the database has data from SIPLACE
Explorer 2.0 - 3.10, you will need to convert the database for SIPLACE 3.11, due to the
changed data structure in the SIPLACE Explorer 3.11 database. In this case, the Convert
Database dialog box will open.
NOTE
Consider the following when converting the database
- You require database administrator privileges.
- Once you have started the conversion, this process can not be stopped.
- The conversion time depends on the size of the database and on the performance of the
computer. It may take up to one hour. 4
Specify the access data for the database administrator and enable the Backup database
option.
Installation and Configuration Guide SIPLACE Explorer 4 Configuration
Edition 11/2020 EN 4.2 Configuring the Factory Configuration Utility
63
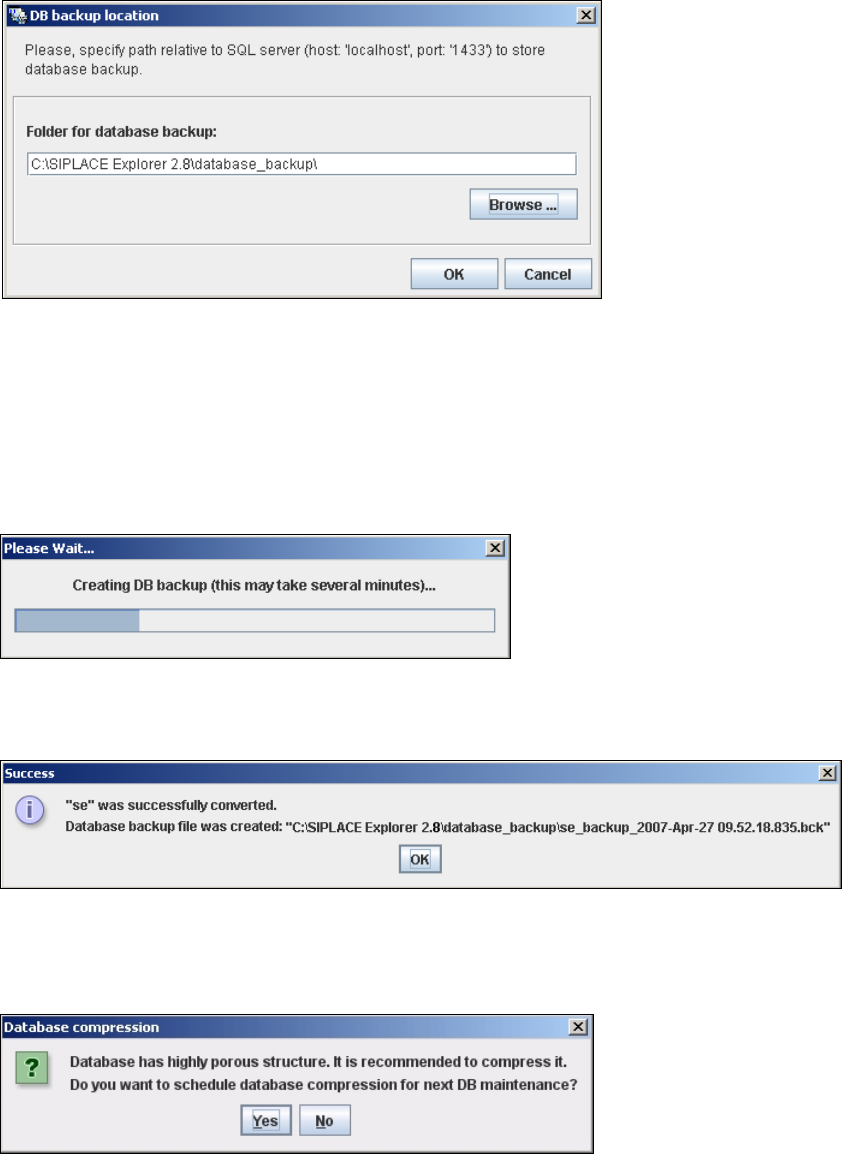
Confirm your entries with OK. The DB backup location dialog box will open
4
Fig. 4 - 31 DB backup location
Before performing the conversion, the system creates a backup file of the database. Specify
the folder for this file in the Folder for database backup field. Click on the Browse ...
button to select an existing folder.
Confirm your choice with OK. The database will be converted. This may take up to one
hour. The conversion time depends on the size of the database.
4
Fig. 4 - 32 DB backup
After successful conversion of the database, the following information window will open:
4
Fig. 4 - 33 Success
Dependent of the database size, you can compress the database, the following information
window will open:
4
Fig. 4 - 34 Database compression