00195311-0202_SM_CurrentLimiter_DE EN.pdf - 第32页
Service Manual: Replacing the inrush current limiter, SIPLACE X-se ries 10/2006 Edition 32 : Push the old or the new , longer insulation sl eeving from the retrofit kit onto the hexagonal spacer at the top left. 2 2 : At…
Service Manual: Replacing the inrush current limiter, SIPLACE X-series
10/2006 Edition
31
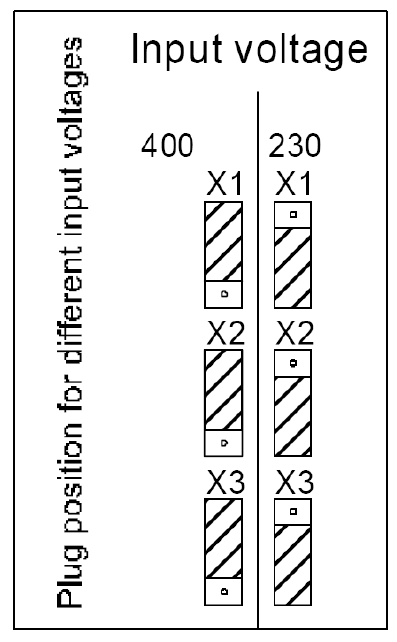
: Plug the connectors in line with the supply voltage:
2
2
The inrush current limitation board must be configured in line with the supply voltage. This is per-
formed with the help of plug-in jumpers on the inrush current limitation board. 2
: Check the jumper assignements and correct these, where necessary.
2
2
2
2
2
2
2
2
2
X1, X2, X3: Plug-in jumper to configure the
inrush current limitation
Service Manual: Replacing the inrush current limiter, SIPLACE X-series
10/2006 Edition
32
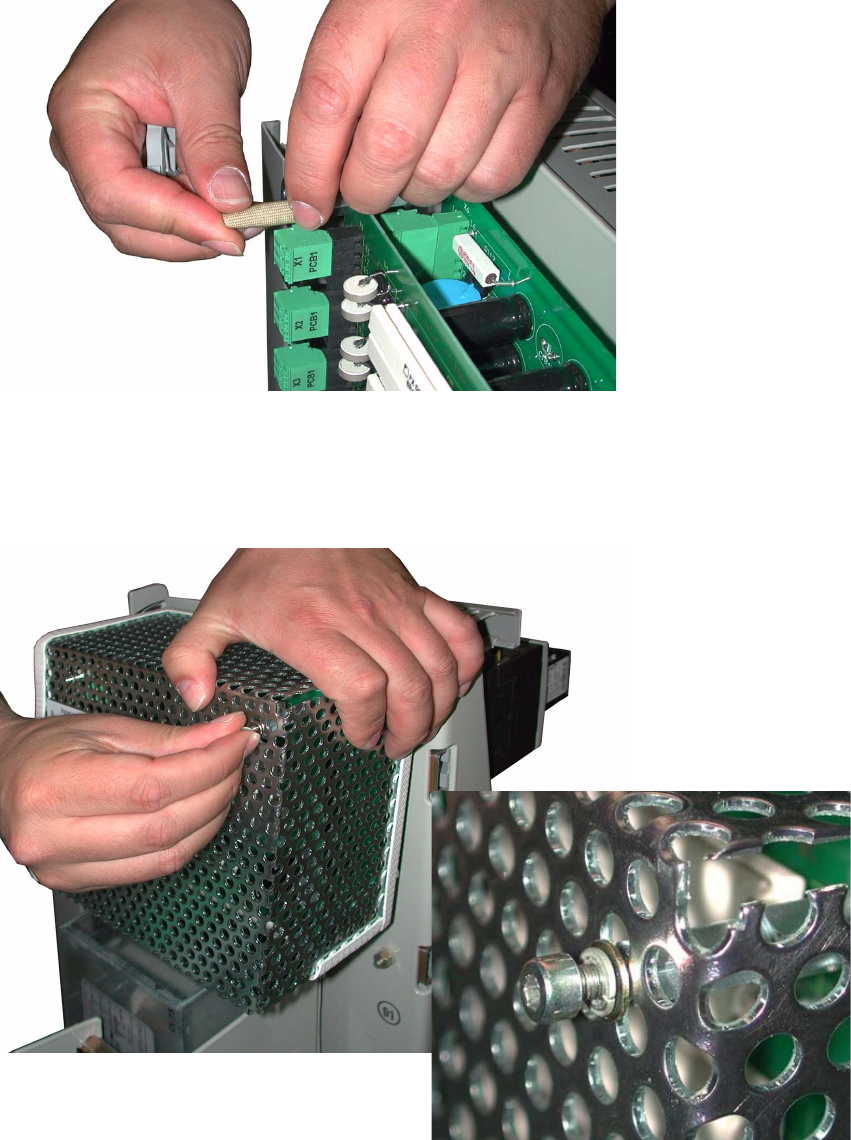
: Push the old or the new, longer insulation sleeving from the retrofit kit onto the hexagonal
spacer at the top left.
2
2
: Attach the new grid cover.
Screw it in place with four screws. The screw holes are located between the grid openings.
2
2
Service Manual: Replacing the inrush current limiter, SIPLACE X-series
10/2006 Edition
33
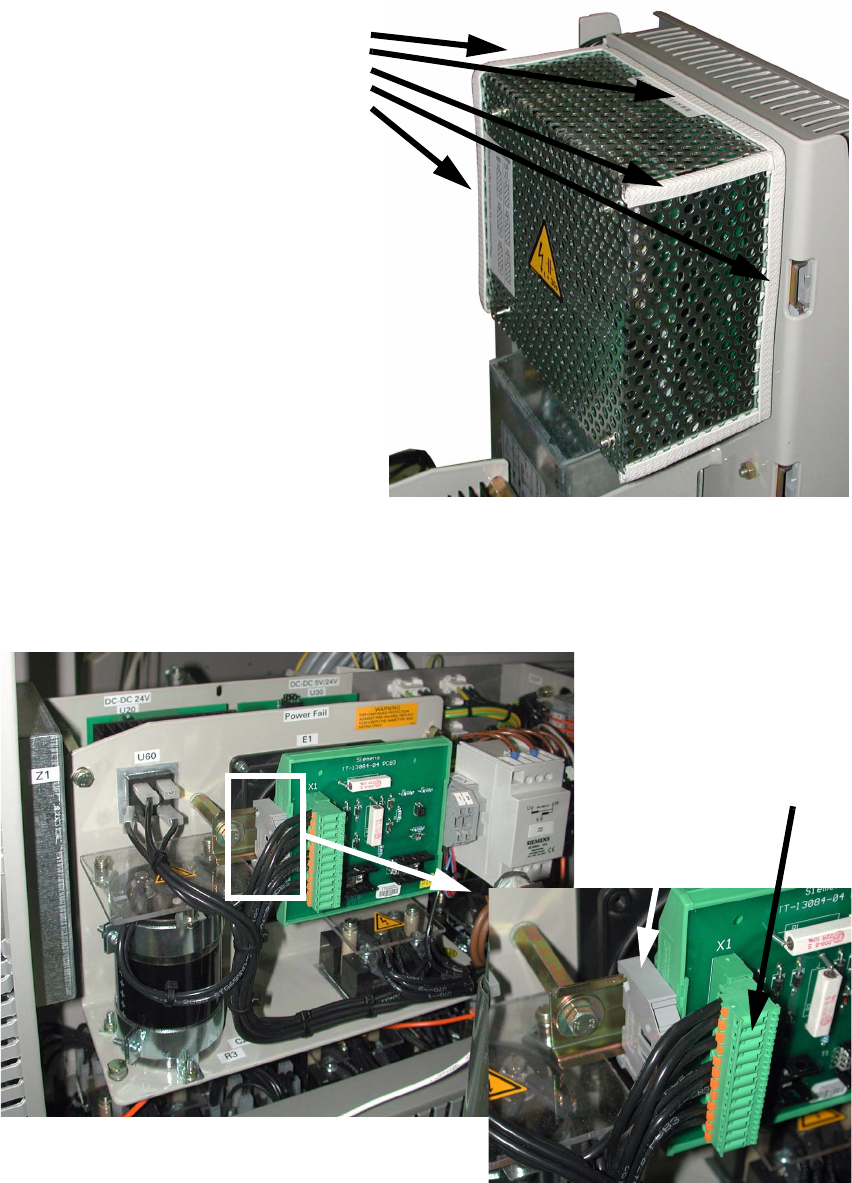
: Check that the edge protector is attached to the grid.
2
2
: Remove the terminal end piece from the top hat rail.
The connector at X1 may be removed for ease of access.
2
Edge protector
Terminal end piece
Connector