TS5622VU-DVD.pdf - 第10页
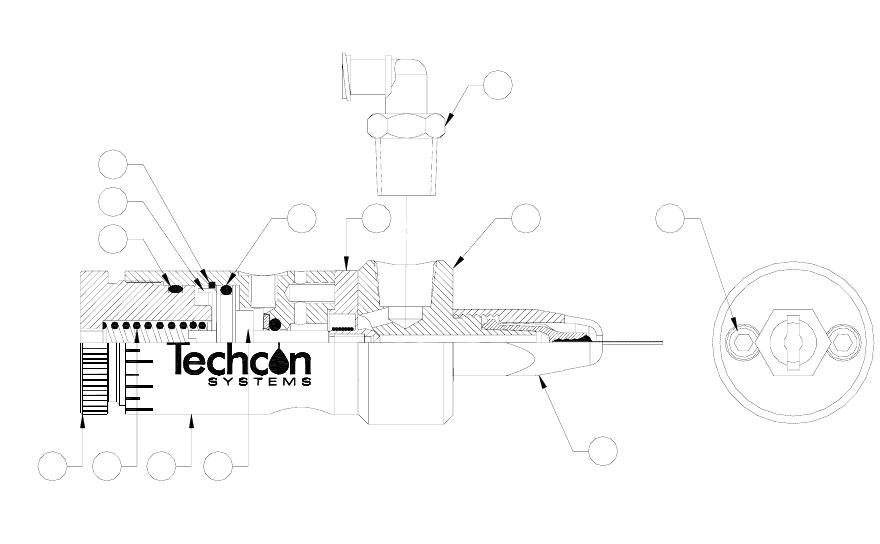
10 8.3 TO CHANGE OR LUBRIC ATE PISTON O-RING 1. Remove the fluid housing (6). 2. Remove the diaphragm (5). 3. Remove the stroke control knob (8) and spring (9). 4. Remove the retainer ring (2) and an ti-rotating washer (…
9
8.2 TO CHANGE THE DIAPHRAGM
Tool required: Flat tip screwdriver, Snap ring flier, 7/64” hex wrench.
1. Remove needle retaining cap (12) then remove the dispense needle.
2. Remove the two socket head cap screws (7) from the fluid housing (6)
3. Pull the fluid housing away from the air cylinder assembly (10)
4. Remove the old diaphragm (5) by unscrew it in the counterclockwise direction.
5. Install the new diaphragm by threading it in the clockwise direction. Make sure the internal
thread on the diaphragm is not stripped or cross-threaded.
6. Hand tightened the diaphragm until it bottoms out against shoulder on piston rod. At this point,
do not over tighten or loosen the diaphragm to align the diaphragm and air cylinder holes.
7. The valve is designed so that the fluid housing can be rotated in 45° increments to allow for
material input/output alignment. To align the holes of the diaphragm with the appropriate holes
in the air cylinder body, insert a small flat tip screwdriver through the hole in the stroke control
knob (8) and engage the piston rod slot. Turn the screwdriver clockwise to rotate the rod, piston
and diaphragm assembly until the appropriate holes are lined up.
8. Reinstall the fluid housing (6).
9. Align the fluid housing mounting holes with diaphragm and air cylinder holes.
10. Reinsert the two socket head cap screws (7). Do not exceed 14 in lb (1.58 N-m) torque.
10
8.3 TO CHANGE OR LUBRICATE PISTON O-RING
1. Remove the fluid housing (6).
2. Remove the diaphragm (5).
3. Remove the stroke control knob (8) and spring (9).
4. Remove the retainer ring (2) and anti-rotating washer (1).
5. Remove the piston assembly (11).
6. Replace O-ring (4) if damaged; otherwise lubricate O-ring with O-ring grease.
7. Reinstall piston, retainer ring and anti-rotating washer.
8. Reinstall spring and stroke control knob.
9. Reinstall diaphragm and fluid housing.
810911
12
2
3
1
4 5 67
13
Figure 6.0
11
9. SPARE PARTS AND ACCESSORIES
9.1 SPARE PARTS
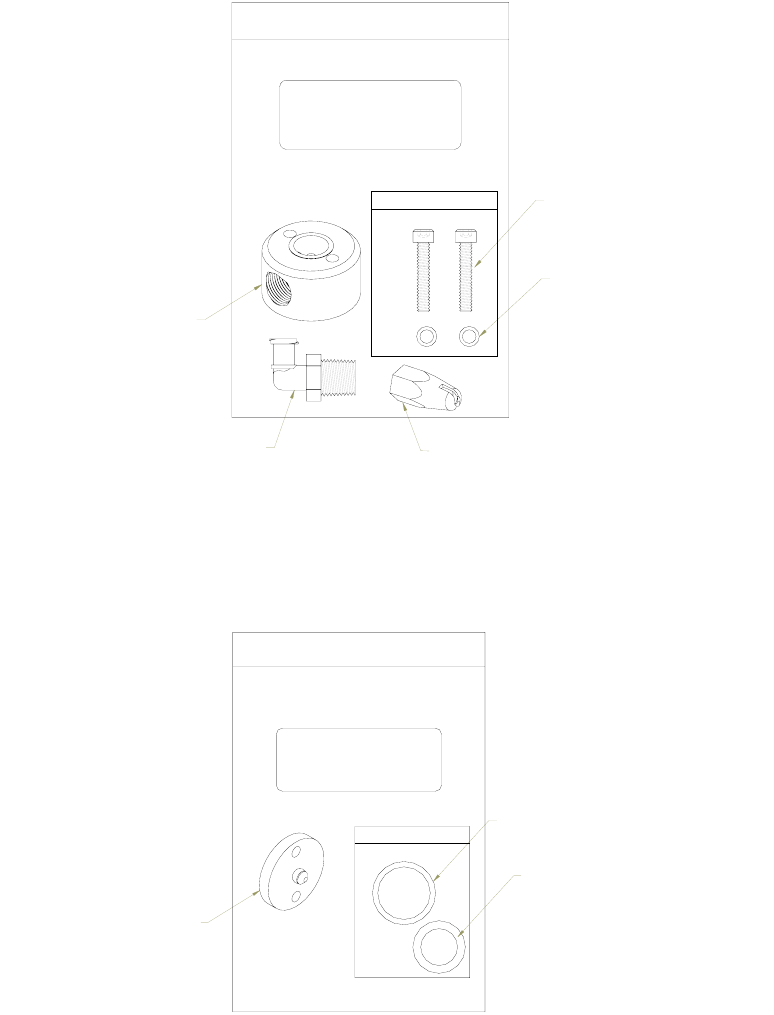
Techcon Systems makes available fluid housing replacement kit and diaphragm replacement kit.
The fluid housing replacement kit includes:
The diaphragm replacement kit includes:
5622VU-DVD-FHKIT
Fluid housing replacement kit
Fluid housing (6)
Fluid inlet fitting (13)
Needle cap (12)
Flat washers
Socket head cap
cap screw (7)
Figure 7.0
5620UHMW-DKIT
REPAIR KIT, DIAPHRAGM VALVE
DIAPHRAGM ASSEMBLY (3)
O-RING (4)
O-RING (7)
Figure 8.0