Nordson_EFD_RV_Series_Operating_Manual.pdf - 第111页
RV Series Automated Dispensing Systems 111 www.nordsonefd.com info@nordsonefd.com +1-401-431-7000 Sales and service of Nordson EFD dispensing systems are available worldwide. Fill End Click Function Double-click address …
RV Series Automated Dispensing Systems
110 www.nordsonefd.com info@nordsonefd.com +1-401-431-7000 Sales and service of Nordson EFD dispensing systems are available worldwide.
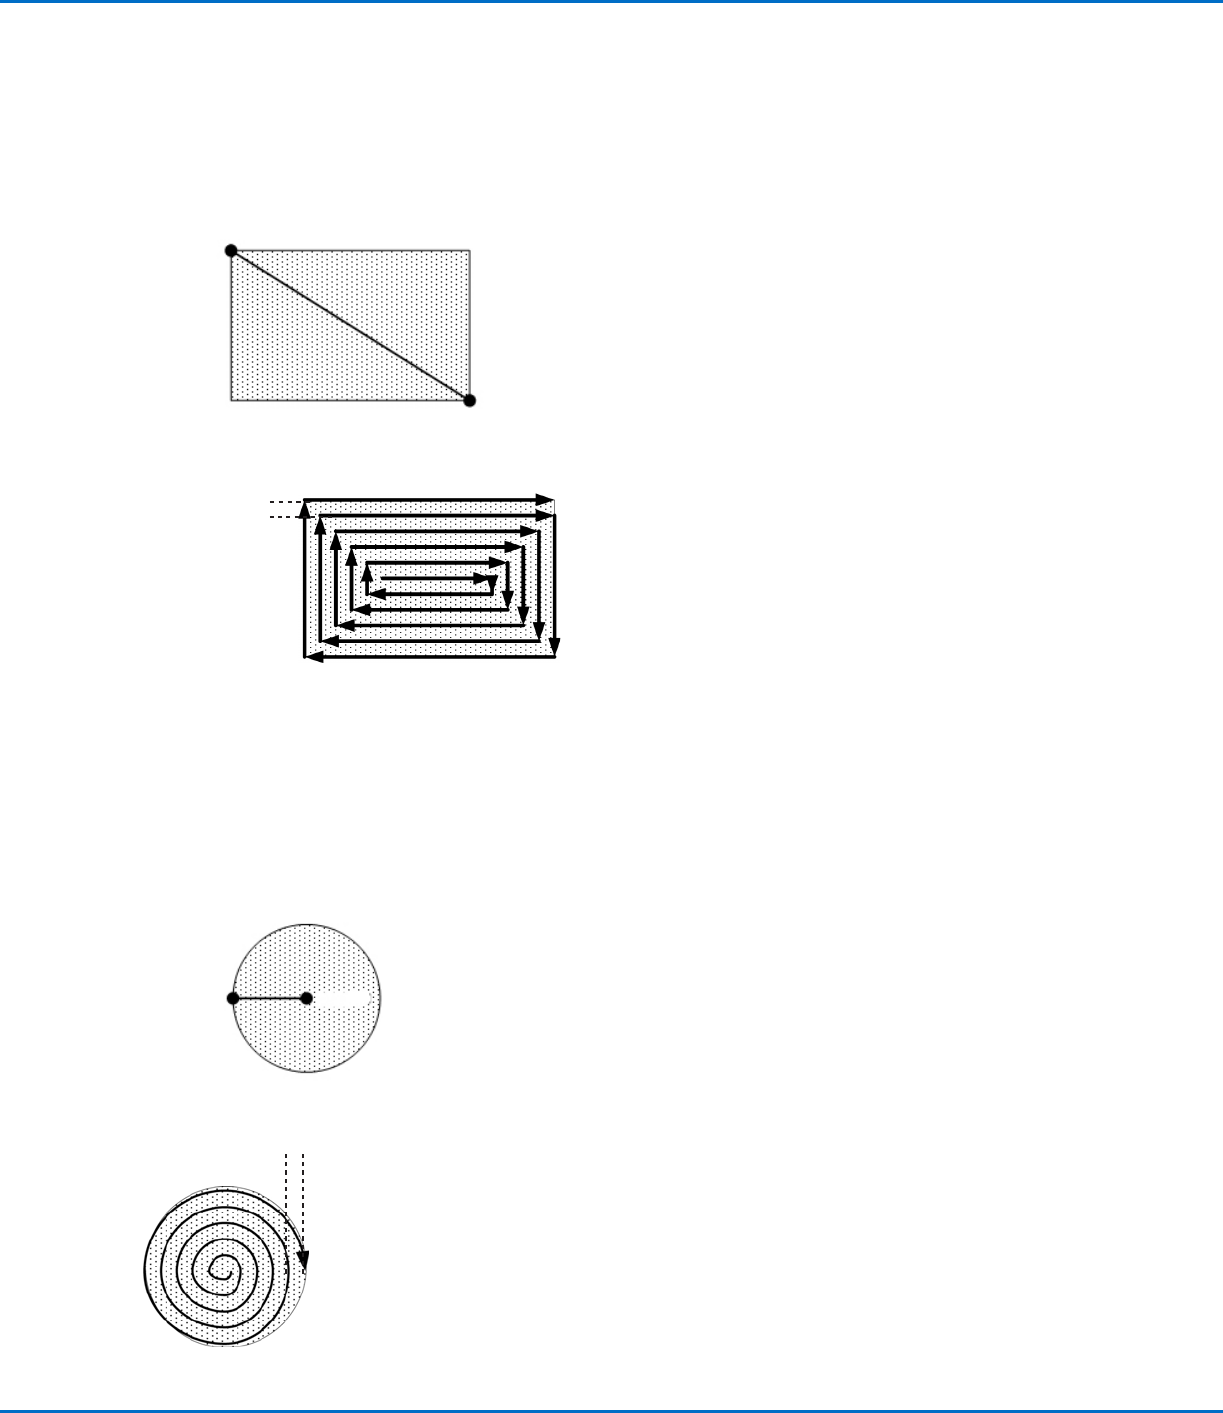
Fill Area: 6. Rectangle (Inner to Outer)
This command fills the defined area by moving the tip along a square, spiral-shaped path from the center of the rectangle to the
outside edge. After entering a Fill Area Rectangle command, enter a Line Start point at the top left corner of the area to be filled
and a Line End point at the bottom right corner of that area.
Line Start
Line End
Fill Area
EXAMPLE: If a Width of 5 mm is entered, the tip makes the following path:
Width = 5 mm
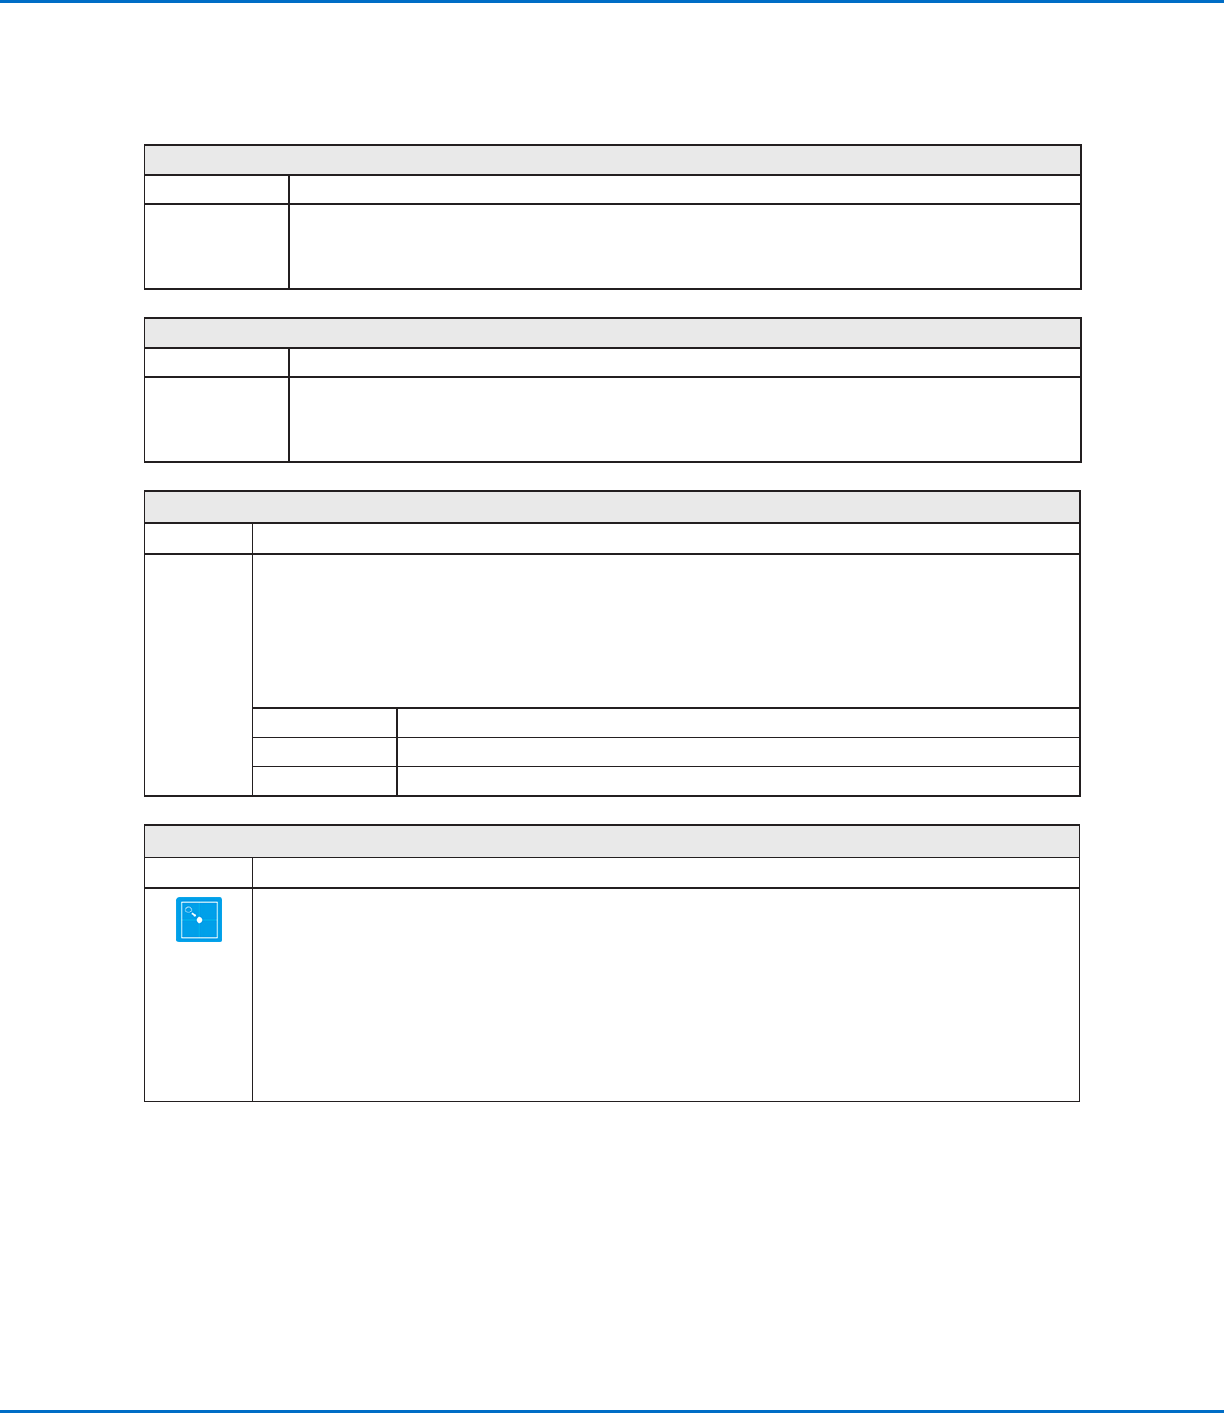
Fill Area: 7. Circle (Inner to Outer)
This command fills the defined area by moving the tip along a spiral path from the center of the circle to the outside edge. After
entering a Fill Area Circle command, jog the tip to a point on the center of the circle to be filled and enter that location as a Line
Start point. Then jog the tip directly across to the outside of the circle and enter that location as a Line End point.
Line End
Line Start
Fill Area
EXAMPLE: If a Width of 5 mm is entered, the tip makes the following path:
Width = 5 mm
Appendix A, Command Function Reference
(continued)
RV Series Automated Dispensing Systems
111www.nordsonefd.com info@nordsonefd.com +1-401-431-7000 Sales and service of Nordson EFD dispensing systems are available worldwide.
Fill End
Click Function
Double-click
address and
select from drop-
down menu
Used in tandem with Fill Area and Fill Start, the Fill End command designates the end of a Fill Area
command. The correct sequence of commands for a fill area is: (1) Fill Start, (2) Fill Area, (3) Fill End.
NOTE: Line End can be used in place of Fill End.
Fill Start
Click Function
Double-click
address and
select from drop-
down menu
Used in tandem with Fill Area and Fill End, the Fill Start command designates the start of a Fill Area
command. The correct sequence of commands for a fill area is: (1) Fill Start, (2) Fill Area, (3) Fill End.
NOTE: Line Start can be used in place of Fill Start.
Find Angle Mark
Click Function
Double-click
address and
select from
drop-down
menu
Used in tandem with Fiducial Marks to cause the system to search for a change in the XY orientation of a
workpiece by searching in an angle-shaped area on the workpiece. If a change is found, the system adjusts the
dispense program accordingly.
EXAMPLE: If Start Angle = 0 and End Angle = 90, the system searches for marks within the specified angle-
shaped area. If a workpiece differs from the previous workpiece within that area, the system adjusts the dispense
program accordingly. If the system cannot find the marks within the specified angle-shaped area, it skips the
workpiece.
Parameter Description
Start Angle The angle (in degrees) at which the systems starts searching.
End Angle The angle (in degrees) at which the system stops searching.
Find Mark
Click Function
Causes the system to search for the mark specified in the No. (number) field of a Find Mark command. The
mark is then used by the Mark Adjust command to adjust the dispense program accordingly for any XY position
changes between workpieces.
NOTES:
• Only one Find Mark is required in a program for the system to perform this function correctly.
• A Find Mark is different from a Fiducial Mark. A Find Mark is used only to check the XY position of a workpiece
whereas a Fiducial Mark is used to check the orientation of a workpiece.
• Refer to “About Marks” on page24 for more information on marks.
AppendixA, Command Function Reference
(continued)
RV Series Automated Dispensing Systems
112 www.nordsonefd.com info@nordsonefd.com +1-401-431-7000 Sales and service of Nordson EFD dispensing systems are available worldwide.
Goto Address
Click Function
Causes the program to jump to the specified address.
Goto Label
Click Function
Causes the program to jump to the address in the program that has the specified label.
Height Sensor
Click Function
Double-click
address and
select from
drop-down
menu
Measures the height of an object on a workpiece where a dispense dot is to be placed; the measured data is
then used to adjust dispensing accordingly for any height changes between workpieces.
NOTE: This function is not currently available.
Initialize
Click Function
Causes the robot to perform an initialization. The dispensing tip moves to the home position (0, 0, 0) and the
robot relocates the home position using the home position sensors.
Input
Click Function
Causes the program to check for an input signal at the specified port and to turn the input ON or OFF.
Parameter Description
Port(1~8) Sets the input port number.
0 Off, 1 On Turns the input OFF or ON.
Address or
Label
Causes the program to check the input at the specified address or label. Click Change to
toggle between Address and Label.
AppendixA, Command Function Reference
(continued)