Nordson_EFD_RV_Series_Operating_Manual.pdf - 第69页
RV Series Automated Dispensing Systems 69 www.nordsonefd.com info@nordsonefd.com +1-401-431-7000 Sales and service of Nordson EFD dispensing systems are available worldwide. Circle Sample Pr ogram NOTES: • The X and Y pa…

RV Series Automated Dispensing Systems
68 www.nordsonefd.com info@nordsonefd.com +1-401-431-7000 Sales and service of Nordson EFD dispensing systems are available worldwide.
How to Create Patterns
The vision-guided automated dispensing software allows you to create patterns in many ways. This part of the
manual provides example programming for some of the most common command sequences. Use these examples
as a guideline for making other patterns. Refer to “AppendixA, Command Function Reference” on page98
for detailed information on all commands. Refer to “How to Use the Example Icon” on page69 for some pre-
programmed example programs already created in the DispenseMotion software.
Dispense Dot Sample Program
Lines and Arcs Sample Program
Line Start
point
Line End
point
Arc Point
Line Passing
point
Line Passing
point
RV Series Automated Dispensing Systems
69www.nordsonefd.com info@nordsonefd.com +1-401-431-7000 Sales and service of Nordson EFD dispensing systems are available worldwide.
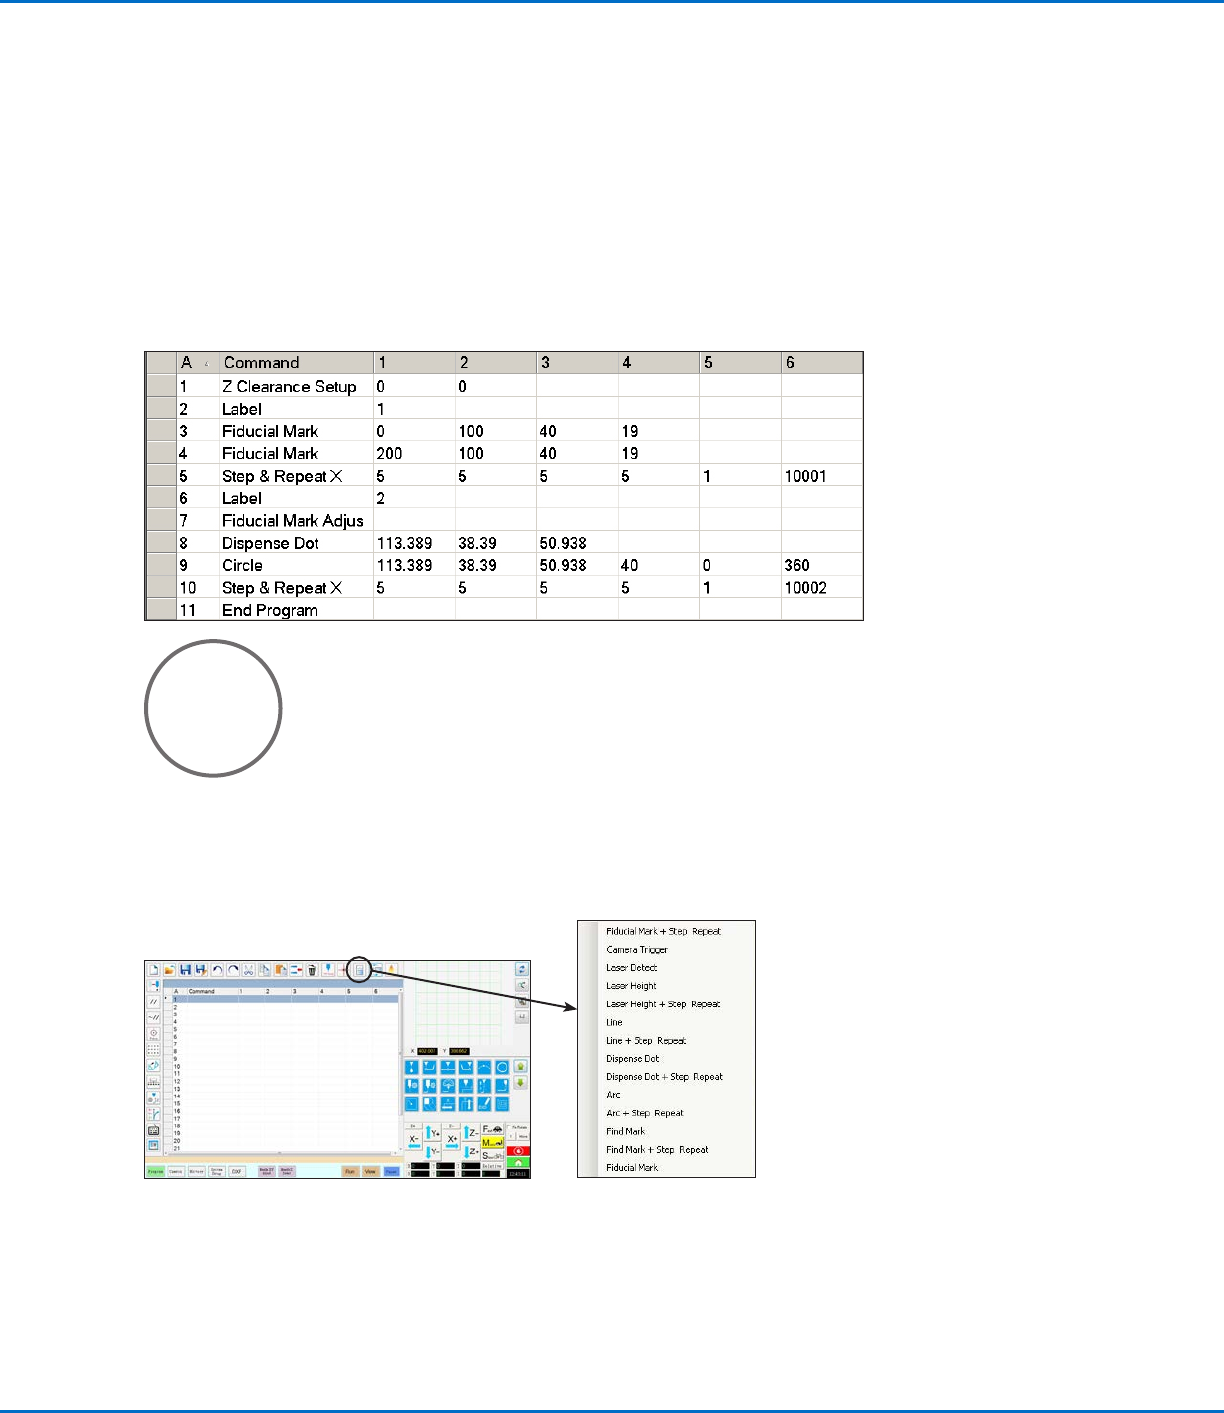
Circle Sample Program
NOTES:
• The X and Y parameters are the center of the circle.
• The diameter of the circle on the workpiece was measured as 5.5mm. Click the Measure Circle Diameter icon
on the Camera screen to measure the diameter of a circle on a workpiece. Refer to “How to Measure a Path or
Circle on a Workpiece” on page67.
• Do not use a non-zero rotation angle in a circle command; doing so will cause the rotation angle to reset to 0
when the command occurs.
How to Create Patterns (continued)
How to Use the Example Icon
A selection of pre-programmed sets of commands are available when you click the Example icon. You can use
these programs as a starting point for any program.
RV Series Automated Dispensing Systems
70 www.nordsonefd.com info@nordsonefd.com +1-401-431-7000 Sales and service of Nordson EFD dispensing systems are available worldwide.
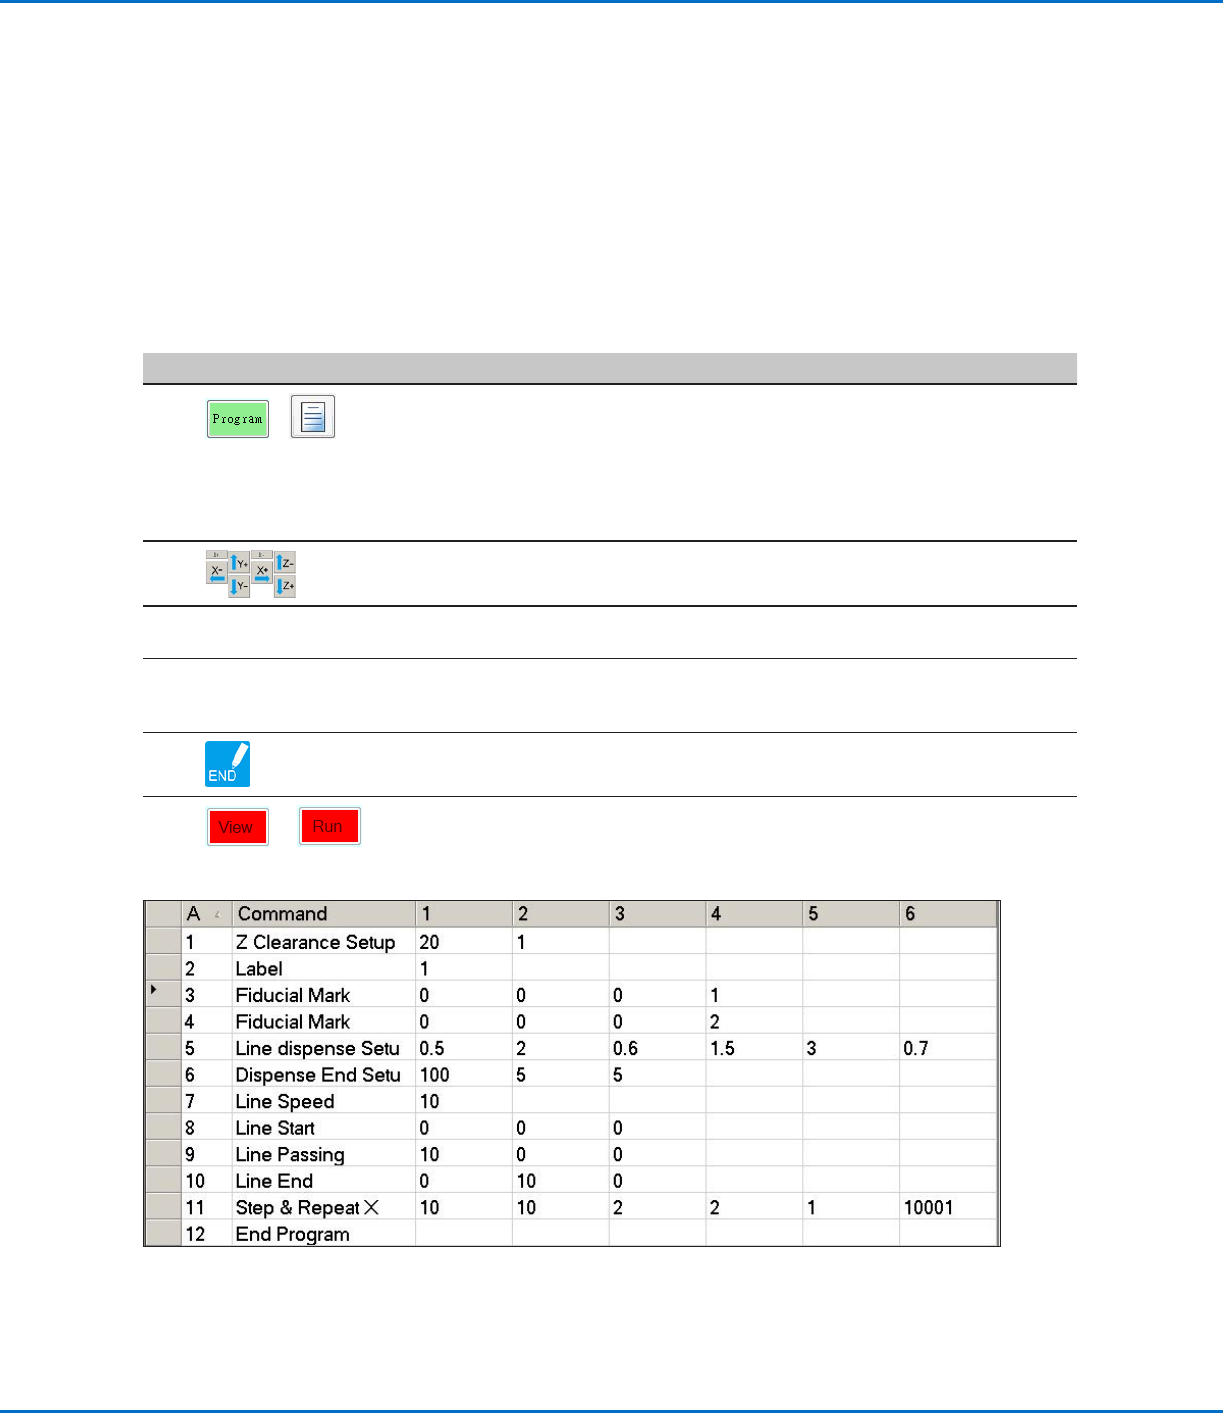
How to Dispense on Multiple Workpieces in an Array
Use the Step & Repeat commands to dispense the same pattern on multiple workpieces in an array.
NOTE: You can use the Step & Repeat Block icon to disable dispensing for workpieces not present. Refer to “How
to Disable Dispensing for Specific Workpieces in an Array” on page71.
PREREQUISITES
The system is properly set up. Refer to “Setting Up and Calibrating the System (Required)” on page45.
If the tip or any element of the Zaxis head was changed, repeat system setup and calibration using the Robot
Initial Setup wizard. Refer to “Setting Up the System Using the Robot Initial Setup Wizard” on page48.
The system is in the CCD Mode.
Multiple workpieces are properly positioned on the fixture plate.
#
Click Step
1
>
• Click the PROGRAM tab, then click the Example icon and select FIND MARK
+ STEP REPEAT. Click YES when prompted for confirmation.
A sample Step & Repeat X program appears.
NOTE: You can also use Step & Repeat Y to dispense onto multiple pieces
in an array. Refer to “AppendixA, Command Function Reference” on
page98 for detailed information on both Step & Repeat commands.
2
• Jog the dispensing tip to the first workpiece in the array and create a mark.
Refer to “How to Create a Mark” on page72 as needed.
3
• Click the FIND MARK command and enter the number of the mark created in
step 2.
4
• Click the remaining commands and enter the parameters that will work
for your array. Refer to “AppendixA, Command Function Reference” on
page98 for detailed information on commands.
5 • Click END PROGRAM to end the program.
6
or
• Test the program and make adjustments until the program runs correctly.