00193437-03_AI_PowerSupplyConversion_DE+EN.pdf - 第234页
7 Converting the power supply on the HS-60 / D4 / D1/D2 ma chine Assembly Instructions, Converting the Power Supply 7.5 Converting the power supply from 3 x 400 VAC to 3 x 208 VAC 12/2013 Edition 232 7.5.1 Removing the p…

Assembly Instructions, Converting the Power Supply 7 Converting the power supply on the HS-60 / D4 / D1/D2 machine
12/2013 Edition 7.5 Converting the power supply from 3 x 400 VAC to 3 x 208 VAC
231
7.5 Converting the power supply from 3 x 400 VAC to 3 x 208 VAC
RISK OF DEATH 7
Disconnect the machine correctly as described in section 1, page 145.
Disconnect the machine from the main power supply.
Take suitable action to ensure that the machine cannot be connected to the power supply dur-
ing the conversion work.
Put up warning signs to indicate that work is being carried out on the electrical system.
7 Converting the power supply on the HS-60 / D4 / D1/D2 machine Assembly Instructions, Converting the Power Supply
7.5 Converting the power supply from 3 x 400 VAC to 3 x 208 VAC 12/2013 Edition
232
7.5.1 Removing the power supply unit
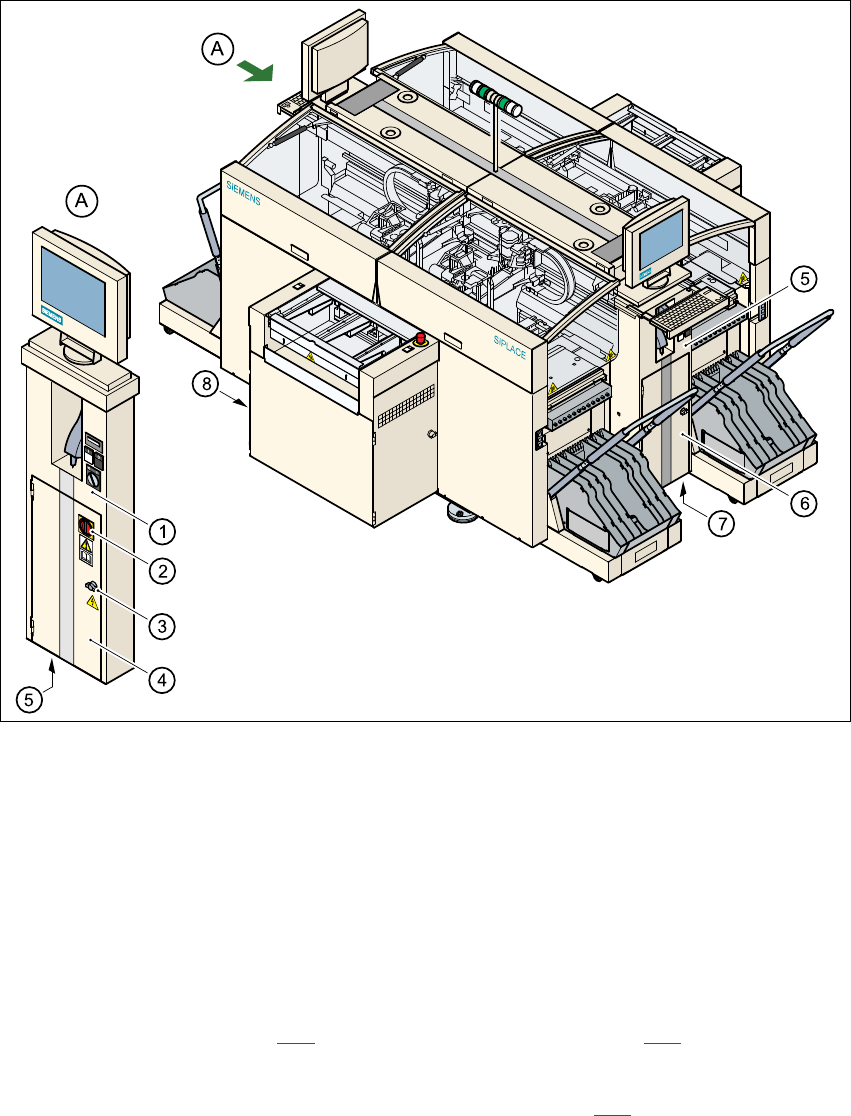
Fig. 7 - 1 Accessing the power supply unit
(1) Operator panel, left-hand side
(2) Main switch
(3) Door lock
(4) Protective doors to power supply unit
(5) Hole for power cable
Open the lock (item 3 in Fig. 7 - 1) on the protective door (item 4 in Fig. 7 - 1 using the machine
key.
Use the Allen key to loosen the M8 locking screw (item M8 in Fig. 7 - 2) on the lower front panel.
Pull the power supply unit out as far as the stop.
Assembly Instructions, Converting the Power Supply 7 Converting the power supply on the HS-60 / D4 / D1/D2 machine
12/2013 Edition 7.5 Converting the power supply from 3 x 400 VAC to 3 x 208 VAC
233
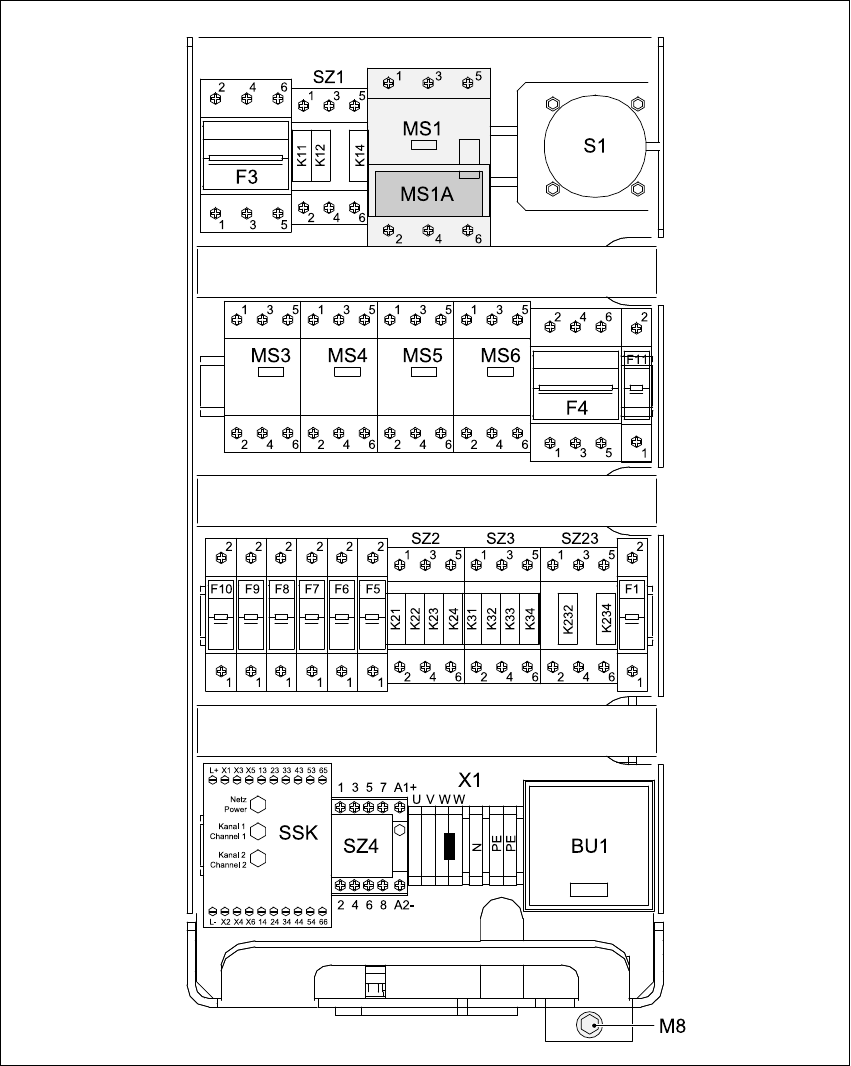
Fig. 7 - 2 Power supply unit front view
MS1 Motor circuit-breaker
MS1A Motor protection trip block
X1 Terminal strip for the main power cable
BU1 Service socket
M8 Locking screw for power supply unit