JO-109-002_JG-0209.pdf - 第106页
4-18 JO-109 1005-001 2. Feeder Measurement (10) Press the [ST AR T] button in the window . The accuracy inspection is executed, excluding the following two points. • Discrepancy in T ype Data When a discrepant item exist…
4-17
JO-109
1005-001
2. Feeder Measurement
•
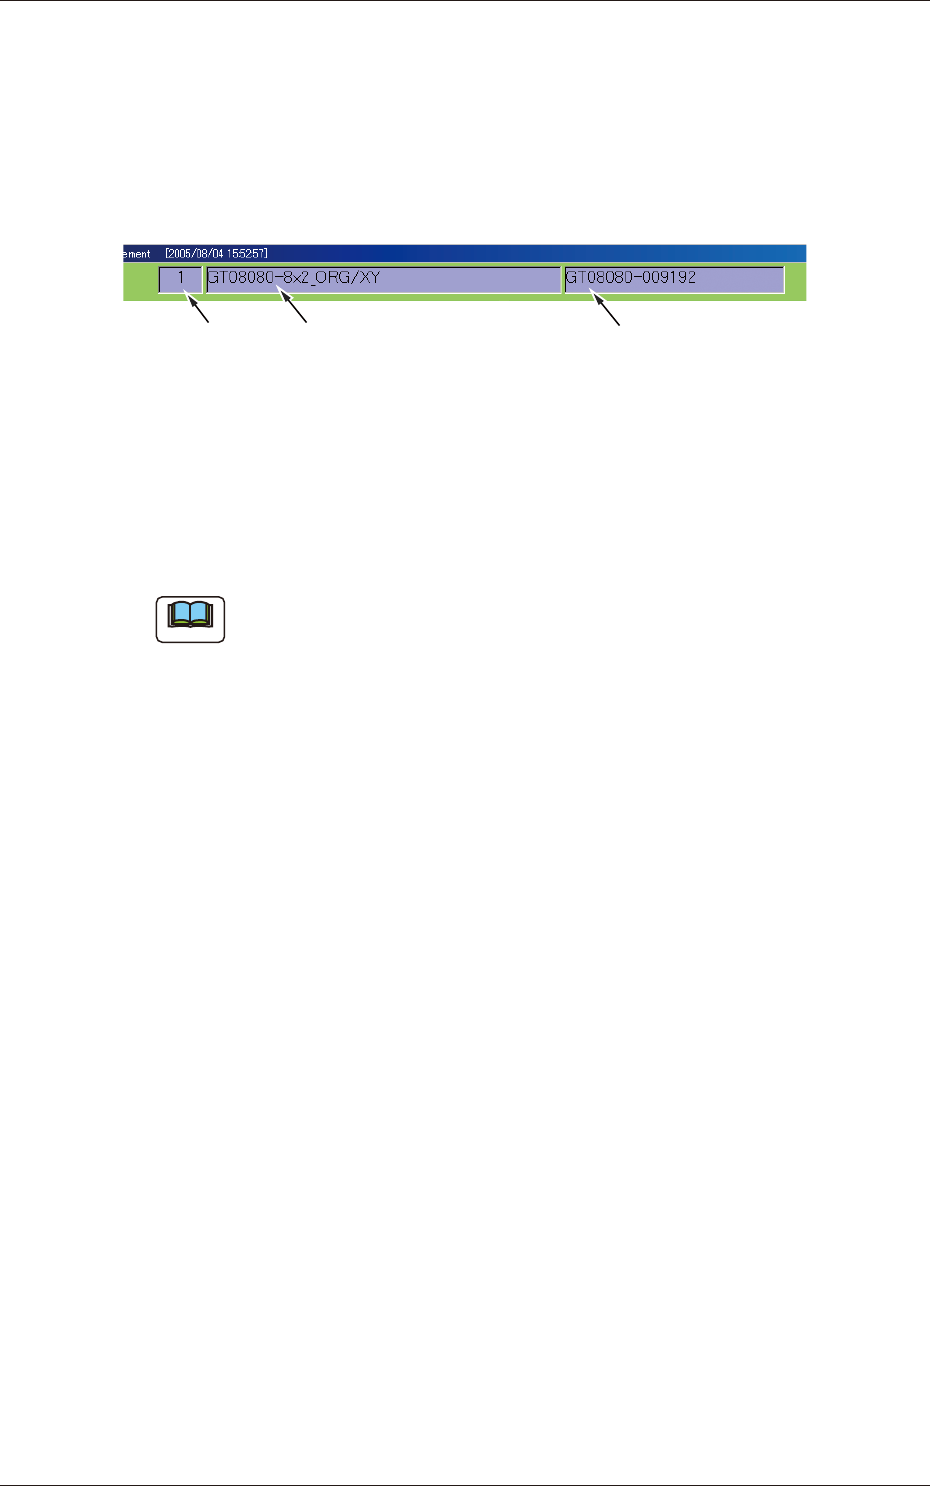
Conrmation of Type No. Type Name, and Serial No.
The type No. the type name, and the serial No. are displayed on the upper
area of the window for the conrmation.
Remarks
: It is required to manually create a type or change the type before
executing the inspection on the type that was not retrieved
through the automatic type change sequence or on another type.
Type No. Type Name Serial No.
Fig. D16
•
Conrmation of Crosshair
When a crosshair is not displayed, press the [+] button in the "Measurement"
window to make the crosshair appear.
Note
•
To stop the accuracy inspection sequences temporarily
When the [START] button is pressed to start the inspection, the label on
the button is changed to "STOP".
When the [STOP] button is pressed, the inspection is interrupted
temporarily.
"PAUSE" appears in the mode indicator box (located on the upper right
side of the window) while the inspection is stopped temporarily.
To cancel the "PAUSE" mode and continue the inspection, press the
[START] button again.
•
To stop the accuracy inspection sequences completely
To stop the inspection sequences completely, press the [RESET] button
(displayed on the upper left area of the window) in the "PAUSE" mode.
A message box appears, enabling you to determine whether or not the
sequences should be stopped completely.
When you press the [YES] button, the inspection sequences are stopped
completely.
4-18
JO-109
1005-001
2. Feeder Measurement
(10) Press the [START] button in the window.
The accuracy inspection is executed, excluding the following two
points.
•
Discrepancy in Type Data
When a discrepant item exists in the type data, a warning
message box opens, indicating that the accuracy inspection
cannot be executed.
Correct the discrepant data.
•
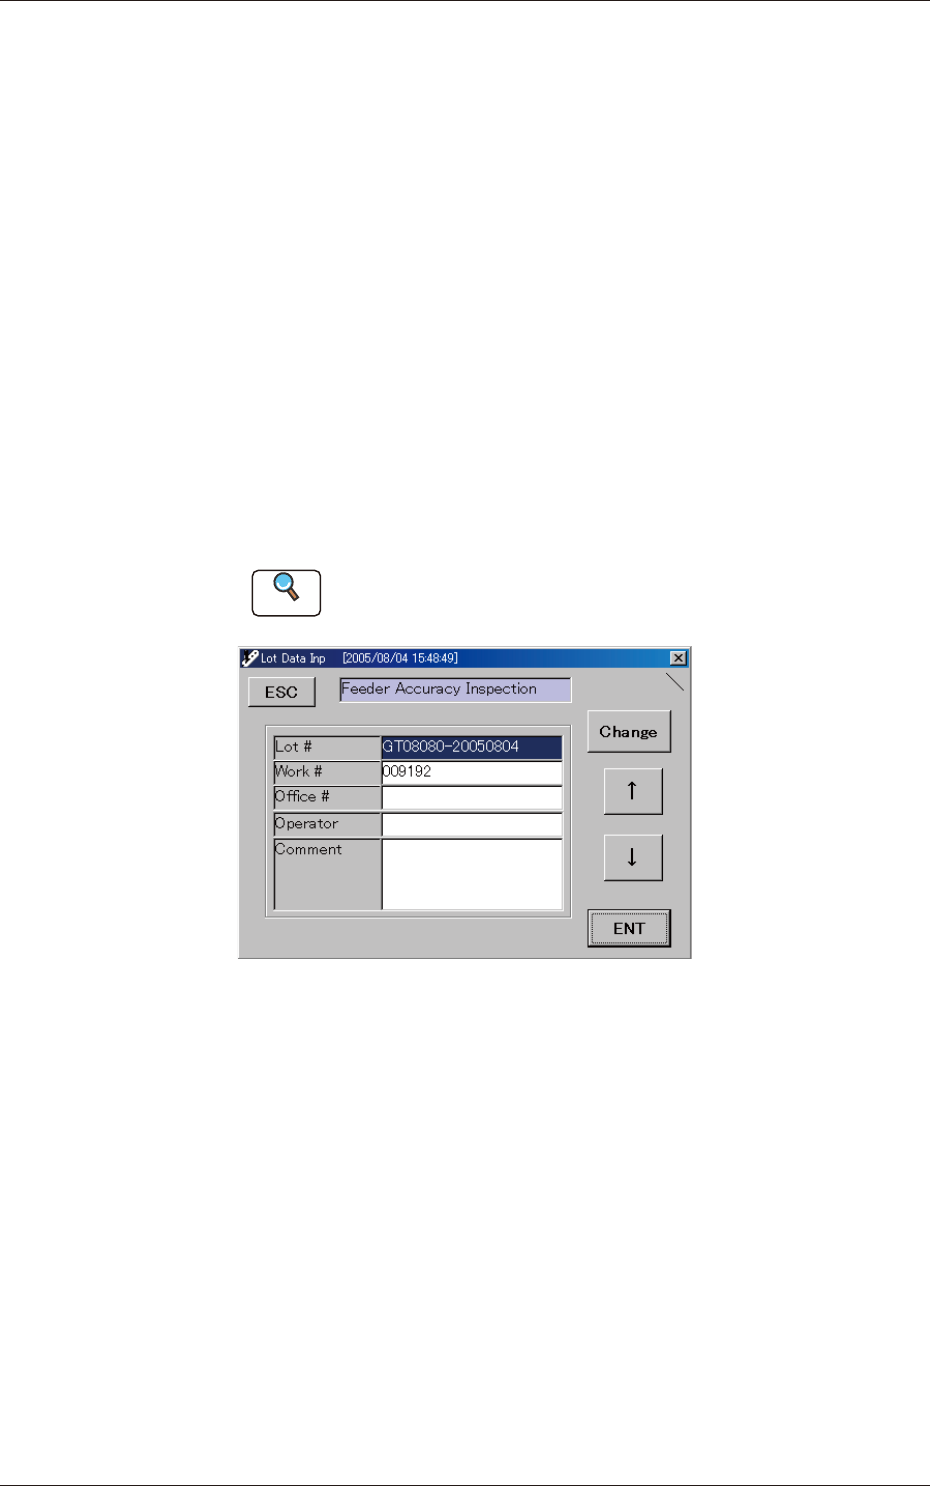
"Lot Data Inp" Window
When "0" or "1" is set in the "Lot Data Input Omission Flag" text
box in the "Type Setting #1" window, the "Lot Data Inp" window
opens once before the inspection is executed initially, prompting
you to set the lot data.
When the [START] button is pressed after the setting, the
accuracy inspection starts.
Reference
Refer to "4. "Type Setting" Window" in "Section 3" for the lot
data input omission ag.
Fig. D17 "Lot Data Inp" Window
Lot #
: "type-yyyymmdd" is automatically allocated as a le
name to be recorded.
(yyyy = Year, mm = Month, dd = Day)
Example
: 2004/08/17 = 20040817
Work #
: The numerical values in the serial area of the serial
No. are automatically allocated and entered in the
text box.
Ofce #
: An arbitrary string of characters can be entered.
Operator
: An arbitrary string of characters can be entered.
Comment
: An arbitrary string of characters can be entered.
4-19
JO-109
1005-001
2. Feeder Measurement
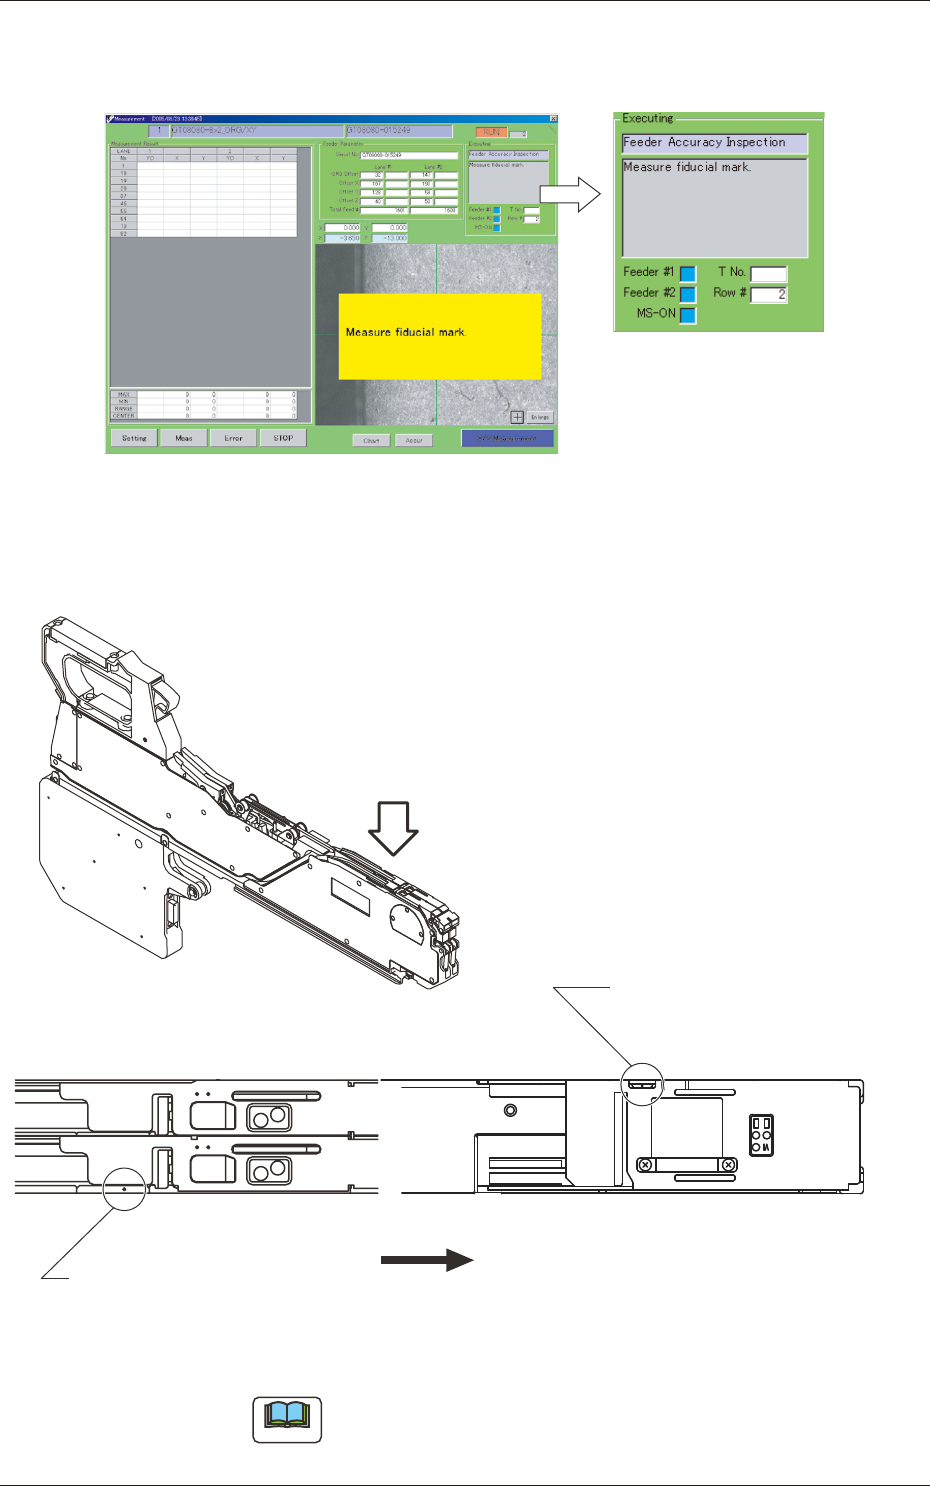
(11) The ducial mark position of the feeder is measured.
The following dialog box appears for three seconds.
Fig. D18
(12) Move the micrometer until the hole at the ducial mark position
is aligned with the center of the crosshair.
4
2
4
2
4 8
12
Direction of Tape Feed
Fiducial Mark Position of
G*-12160 or more
(G*-24320 used in the figure)
Fiducial Mark Position
of G*-0808*
Fig. D19 Position of Fiducial Mark
Note
The ducial mark position is based on the X/Y coordinates of
the computer screen and almost located at the coordinates in
the following table.