JO-109-002_JG-0209.pdf - 第134页
4-46 JO-109 1005-001 3.2 Measuring Method (2) Raise the suppressor and perform the measurement as shown below . Measurement with GT -08080 (Example) Push down the feeder with your hand. Fig. D56 (3) See the gures below …
4-45
JO-109
1106-002
3. Measurement of Jig Origin Height
3. Measurement of Jig Origin Height
3.1 Required Measuring Apparatuses
•
Block Gauge 104.00 mm
Ref.
: Several block gauges can be piled up to be 104.00 mm.
•
Pry-Type Dial Gauge 0.01 mm
•
Stand (used for the pry-type dial gauge)
•
Surface Plate Size: 300 mm × 300 mm or more
3.2 Measuring Method
Note
Perform the measurement on the surface plate.
Procedure
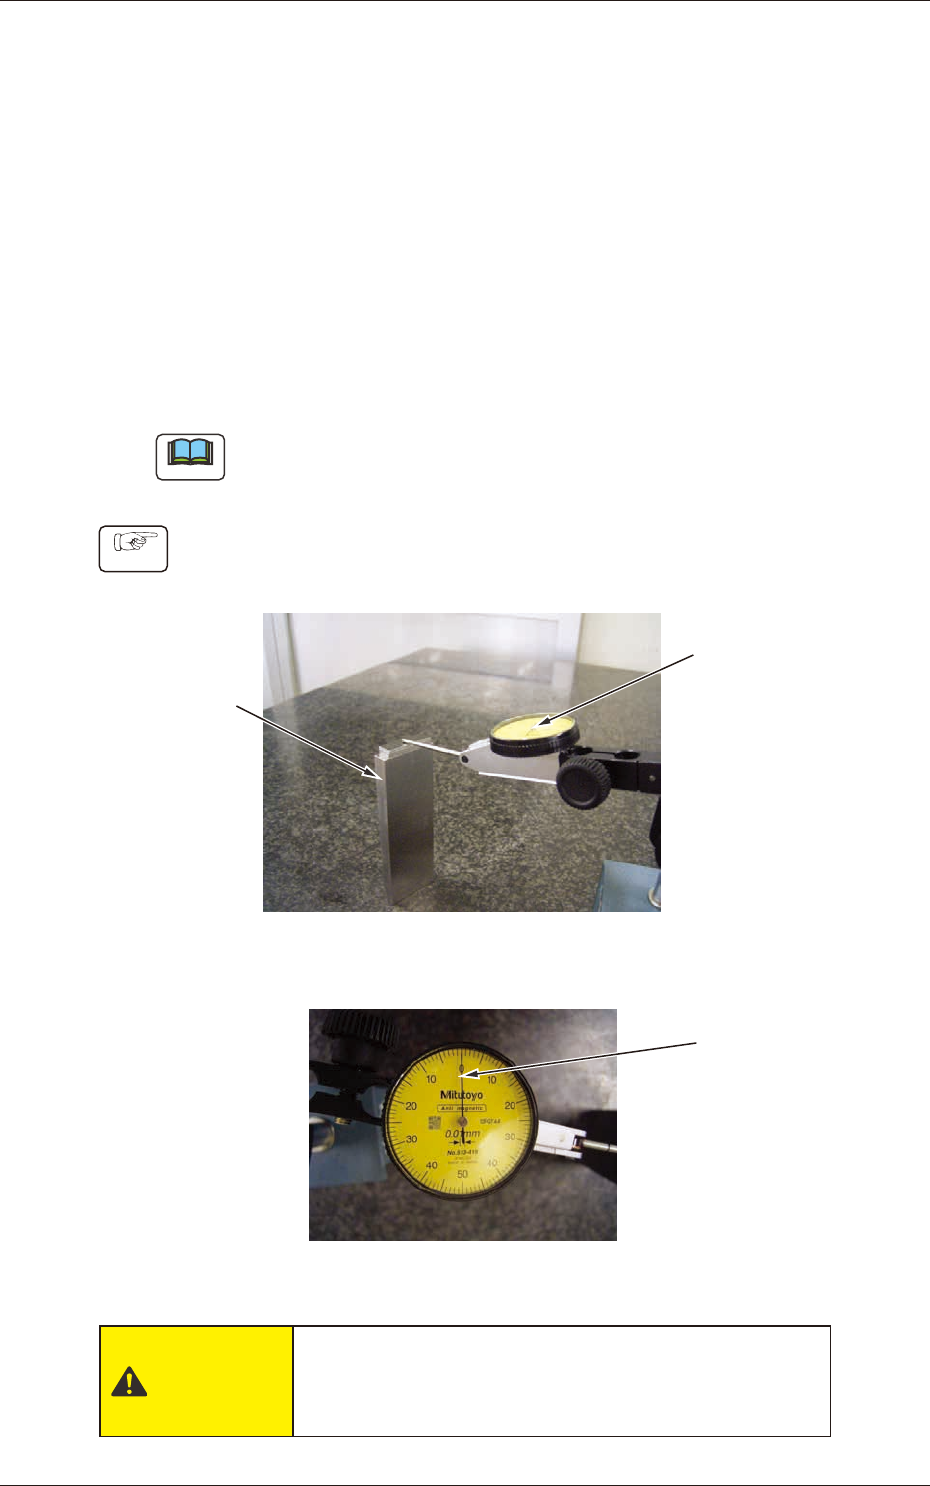
(1) Adjust the pointer of the pry-type dial gauge to "0" (zero), using
the block gauge (104.00).
Block Gauge
104.0 mm
Adjust the pointer
to "0" (zero).
Pry-Type Dial Gauge
Measurement on the surface plate
Fig. D55
CAUTION
Carefully handle the pry-type dial gauge because
the tip of the probe is very sharp. Your hand will get
injured if the tip is inserted.
4-46
JO-109
1005-001
3.2 Measuring Method
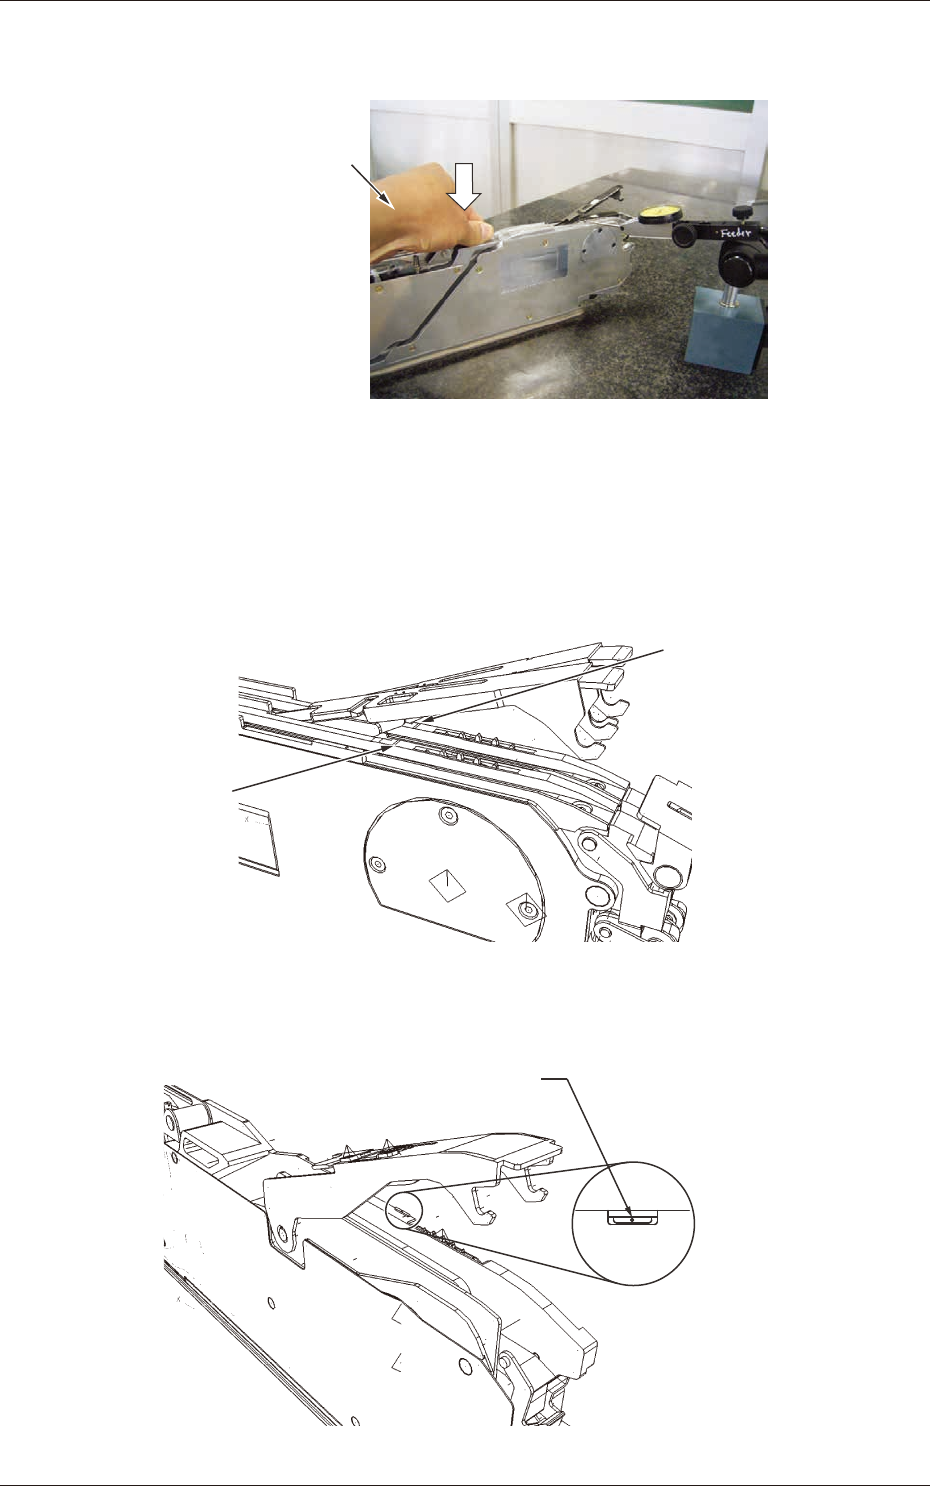
(2) Raise the suppressor and perform the measurement as shown
below.
Measurement with GT-08080 (Example)
Push down the feeder
with your hand.
Fig. D56
(3) See the gures below for the spots to be measured.
•
Measuring Position for G*-0808*
Measuring Position on
Lane #2 Side
Measuring Position on
Lane #1 Side
Fig. D57
•
G*-12160 or more
Measure the area beside
the fiducial mark.
Magnified View
Fig. D58
4-47
JO-109
1005-001
3.2 Measuring Method
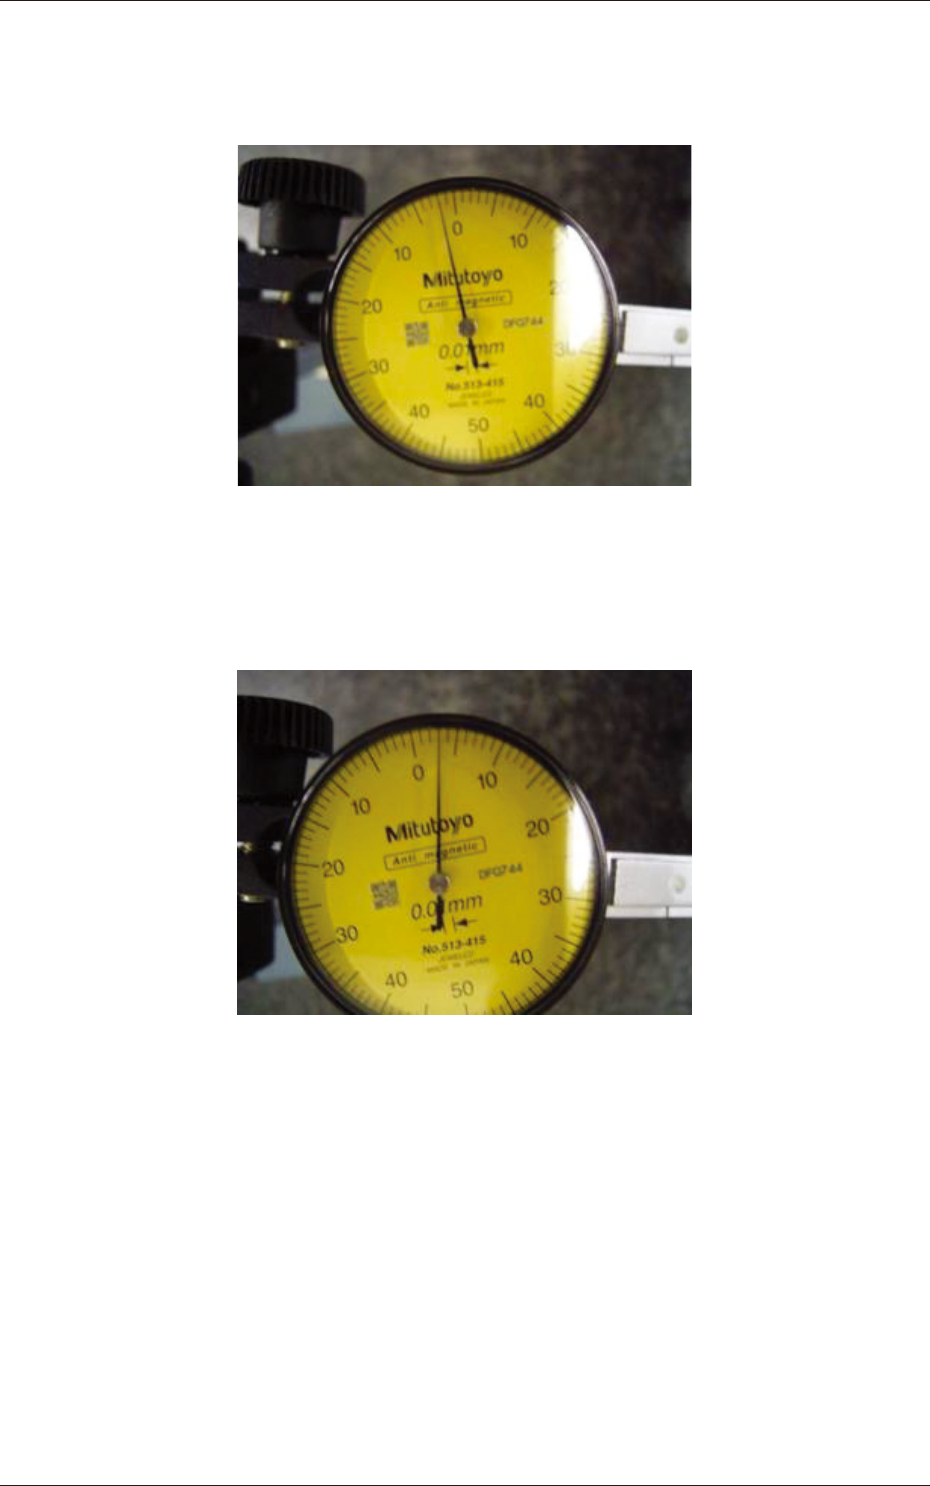
(4) Check the reading of the pry-type dial gauge.
Example 1
: When the dial gauge reads "-0.02 mm" as shown
below, it is required to enter the offset value "20".
Fig. D59
Example 2
: When the dial gauge reads "+0.03 mm" as shown
bellow, it is required to enter the offset value "-30".
Fig. D60