00196578-03_AI_Pipettenwechsler_SX12_DE_EN.pdf - 第69页
3 Installation 3.3 Fitting the row 2 nozzle changer Assembly Instructions / Montageanleitung SIPLACE SX1/SX2 Nozzle Changer Pipettenwechsler 06/2020 69 Fig.25: Pins on the nozzle reject mount ► Knock the pins (DIN 6325 …
3 Installation
3.3 Fitting the row 2 nozzle changer
68 Assembly Instructions / Montageanleitung SIPLACE SX1/SX2 Nozzle Changer Pipettenwechsler 06/2020
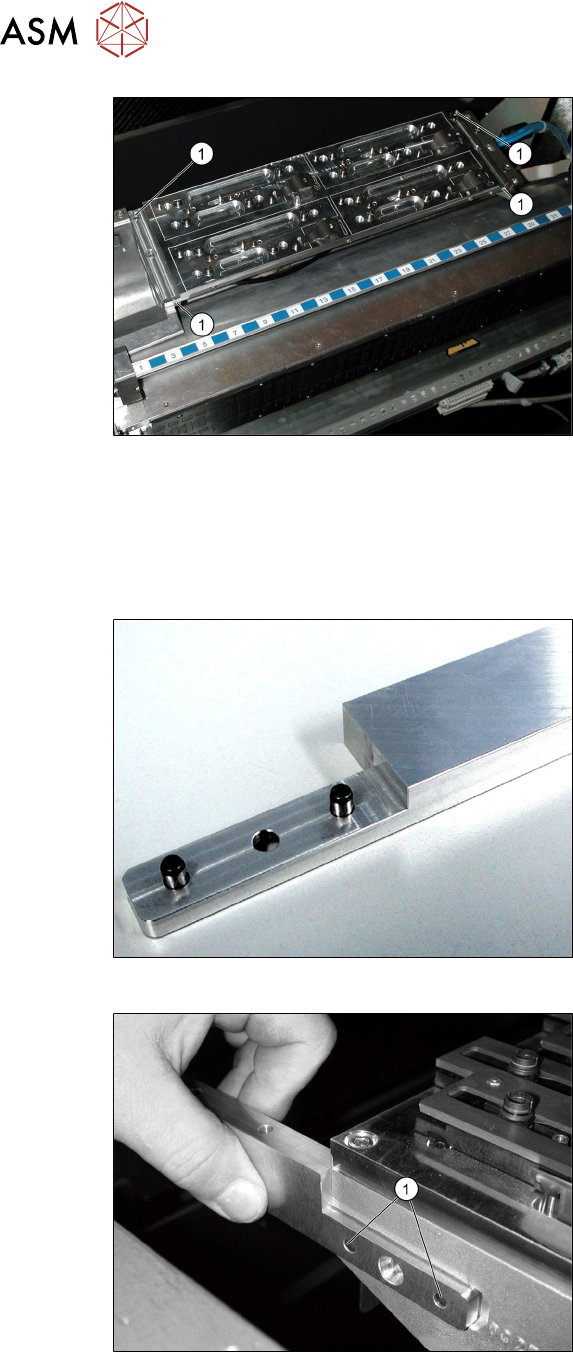
Fig.22: Fitted nozzle changer
► Insert the nozzle changer and fix into
place (four screws)(1).
► Fit the magazine onto the nozzle
changer.
3.3 Fitting the row 2 nozzle changer
When fitting the holder for the second row of nozzle changers, pay attention to the correct height
setting (see 3.1.1 "Setting the height of the nozzle changer" [}65]).
Fig.23: Holder center NC row 2 / SX [03066216-xx]
► Knock the locating pins (DIN 6325 -
5m5 x 20 x [00619868-xx]) into the cor-
responding holes in the holder.
Fig.24: Screws on holder
► Screw the holder into place as shown
in the diagram (screws ISO 4762 -
M5x16-A2-70 [03042562-xx])(1).
3 Installation
3.3 Fitting the row 2 nozzle changer
Assembly Instructions / Montageanleitung SIPLACE SX1/SX2 Nozzle Changer Pipettenwechsler 06/2020 69
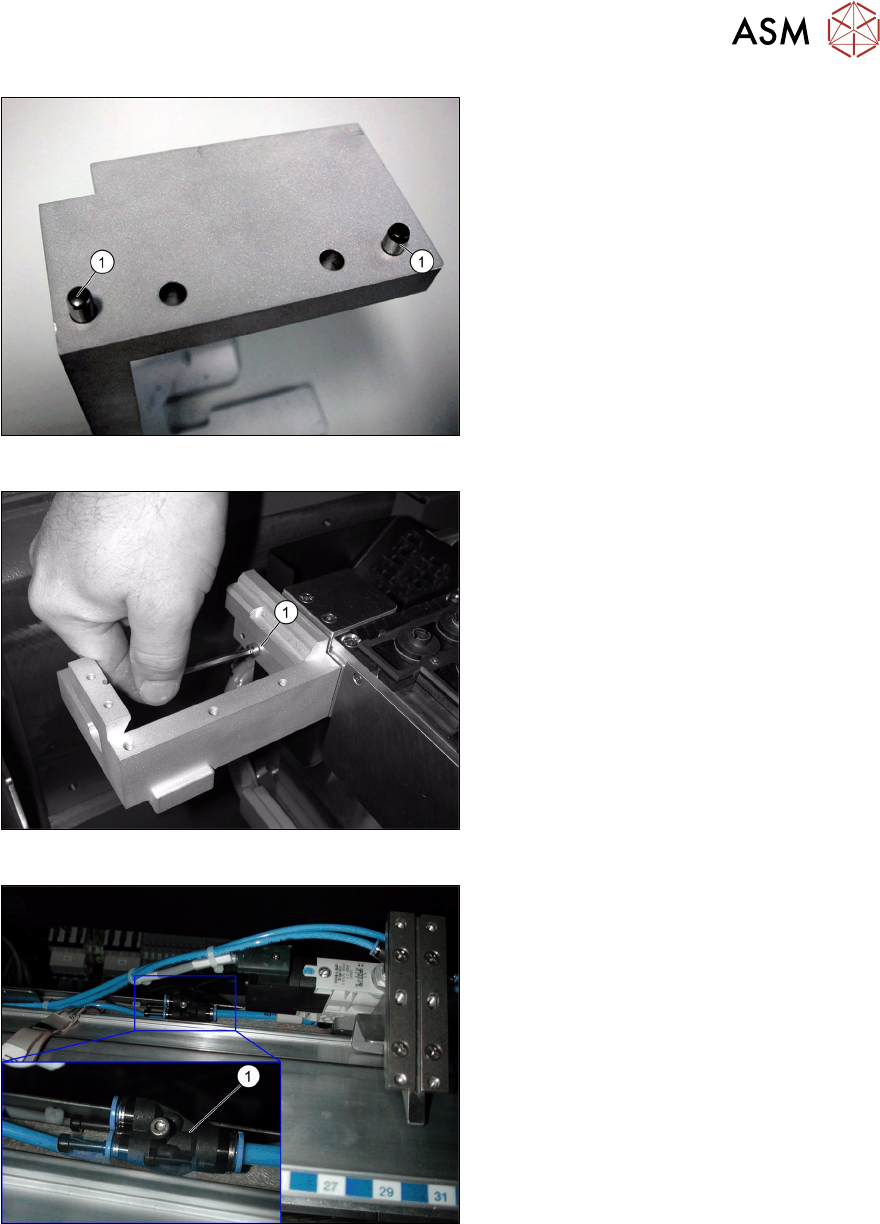
Fig.25: Pins on the nozzle reject mount
► Knock the pins (DIN 6325 - 5m5 x 20 x)
[00619868‑xx](1) into the correspond-
ing holes in the holder "left NC row 2
assembly / SX" [03066001‑xx].
Fig.26: Screwing the holder into place
► Screw the holder into place as shown
in the diagram with the screws ISO
4762 - M5x16-A2-70 [03042562-xx](1).
Fig.27: Compressed air connection
► Connect the second nozzle changer.
► Divide the compressed air hose and re-
connect the two nozzle changers with a
Y piece(1) to the compressed air sup-
ply.
► After fitting the "extension row 2 NC, check for the correct height (see 3.1.1 "Setting the height
of the nozzle changer" [}65]).
► Fit the NC into place with four screws (M5x14).
3 Installation
3.4 Final work
70 Assembly Instructions / Montageanleitung SIPLACE SX1/SX2 Nozzle Changer Pipettenwechsler 06/2020
3.4 Final work
3.4.1 Taking the nozzle changer into operation
► Fill the magazine outside the placement machine.
► Only change a whole magazine at any time.
► Open the key plate and place the nozzles in the nozzle holders.
► Close the key plate so that the nozzles cannot drop out of the magazines.
NOTICE
Nozzles in magazines
Before you fill magazine, make sure that all the nozzles on the placement head have been
returned to their magazines.
NOTICE
Damaging the magazine
Do not allow components to drop onto the magazines. This can lead to a jamming of the
key plate.
Vacuum the magazines and free locations on a regular basis (see maintenance manual).
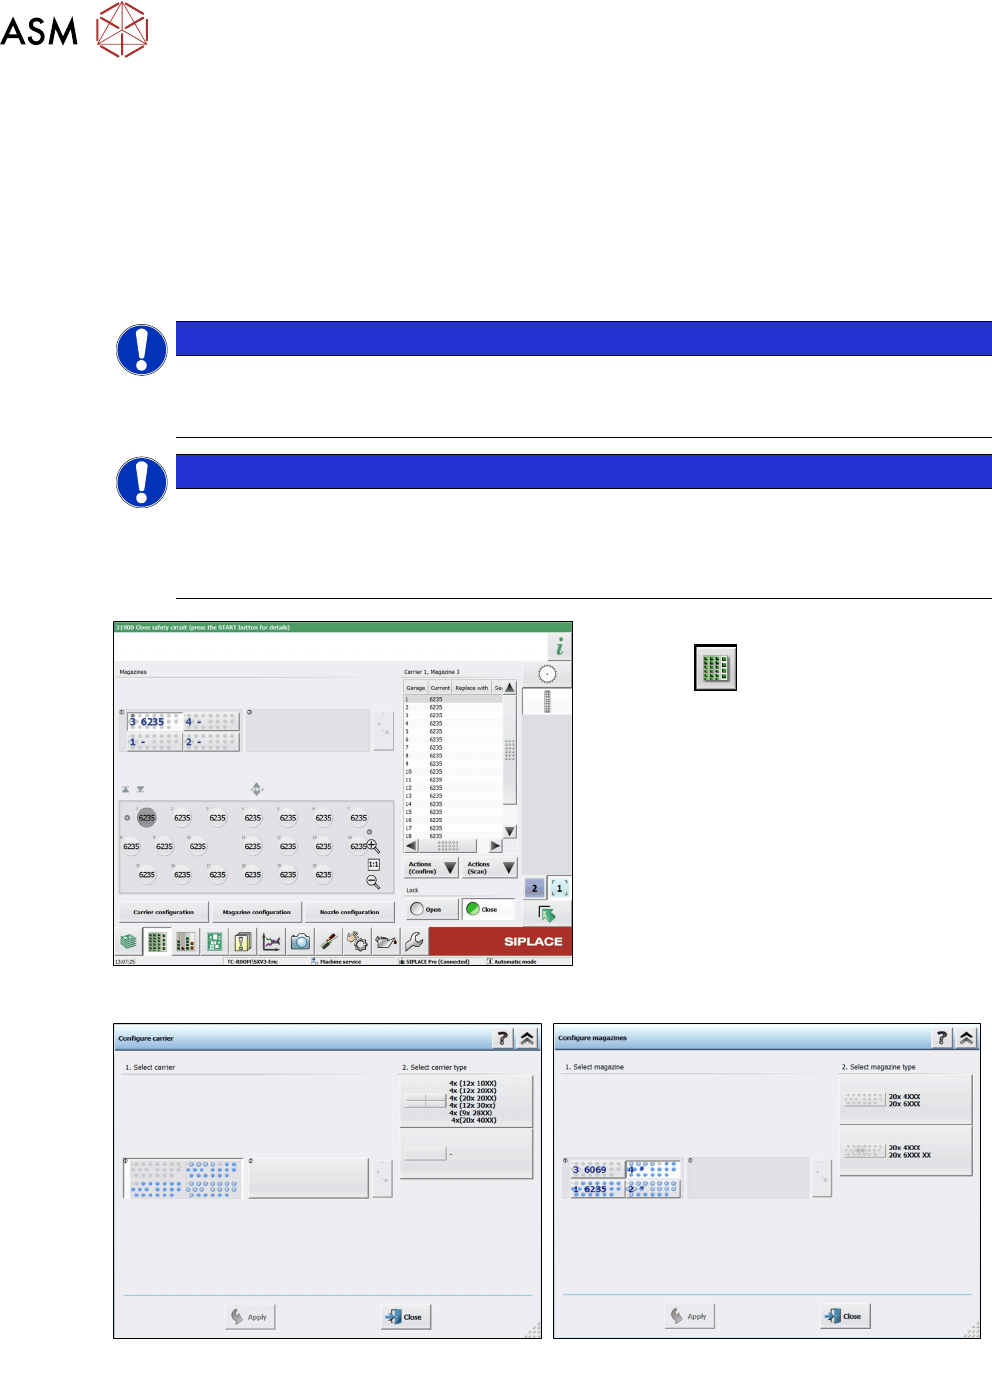
Fig.28: Menu for location nozzle changer
The nozzle changer functions can be found
in the menu .
► Select the buttons for the menus
Magazine carrier configuration,
Magazine configuration and Nozzle
configuration (see below).
Fig.29: Menu: Magazine carrier configuration
Fig.30: Menu: Magazine configuration