00196932-02 SM S-Feeder Repair DE+EN multilang.pdf - 第115页
8 2x8mm S-Feeder checking and replace worm gear 8.1 Removing Sprocket Wheel / Worm Gear SIPLACE S-Feeder Repair SIPLACE S-Förderer Reparatur 115 8 8 2 x 8 m m S - F e e d e r c h e c k in g a n d r e p la c e w o r m g e…
7 3x8mm S-Feeder checking and adjusting worm gear
7.2 3x8mmS: Adjusting current input via the worm play
114 SIPLACE S-Feeder Repair SIPLACE S-Förderer Reparatur
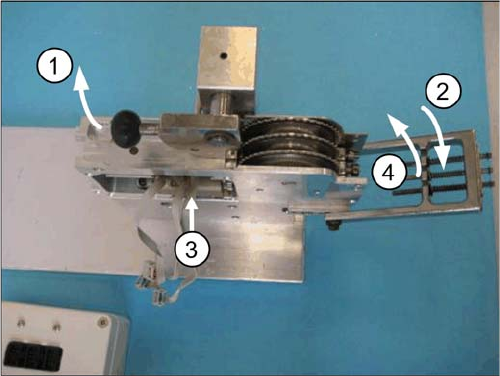
Prior to remove the worm gear:
▪ Switch the tester OFF (Power OFF).
▪ Then remove the 3 plugs from the connection box.
1. By now swing the lever (black handle) upward.
2. Fold the track-adjusting jig downward.
3. Remove the worm gear drive.
4. Now close the jig again. Testing is completed.
8 2x8mm S-Feeder checking and replace worm gear
8.1 Removing Sprocket Wheel / Worm Gear
SIPLACE S-Feeder Repair SIPLACE S-Förderer Reparatur 115
8
8 2x8mm S-Feeder checking and replace worm gear
2x8mm S-Feeder checking and replace worm gear
8.1
8.1 Removing Sprocket Wheel / Worm Gear
Removing Sprocket Wheel / Worm Gear
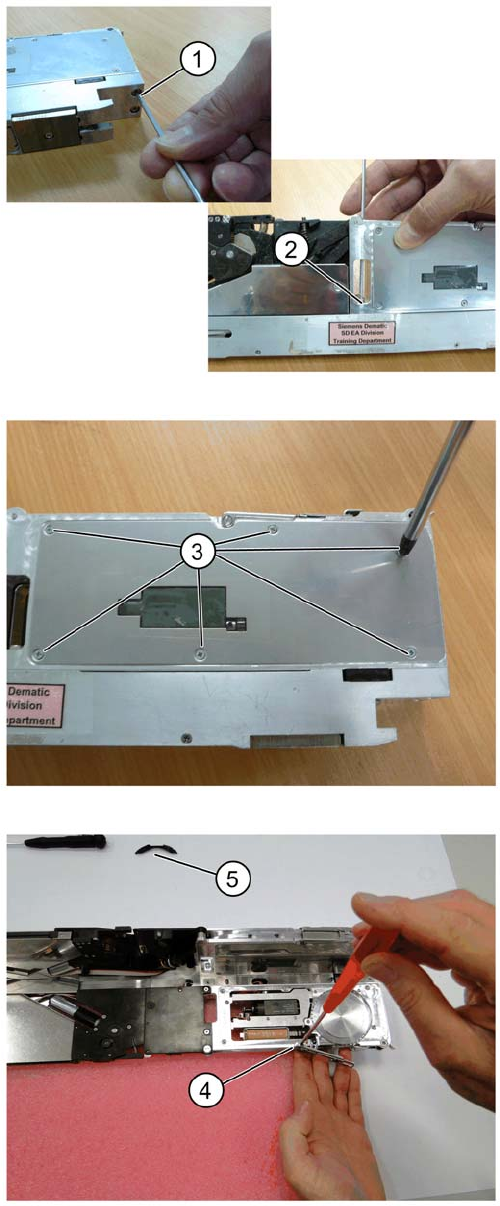
Remove the M2.5 screw on base of the respective front
track at location
1. On the front under site of the feeder.
2. From the top in the middle of the base plate.
3. Remove six countersunk screws on each side of the
track.
4. Remove the pickup window.
5. Remove the protection ring.
8 2x8mm S-Feeder checking and replace worm gear
8.1 Removing Sprocket Wheel / Worm Gear
116 SIPLACE S-Feeder Repair SIPLACE S-Förderer Reparatur
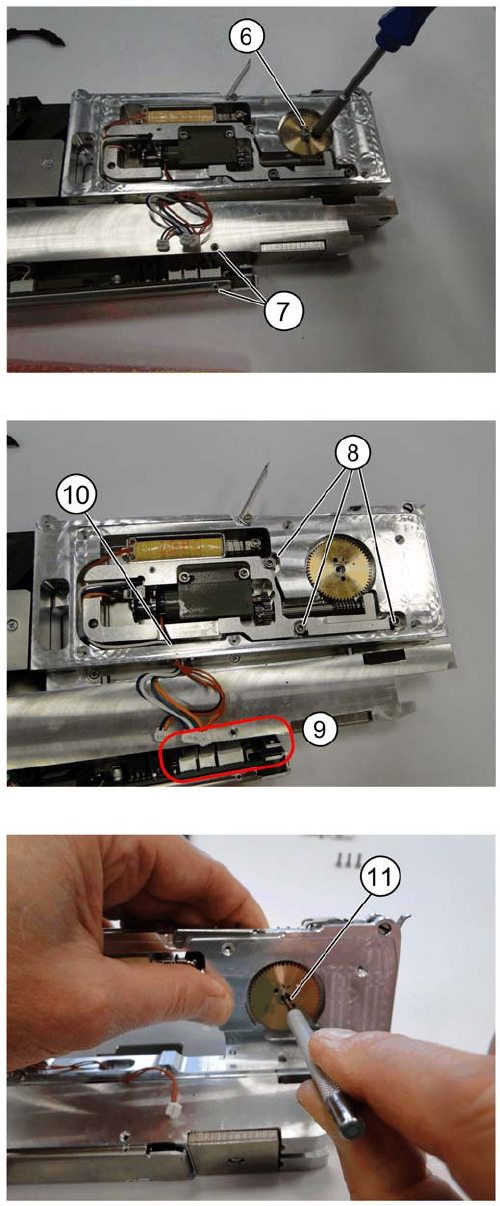
6. Remove the hex screw (M5), holding the sprocket
wheel.
7. Open the under cover above the control pcb.
8. Remove three M2.5 screws
9. Disconnect all connectors (qty : 03) on the PCB
10. Slide out the drive motor unit upwards, down from the
guide pin.
11. Remove sprocket wheel assembly using a pin punch.