00197082-03_AI_MTC2_at-Loc2_X-Series-S_DE_EN.pdf - 第58页
2 Brief Description 2.6 Required Working Time 58 Assembly Instructions / Montageanleitung SIPLACE X-Series S MTC2 at Location 2 MTC2 an Stellplatz 2 05/2019 2.6 Required Working Time The complete installation will take a…
2 Brief Description
2.5 Tools and Equipment Required
Assembly Instructions / Montageanleitung SIPLACE X-Series S MTC2 at Location 2 MTC2 an Stellplatz 2 05/2019 57
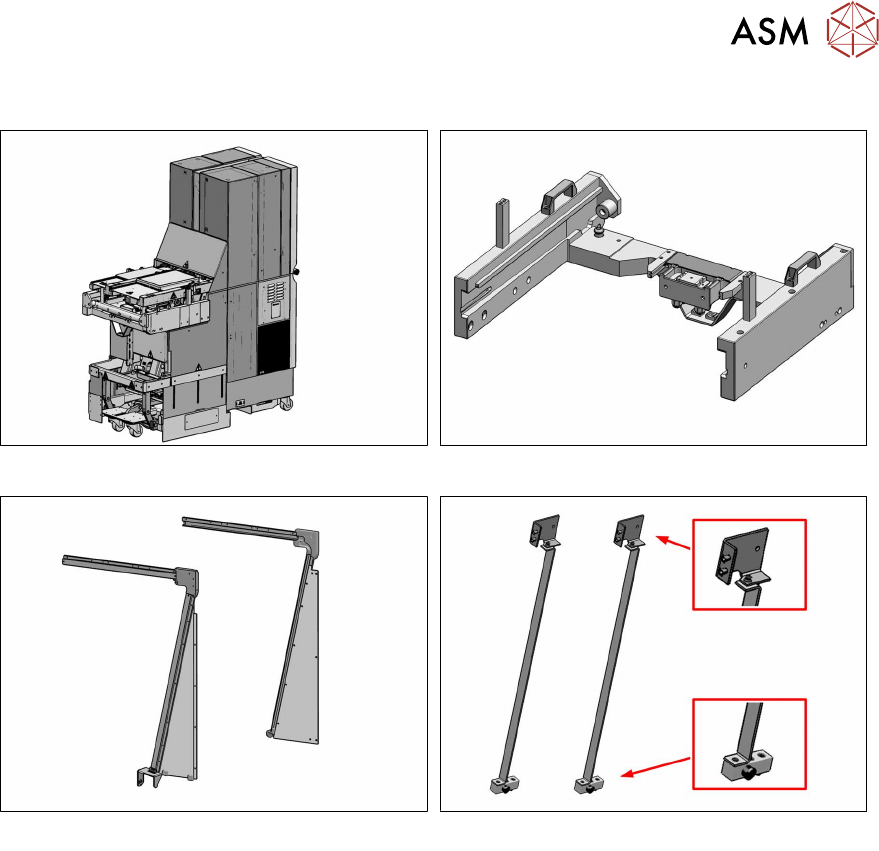
2.4.1 Overview of Parts
Fig.8: MTC2 [03011837‑xx]
Fig.9: Slide-in framework for the MTC [03009963-xx]
Fig.10: Guides and distance sheets
Fig.11: Hinges
2.5 Tools and Equipment Required
●
Standard tooling
●
Mounting tool for trolley or COT insert/X-Series [03015976-xx]
●
Suitable lifting device (e.g. hand-operated crane)
●
Protective gloves
●
Set of cable ties
●
User manual SIPLACE MTC2 [DE: 00193634-xx] [EN: 00193635-xx] – Other languages avail-
able on request.
You may need additional documents, which differ according to the configuration and machine type
used:
●
Instruction manual "SIPLACE X‑SeriesS" (up to serial no. Gxxxx) [DE:00197003‑xx]
[EN:00197004‑xx] – other languages available on request.
●
Instruction manual "SIPLACE X‑SeriesS" (from serial no. Hxxxx) [DE:00197901‑xx]
[EN:00197902‑xx] – other languages available on request.
●
Assembly instructions "SIPLACE X‑SeriesS NC series 2 – NC before MTC2/WPC" [DE+EN:
00197369‑xx]
●
Assembly instructions "SIPLACE X‑SeriesS service flap" [DE+EN: 00197396‑xx]
●
Assembly instructions "SIPLACE X‑SeriesS Input/output conveyor extension and hand
guard" [DE+EN: 00197089‑xx]

2 Brief Description
2.6 Required Working Time
58 Assembly Instructions / Montageanleitung SIPLACE X-Series S MTC2 at Location 2 MTC2 an Stellplatz 2 05/2019
2.6 Required Working Time
The complete installation will take approx. 5 hours.
3 Installation
3.1 Preparatory Steps
Assembly Instructions / Montageanleitung SIPLACE X-Series S MTC2 at Location 2 MTC2 an Stellplatz 2 05/2019 59
3 Installation
WARNING
High weight
The MTC2 is very heavy. If the surface on which it stands is slightly slanted, the MTC could
roll away and damage other machines or injure persons. Bear the high inertia in mind when
pushing or pulling the MTC2.
► Check every movement so that no damage or injury is caused.
3.1 Preparatory Steps
► Move the component trolleys out of the machine.
► Switch off the machine, disconnect it from the power supply and secure it to prevent
unauthorized reactivation.
1.2 "Preparatory work..." [}46]
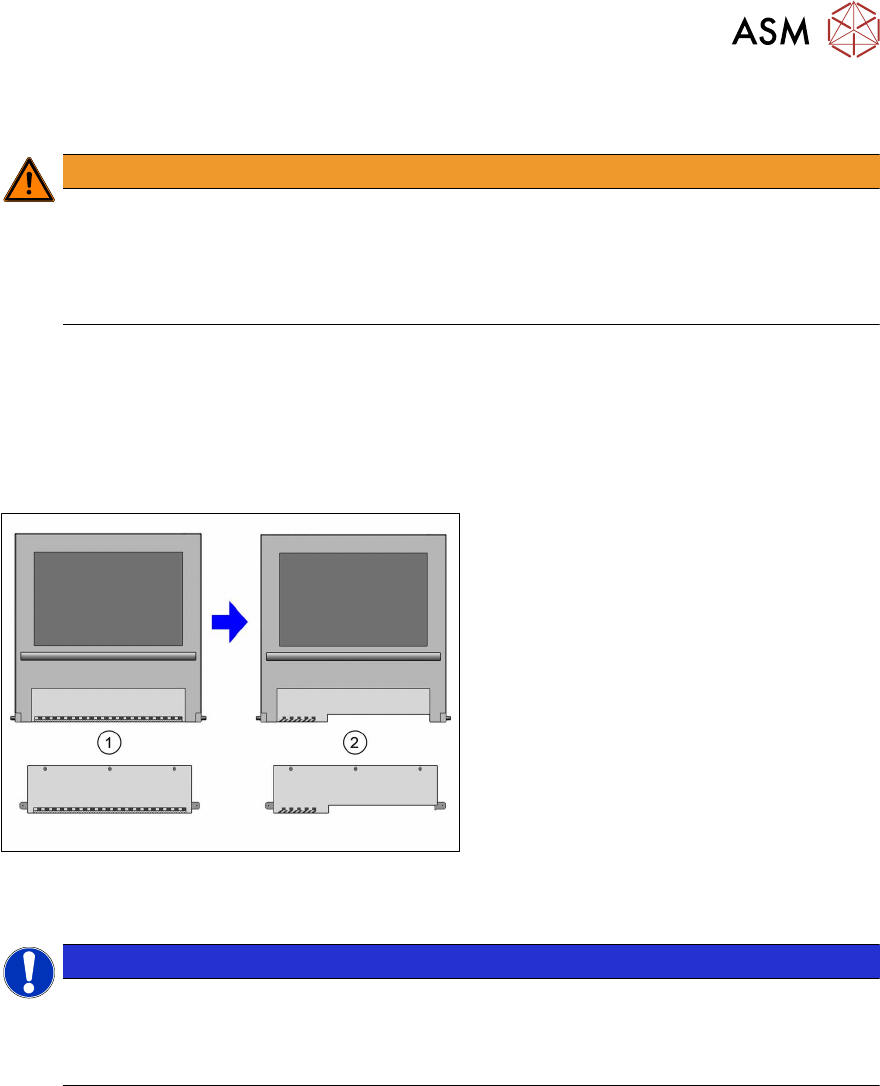
Fig.12: Replacing the bottom sheet of plexiglass
► Dismantle the bottom sheet of plexi-
glass(1) at location2.
► Fit the "Window assy shortened for use
with MTC" [03048626‑xx](2).
► Remove the cover on the distributor and store this outside the working area.
NOTICE
Heavy machine part!
► Enlist the help of a second person.
One person holds the MTC2 slide-in framework tightly by its handles and the other
person loosens the four screws fixing the slide-in framework to the MTC2.
► In addition to the MTC2, an output extension or conveyor are fitted as a default. Read the cor-
responding assembly instructions for this.
– Assembly instructions "SIPLACE X‑SeriesS Input/output conveyor extension and hand
guard" [DE+EN: 00197089‑xx]
► To operate the MTC, you also need to install a service flap. Read the corresponding assembly
instructions for this.
– Assembly instructions "SIPLACE X‑SeriesS service flap" [DE+EN: 00197396‑xx]
► To operate the MTC, you need to install a nozzle changer. Read the corresponding assembly
instructions for this.
– Assembly instructions "SIPLACE X‑SeriesS NC series 2 – NC before MTC2/WPC" [DE
+EN: 00197369‑xx]