00197551-01_MM_CPP-CP-Twin_Kunde_en.pdf - 第24页
Maintenance tasks for CPP Performing Maintenance Tasks 3.5.1 Replacing the Pressure Contro l Valve 24 Maintenance Manual SIPLACE Placement Heads CPP, C&P20, Twin 3.5 3 . 5 P e r f o r m in g M a in t e n a n c e T a …
Maintenance tasks for CPP
Overview of Lubrication Points
Maintenance Manual SIPLACE Placement Heads CPP, C&P20, Twin 23
Support roller
1 x 1 µl Klüber oil GEM 1 220 N (yellow combitip) on the
supporting roller
NOTICE!
Depending on the head version there might be no yellow
dot at the position marked in the picture and no service
drilling for oiling the support roller. It is not necessary to
oil the support roller in this case.
Star bearing
24 x 2 µl Isoflex Topas NCA 5051 (green combitip) into
star bearing
Maintenance tasks for CPP
Performing Maintenance Tasks 3.5.1 Replacing the Pressure Control Valve
24 Maintenance Manual SIPLACE Placement Heads CPP, C&P20, Twin
3.5
3.5 Performing Maintenance Tasks
Performing Maintenance Tasks
3.5.1
3.5.1 Replacing the Pressure Control Valve
Replacing the Pressure Control Valve
Replacin g the Pres sure Contr ol Valve
Replacing the Pressure Control Valve
➢ The placement head must be removed for this maintenance task.
► Replace the pressure control valve. Read the service manual for your placement head for more in-
formation.
3.5.2
3.5.2 Maintenance Tasks on Vacuum-Conducting Parts
Maintenance Tasks on Vacuum-Conducting Parts
Removing the Screwed Joint of the Silencer
NOTICE
Recommendation
We recommend that you have an additional pressure control valve available, so that this can
be easily replaced during head maintenance.
The actual cleaning of the removed pressure control valve can be performed later on.
► For more information about this, read section "6 Maintenance Tasks for Pressure Control
Valve" [ ➙ 65].
NOTICE
Vacuum test
► When carrying out the following tasks, especially check the segments that were noticeable
during the vacuum test.
CAUTION
Checking the silencer
Technical information "Defective silencer at CPP head" [DE: TI2013-04D01] [EN:
TI2013-04E01].
► Check the silencer on the problems described in the technical information and replace it, if
needed.
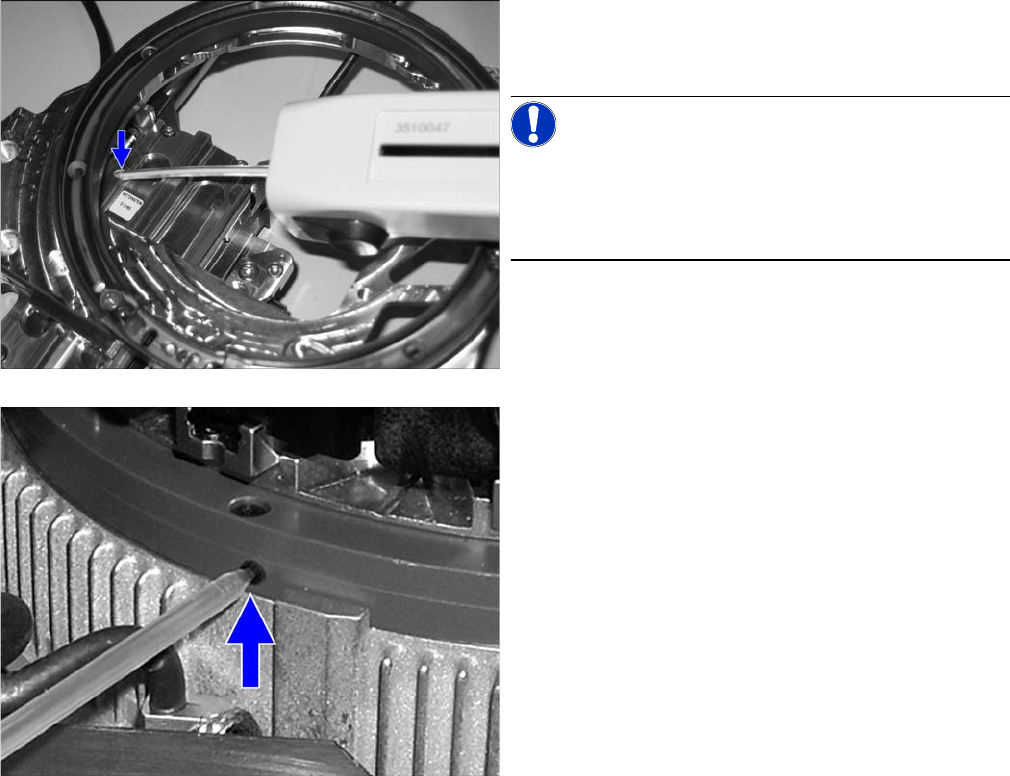
► Remove the screwed joint (1). This task must be car-
ried out by authorized personnel. For removal and in-
stallation details, read the Service manual.
► Take out the holding circuit housing together with the
silencer.
Maintenance tasks for CPP
3.5.2 Maintenance Tasks on Vacuum-Conducting Parts Performing Maintenance Tasks
Maintenance Manual SIPLACE Placement Heads CPP, C&P20, Twin 25
Checking/Replacing the Silencer
Removing the Holding Circuit
Cleaning the Housing of the Holding Circuit
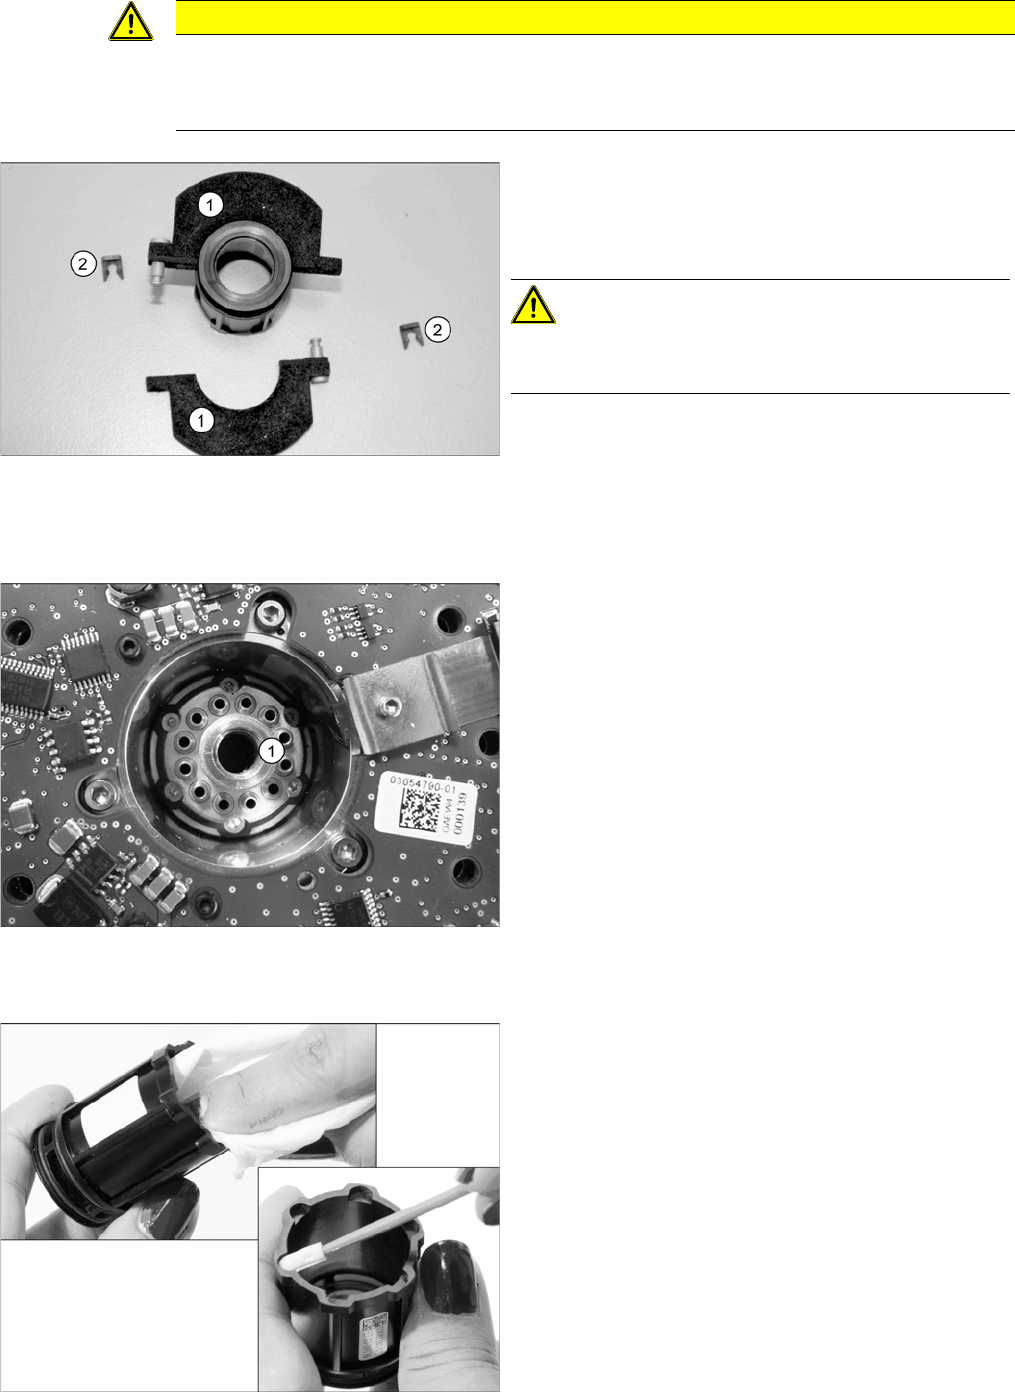
CAUTION
Damage of the board
When replacing the silencer, the board located beneath it could be damaged.
► Only replace the silencer on the removed holding circuit housing.
► Carefully remove the two retaining clips (2) on the left
and right of the silencer (1). You will need to support
the tab on the silencer with your fingers. This pre-
vents the tab from breaking off.
CAUTION!
Make sure that you do not bend the silencer!
Always open both retaining clips to remove the silencer!
► Remove the silencer.
► Check the silencer for dirt and damage. Replace the
silencer, if required.
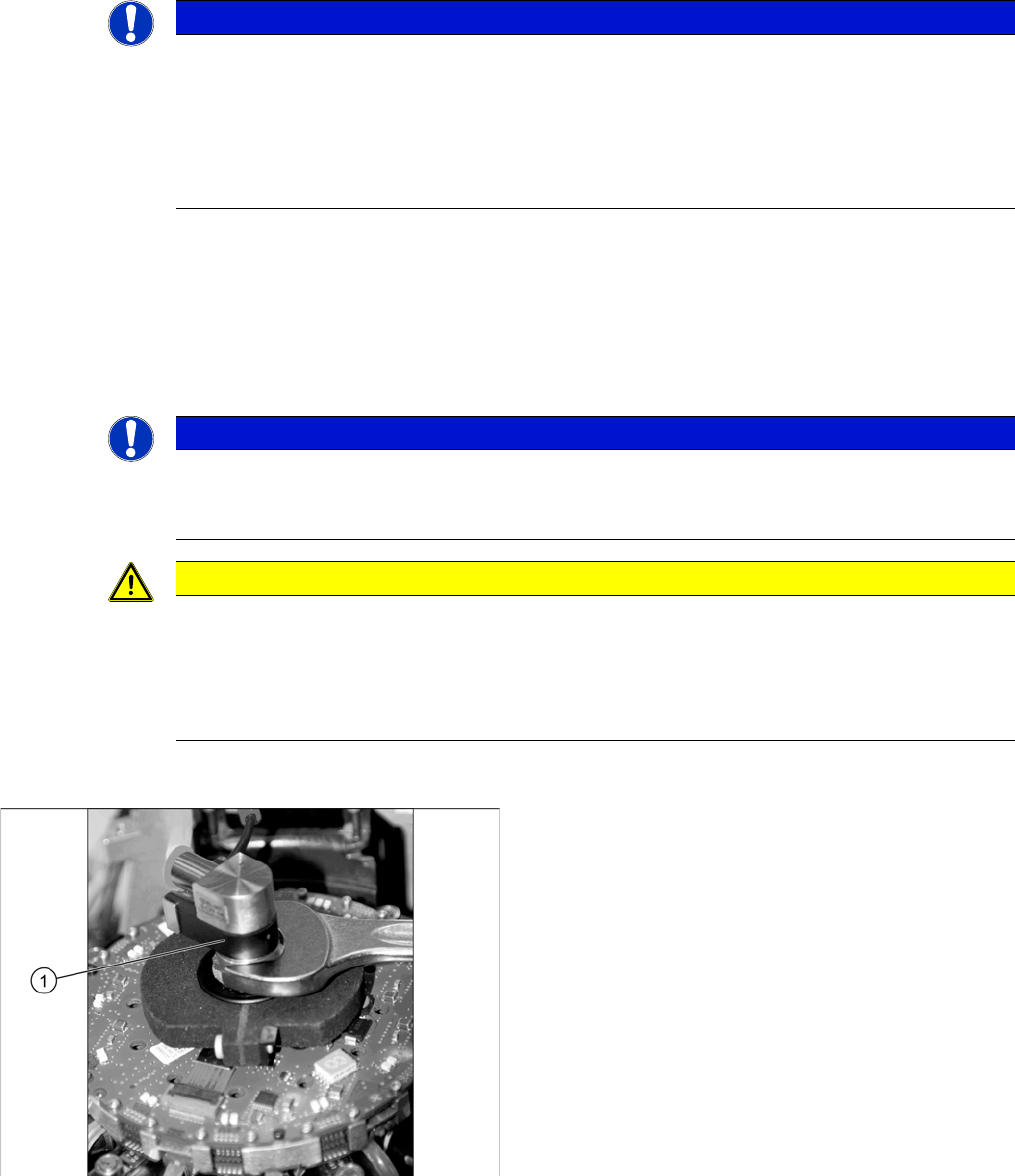
► Dismantle the holding circuit (1). This task must be
carried out by authorized personnel. For removal and
installation details, read the Service manual.
► Use a cloth and cleaning stick to clean the cover, in-
cluding all grooves and recesses.
You can also use an anti-static plastic cleaner for bet-
ter cleaning results.