00197551-01_MM_CPP-CP-Twin_Kunde_en.pdf - 第46页
Maintenance Tasks for C&P20/A/M/P Head Performing Maintenance Tasks 4.6.2 Cleaning the Z Axis 46 Maintenance Manual SIPLACE Placement Heads CPP, C&P20, Twin Installing the Cover Plate Select the applicable versio…
Maintenance Tasks for C&P20/A/M/P Head
4.6.2 Cleaning the Z Axis Performing Maintenance Tasks
Maintenance Manual SIPLACE Placement Heads CPP, C&P20, Twin 45
4.6.2
4.6.2 Cleaning the Z Axis
Cleaning the Z Axis
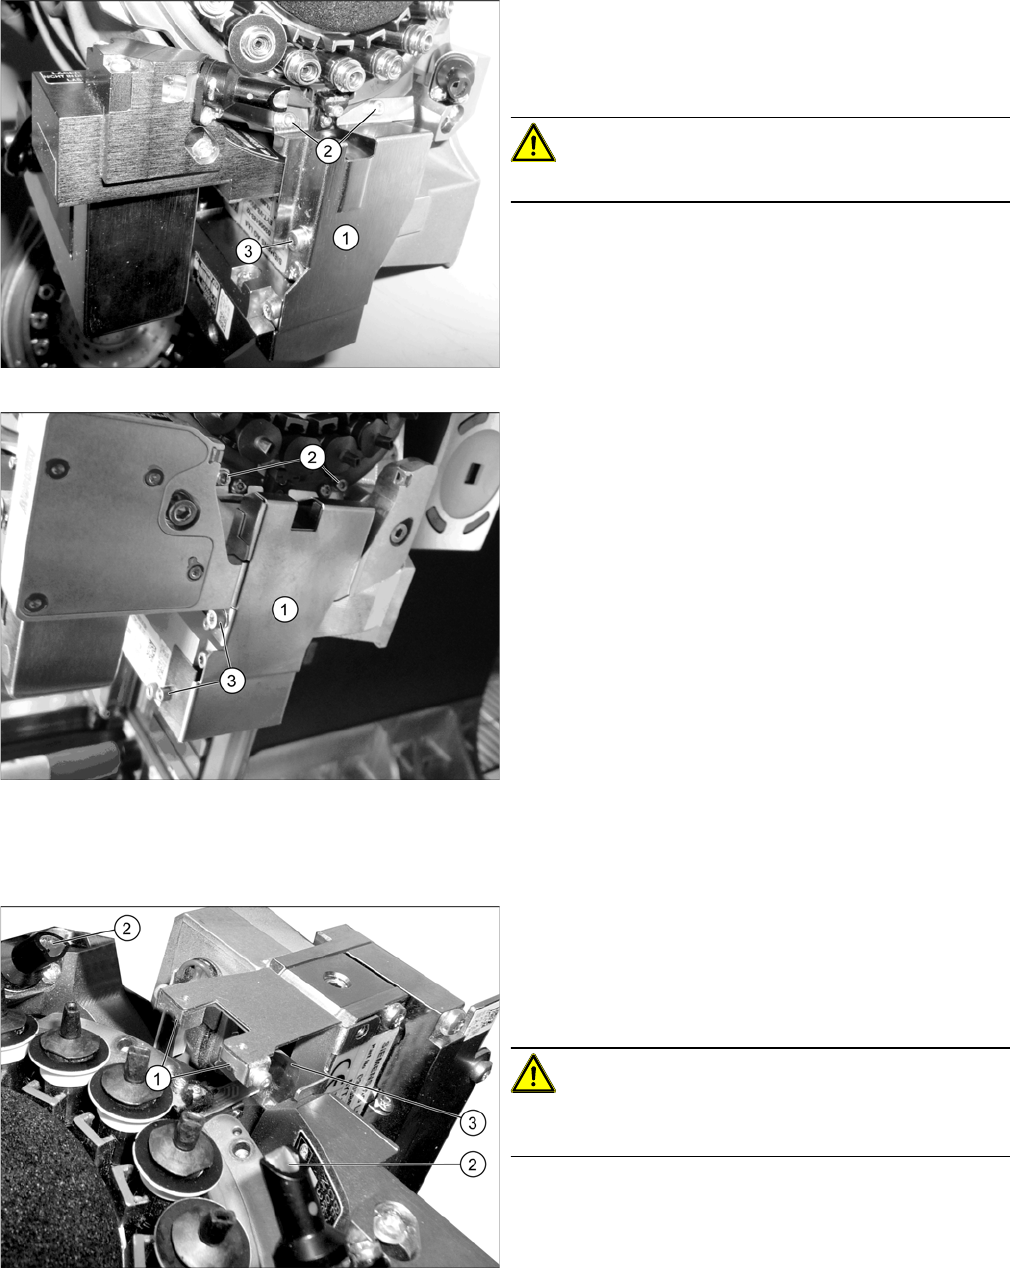
Removing the Cover Plate
Cleaning the z-axis
Cover plate Z axis C&P20/A/M
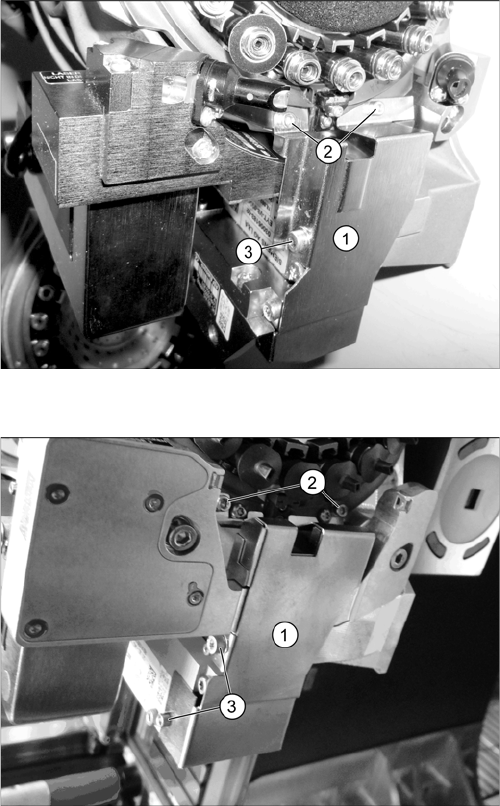
Cover plate Z axis C&P20 P
► Dismantle the cover plate (1) over the Z axis. Loosen
the screws at (2) and (3). Carefully remove the cover
plate.
For details, refer to the service manual.
CAUTION!
Take care not to damage the component sensor prisms.
Z axis (example of C&P20 A shown)
► Use the Bernstein tweezers ([00377393-xx] or
[00377394-xx], from the starter kit) to remove any
components which have collected at the Z axis. Pay
particular attention to the area around the
magnets (1).
CAUTION!
Take care not to damage the component sensor prisms
(2) or the Flexprint (3).
Maintenance Tasks for C&P20/A/M/P Head
Performing Maintenance Tasks 4.6.2 Cleaning the Z Axis
46 Maintenance Manual SIPLACE Placement Heads CPP, C&P20, Twin
Installing the Cover Plate
Select the applicable version for the head type:
Cover plate Z axis C&P20/A/M
► C&P20/A/M:
Fit the cover plate (1). Screw in and tighten the
screws at (2) until hand-tight and then tighten the
screw(s) at (3) with a torque of 130 Ncm.
For details, refer to the service manual.
Cover plate Z axis C&P20 P
► C&P20 P:
Fit the cover plate (1). Screw in and tighten the
screws at (2) and (3) until hand-tight.
For details, refer to the service manual.

Maintenance Tasks for C&P20/A/M/P Head
4.6.3 Oiling the DP Segment Guide Performing Maintenance Tasks
Maintenance Manual SIPLACE Placement Heads CPP, C&P20, Twin 47
4.6.3
4.6.3 Oiling the DP Segment Guide
Oiling the DP Segment Guide
► For this maintenance task, use the blue combitip with Thermoplex ALN 1001/00.
► Set the multipette to 2 µl.
► Rotate the head so that the segments are at the top.
► Clamp the rubber hose (1) between the Z axis and
the driver of the return unit.
► Rotate segment 1 in the center of the service open-
ing. Mark the first segment by removing a nozzle.
► Move the segment on the Z axis rotor out as far as the
end stop. Make sure that the driver bearing is in the
center of the jaws.
► Use a cleaning stick to clean the segment guide rail
on both sides.