00197551-01_MM_CPP-CP-Twin_Kunde_en.pdf - 第72页
Maintenance Tasks for Pressur e Control Valve Performing Maintenance Tasks 6.3.1 Checking /Cleaning the Pressur e Control Valve 72 Maintenance Manual SIPLACE Placement Heads CPP, C&P20, Twin Cleaning the Valve Sensor…
Maintenance Tasks for Pressure Control Valve
6.3.1 Checking/Cleaning the Pressure Control Valve Performing Maintenance Tasks
Maintenance Manual SIPLACE Placement Heads CPP, C&P20, Twin 71
Grease and insert the plunger
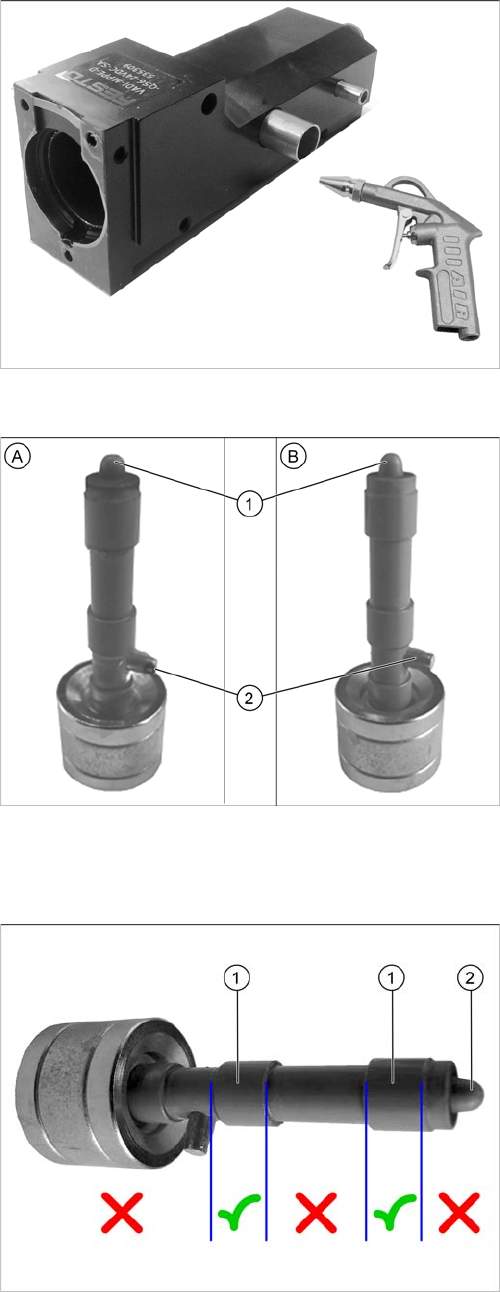
Cleaning with compressed air
► Clean all openings in the pressure control valve with
compressed air.
Dirty and clean plungers
Black residues can form on the plungers.
A = dirty plunger
B = Clean plunger
1. Tip
2. Anti-twist lock
► Wet a lint-free cloth with ethanol.
► Clean the plunger with a lint-free cloth, dipped in eth-
anol.
Pay particular attention to the cleanliness of the tip.
Grease the plunger
► Grease the guideways (1) of the plunger slightly with
Isoflex Topas 5051.
► Wipe off any excess grease.
Maintenance Tasks for Pressure Control Valve
Performing Maintenance Tasks 6.3.1 Checking/Cleaning the Pressure Control Valve
72 Maintenance Manual SIPLACE Placement Heads CPP, C&P20, Twin
Cleaning the Valve Sensor
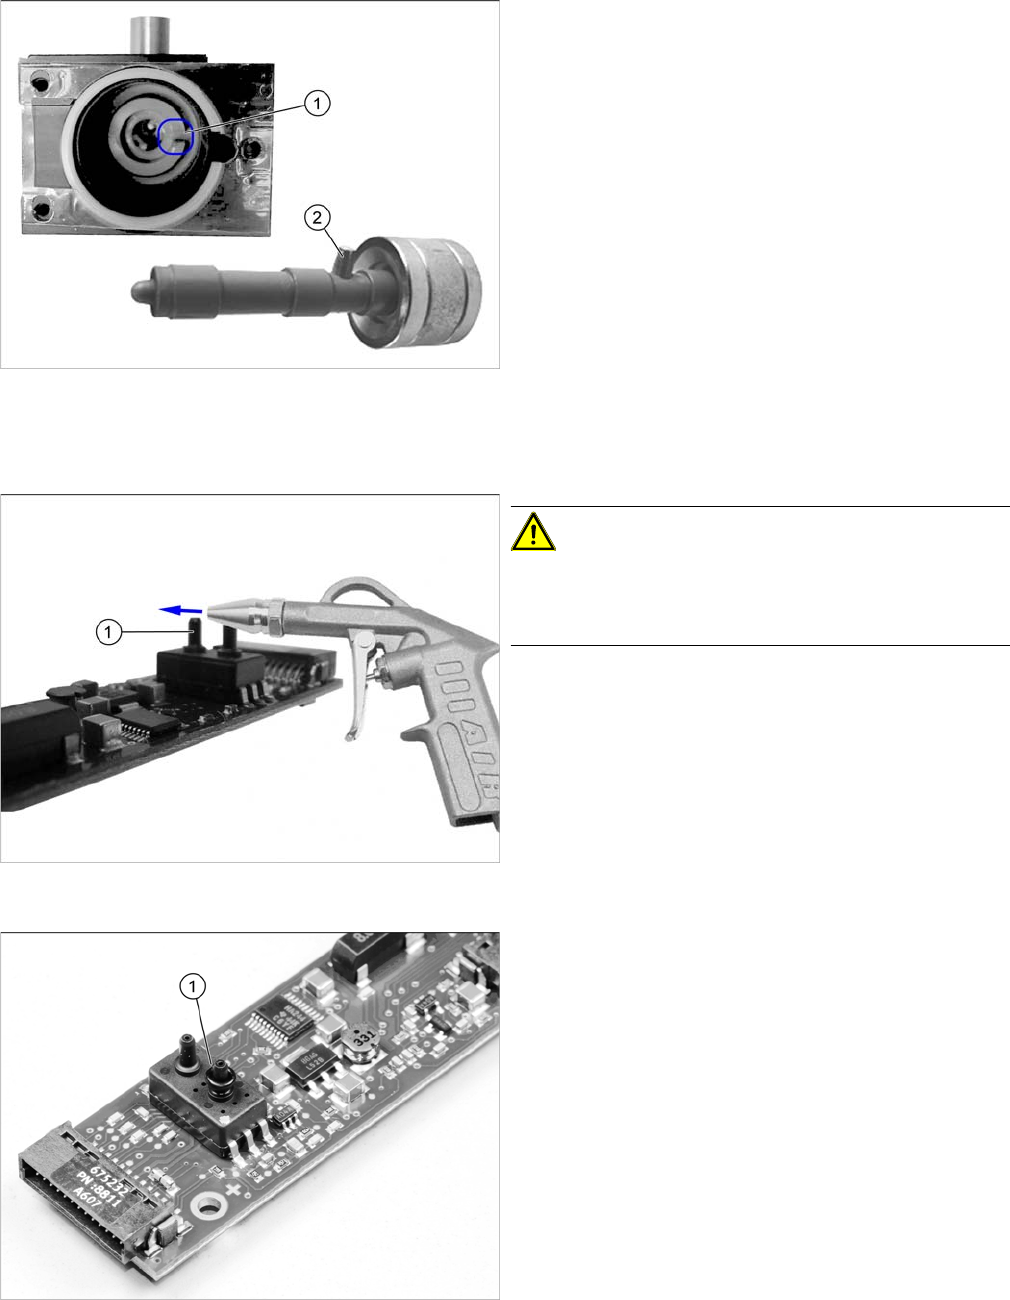
Assembling the valve
► Insert the plunger into the basic body of the valve.
The anti-twist lock (2) must engage in the groove (1).
► Check:
The plunger must move back and forth without effort.
Try to turn the plunger. If it can be turned, the anti-
twist lock has not yet engaged with the groove.
► Make sure that the transparent plastic sheet is posi-
tioned correctly on the basic body of the valve.
Cleaning the valve sensor
CAUTION!
The valve sensor can be irreparably damaged by com-
pressed air.
NEVER blow air directly into the vacuum sensor.
► Blow the compressed air over the vacuum sensor
tube, as shown in the diagram (1).
⇨ The venturi effect created sucks dirt out of the
tube.
► Clean the vacuum sensor with a cleaning stick.
O-ring on vacuum sensor
► Slightly grease the O-ring (1) with Isoflex Topas 5051
and position the O-ring onto the vacuum sensor.
Maintenance Tasks for Pressure Control Valve
6.3.1 Checking/Cleaning the Pressure Control Valve Performing Maintenance Tasks
Maintenance Manual SIPLACE Placement Heads CPP, C&P20, Twin 73
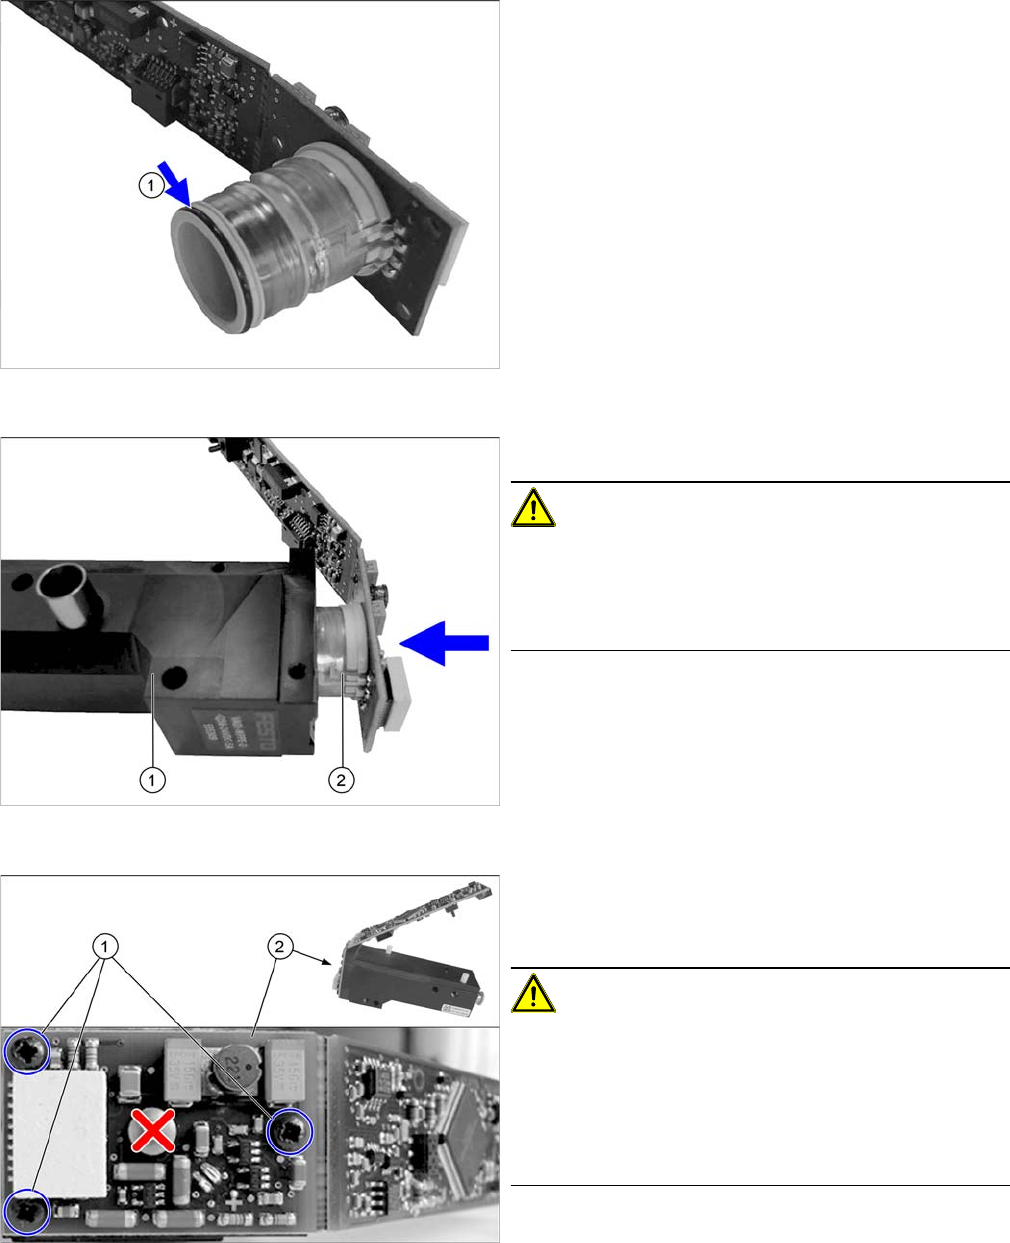
Assembling the Pressure Control Valve
O-ring on the coil
► Lightly grease the O-ring (1) on the coil with Isoflex
Topas 5051.
► Wipe off any excess grease.
Fitting the short board
► Plug the board and coil (2) into the valve body (1).
CAUTION!
Make sure that the coil is pushed straight into the valve
body.
Do not distort the coil.
Only apply slight pressure.
Fastening the short board
► Fix the short board (2) into place, using the three fas-
tening screws (1).
Tighten the fastening screws with a torque of 0.2 Nm.
CAUTION!
The fastening screws for the boards are self-tapping
screws.
Make sure that no new thread is created when screwing
in the screws.
Turn the screws first to the left, in order to use the start of
the existing thread.