00197551-01_MM_CPP-CP-Twin_Kunde_en.pdf - 第44页
Maintenance Tasks for C&P20/A/M/P Head Performing Maintenance Tasks 4.6.1 Replacing the Pressure Contro l Valve 44 Maintenance Manual SIPLACE Placement Heads CPP, C&P20, Twin 4.6 4 . 6 P e r f o r m in g M a in t…
Maintenance Tasks for C&P20/A/M/P Head
Overview of Lubrication Points
Maintenance Manual SIPLACE Placement Heads CPP, C&P20, Twin 43
4.5
4.5 Overview of Lubrication Points
Overview of Lubrication Points
Z linear guide
2 x 4 µl Lubcon Thermoplex ALN 1001/00 (blue combitip)
per ball groove
DP segment guide
2 x 2 µl Lubcon Thermoplex ALN 1001/00 (blue combitip)
per ball groove at each segment
Driver bearing
C&P20:
1 x 1 µl Nye Synthetic Oil 200A (white combitip) per driver
bearing
C&P20A/M/P:
1x 1 µl Klüberalfa DH 3-100 (black combitip) per driver
bearing.

Maintenance Tasks for C&P20/A/M/P Head
Performing Maintenance Tasks 4.6.1 Replacing the Pressure Control Valve
44 Maintenance Manual SIPLACE Placement Heads CPP, C&P20, Twin
4.6
4.6 Performing Maintenance Tasks
Performing Maintenance Tasks
4.6.1
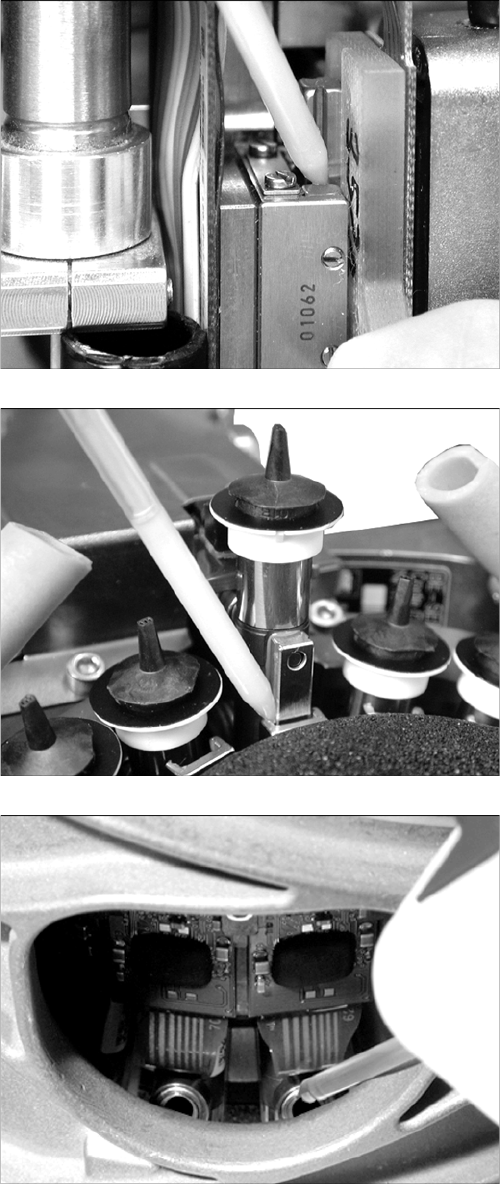
4.6.1 Replacing the Pressure Control Valve
Replacing the Pressure Control Valve
Not on CP20 P
Replacin g the Pres sure Contr ol Valve
Replacing the Pressure Control Valve
➢ The placement head must be removed for this maintenance task.
► Replace the pressure control valve. Read the service manual for your placement head for more in-
formation.
NOTICE
Not on C&P20 P
This maintenance task must be performed on all Twin, CPP, C&P20, C&P20 A and C&P20 M
heads.
This maintenance task is not required for the C&P20 P.
NOTICE
Recommendation
We recommend that you have an additional pressure control valve available, so that this can
be easily replaced during head maintenance.
The actual cleaning of the removed pressure control valve can be performed later on.
► For more information about this, read section "6 Maintenance Tasks for Pressure Control
Valve" [ ➙ 65].
Maintenance Tasks for C&P20/A/M/P Head
4.6.2 Cleaning the Z Axis Performing Maintenance Tasks
Maintenance Manual SIPLACE Placement Heads CPP, C&P20, Twin 45
4.6.2
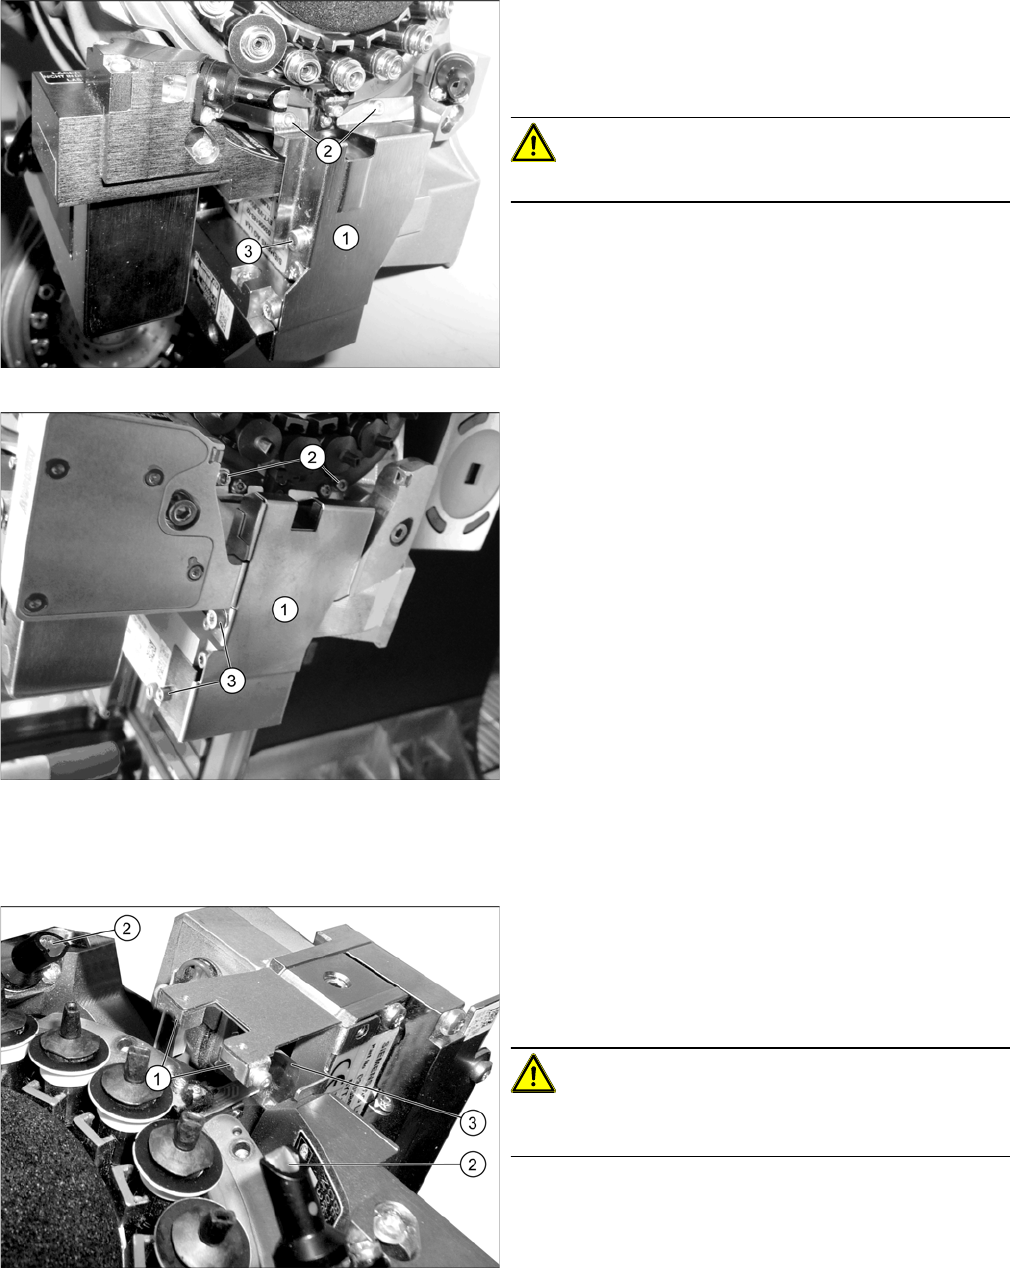
4.6.2 Cleaning the Z Axis
Cleaning the Z Axis
Removing the Cover Plate
Cleaning the z-axis
Cover plate Z axis C&P20/A/M
Cover plate Z axis C&P20 P
► Dismantle the cover plate (1) over the Z axis. Loosen
the screws at (2) and (3). Carefully remove the cover
plate.
For details, refer to the service manual.
CAUTION!
Take care not to damage the component sensor prisms.
Z axis (example of C&P20 A shown)
► Use the Bernstein tweezers ([00377393-xx] or
[00377394-xx], from the starter kit) to remove any
components which have collected at the Z axis. Pay
particular attention to the area around the
magnets (1).
CAUTION!
Take care not to damage the component sensor prisms
(2) or the Flexprint (3).