BA-UI-EN-D33363.pdf - 第20页
20 D33363 | Date 01/2020 Delivery , tr ansport and setting up 3.6.2 Installation options Setting up Comments Suitable for appliance size ... 30 55 75 110 160 260 450 750 Floor T able Check the load capacity fir…
D33363 | Date 01/2020 19
Delivery, transport and setting up
3.6 Setting up
Warning!
Due to its centre of gravity, the appliance can fall over to the front
and injure you or other people. Always attach the appliance to a wall
with the tilt protection (see page 21). If this cannot be done due
to space problems, do not operate the appliance and do not open
the door. Contact the Memmert service team (see page 2).
3.6.1 Prerequisites
The installation site must be flat and horizontal and must be able to reliably bear the weight
of the appliance (see Technical data on page 14). Do not place the appliance on a flamma-
ble surface.
Depending on the model (see nameplate), a 230 V, 115 V or 400 V power connection must be
available at the installation site.
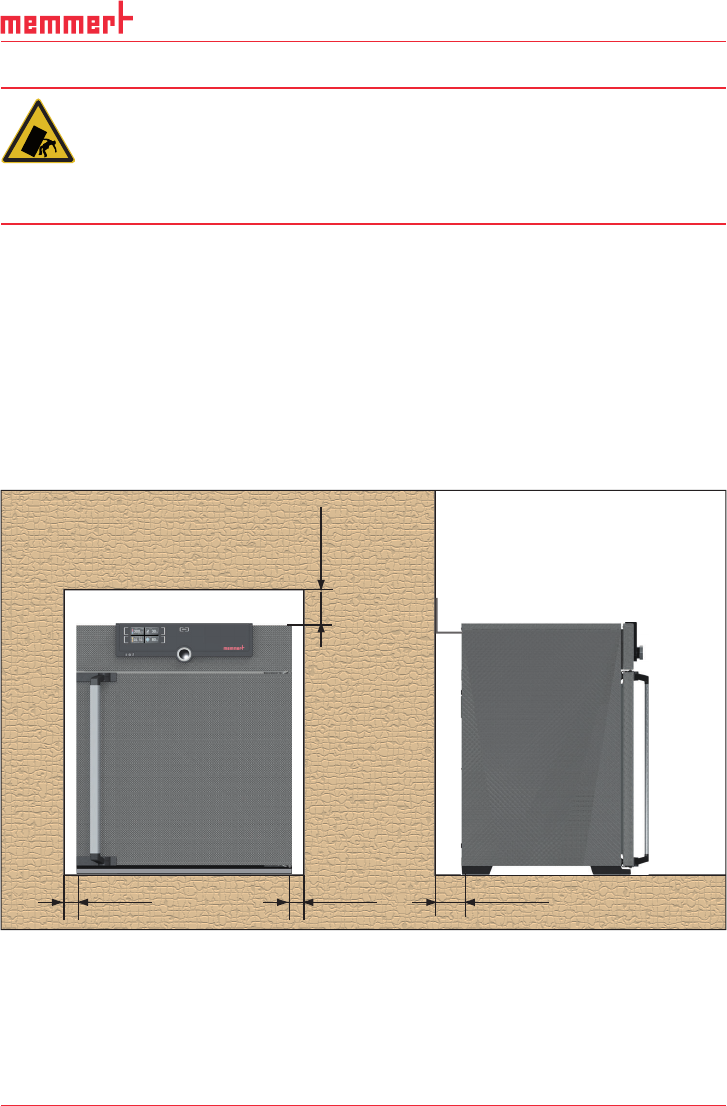
The distance between the wall and the rear of the appliance must be at least 15 cm. The clear-
ance from the ceiling must not be less than 20 cm and the side clearance from walls or nearby
appliances must not be less than 5 cm (Fig. 8). Sufficient air circulation in the vicinity of the
appliance must be guaranteed at all times.
For appliances with castors, these need to be positioned in forward direction at all times.
FP FP FP
FP
Fig. 8 Minimum clearance from walls and ceiling
20 D33363 | Date 01/2020
Delivery, transport and setting up
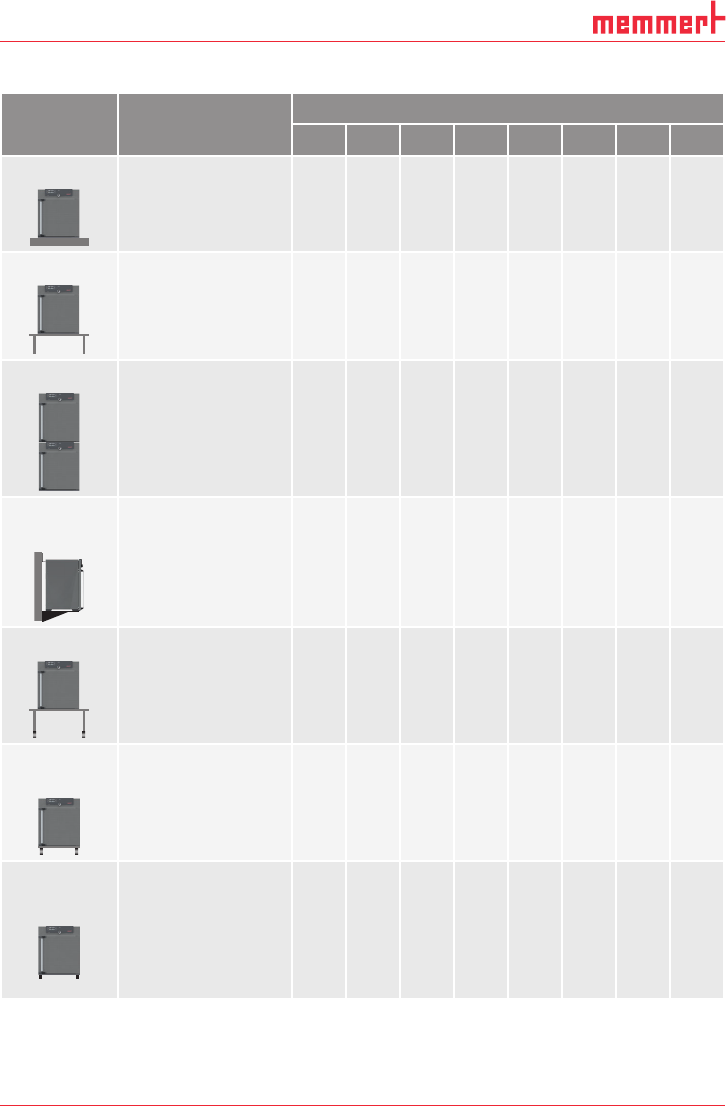
3.6.2 Installation options
Setting up Comments Suitable for appliance size ...
30 55 75 110 160 260 450 750
Floor
Table
Check the load
capacity first
Stacked
two appliances
maximum; mount-
ing material (feet)
provided
Wall
mounting
Separately packaged
fastening material is
included in the scope
of delivery. Observe
the assembly instruc-
tions provided.
Base
with/without cas-
tors
Castor
frame
Height ad-
justable feet
D33363 | Date 01/2020 21
Delivery, transport and setting up
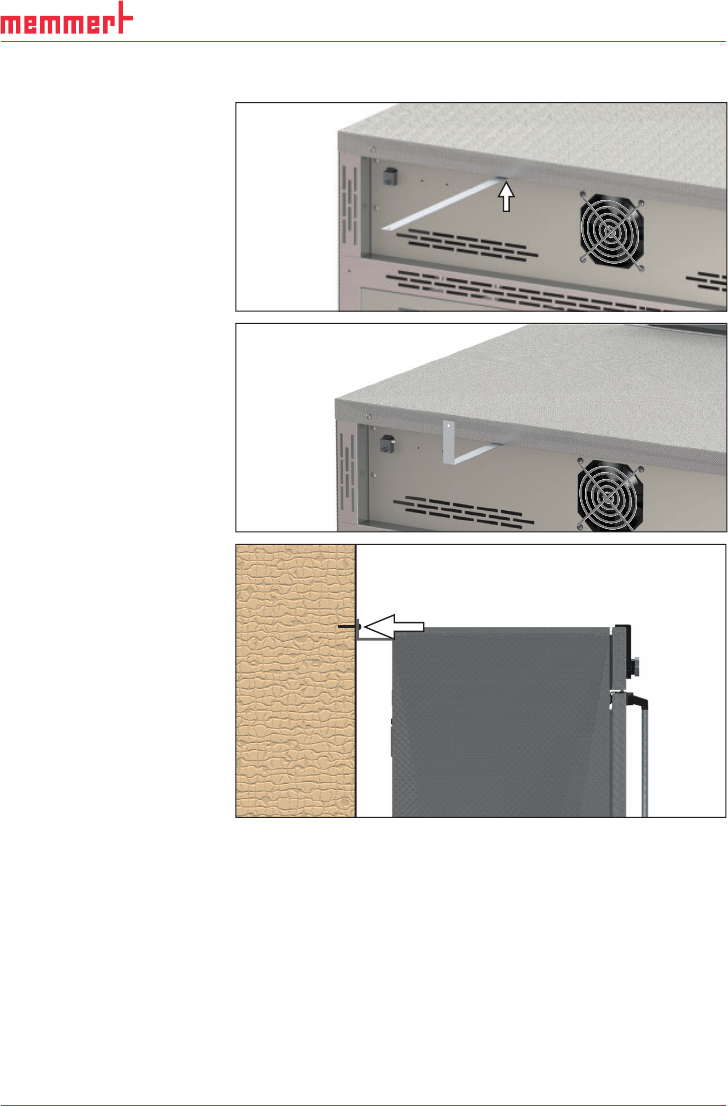
3.6.3 Tilt protection
Attach the appliance to a
wall with the tilt protection.
The tilt protection is included
in the delivery.
1. As illustrated, fasten the
tilt protection to the rear
side of the appliance.
2. Bend the tilt protec-
tion upwards by 90 ° in
the desired distance to
the wall (consider the
minimum distance to the
wall, see Fig. 8).
3. Drill a hole, insert a plug
and screw the tilt protec-
tion to a suitable wall.