BA-UI-EN-D33363.pdf - 第45页
D33363 | Date 01/2020 45 Menu mode 3. With the turn control, set the calibration temperature Cal2 to 120 °C. CK 0,2 - CK 0,1 + CK 0,2 - Temperature Cal1 Cal2 Cal3 180.0 40.0 120.0 4. Save the setting by pressing the conf…
44 D33363 | Date 01/2020
Menu mode
7.5 Calibration
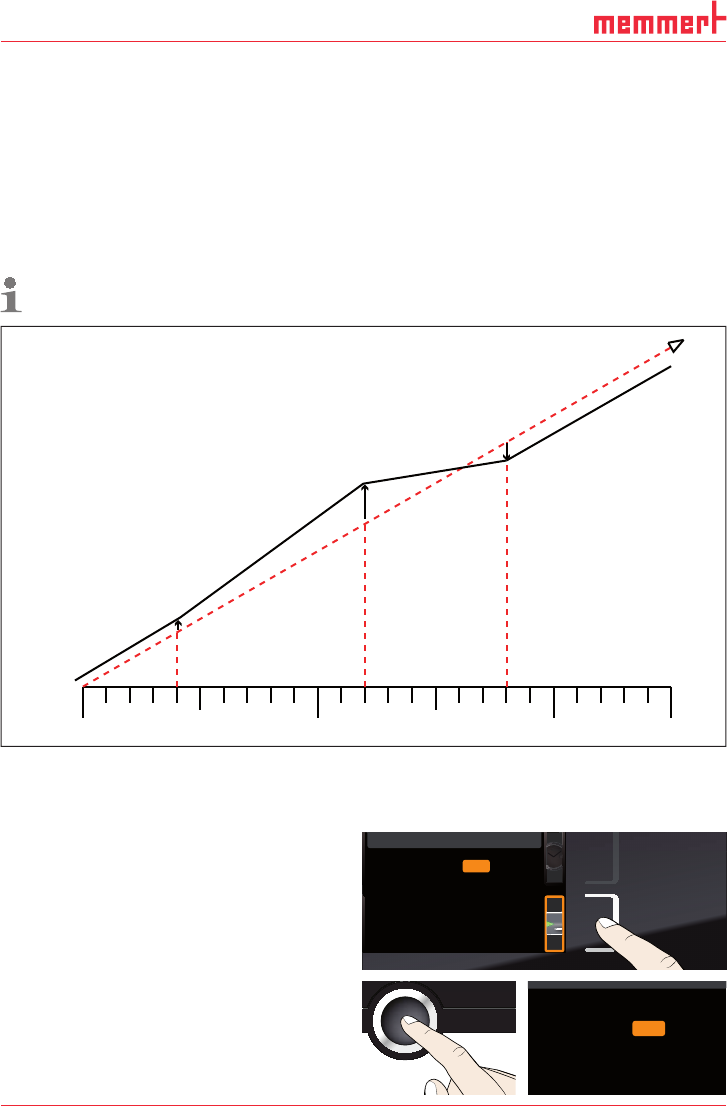
The appliances are temperature calibrated and adjusted at the factory. In case readjustment
should be necessary later on – for example due to influence of the chamber load – the ap-
pliance can be calibrated customer-specifically using three calibration temperatures of your
choice:
► Cal1 Temperature calibration at low temperature
► Cal2 Temperature calibration at medium temperature
► Cal3 Temperature calibration at high temperature
To guarantee perfect control, we recommend to calibrate the appliance once a year.
For temperature adjustment, you will need a calibrated reference measuring device.
CAL 1
+0,5 K
CAL 3
-0,8 K
CAL 2
+2,6 K
180°C
40°C
120°C
0°C
factory calibration
Fig. 24 Schematic example of temperature adjustment
Example: Temperature deviation at 120 °C should be corrected.
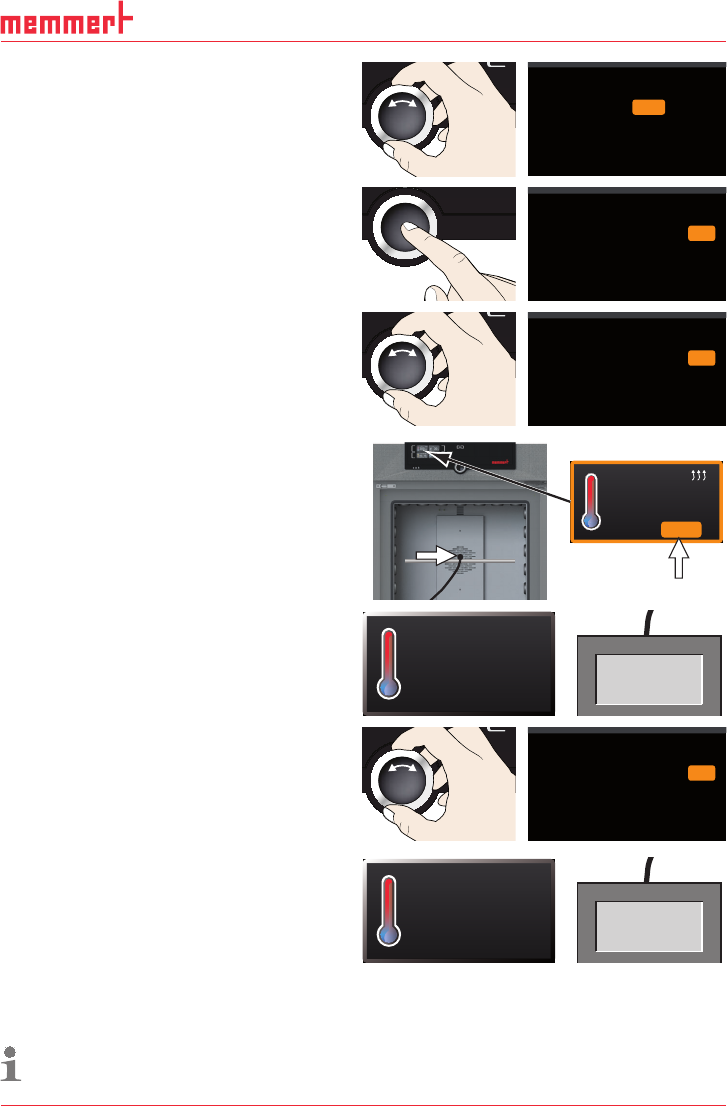
1. Activate the adjustment setting. To do so,
press the activation key on the right side
of the
CALIB display. The display is en-
larged and the first calibration tempera-
ture – in this case 40 °C – automatically
highlighted.
Cal1 °C -0,2K
Cal2 100.0 °C +0,1 K
Cal3 180.0 °C -0,2 K
JUSTIEREN
Temperatur
letzte Justierung 12.10.2012 12:00
40.0
CK0,2-
CK0,1+
CK0,2-
Calibration
Temperature
Last updated 12.10.2012 12:00:00
Cal1
Cal2
Cal3
100.0
180.0
40.0
2. Press the confirmation key repeatedly,
until the calibration temperature Cal2 is
selected.
CK0,2-
CK0,1+
CK0,2-
Temperature Cal1
Cal2
Cal3 180.0
40.0
100.0
D33363 | Date 01/2020 45
Menu mode
3. With the turn control, set the calibration
temperature Cal2 to 120 °C.
CK0,2-
CK0,1+
CK0,2-
Temperature
Cal1
Cal2
Cal3 180.0
40.0
120.0
4. Save the setting by pressing the confir-
mation key. The corresponding calibra-
tion value is automatically highlighted.
CK0,2-
CK
CK
0,2-
Temperature Cal1
Cal2
Cal3 180.0
40.0
120.0 0,1+
5. Set the calibration value to 0.0 K and ac-
cept the setting by pressing the confirma-
tion key.
CK0,2-
CK
CK
0,2-
Temperature Cal1
Cal2
Cal3 180.0
40.0
120.0 0,0
6. Position the sensor of a calibrated refer-
ence instrument centrally in the appli-
ance's working chamber.
7. Close the door and, in manual mode,
adjust the set temperature to 120 °C.
21.4 °C
TEMP
120.0 °CSet
8. Wait until the appliance reaches the set
temperature and displays 120 °C. The
reference instrument for example displays
122.6 °C.
120.0°C
TEMP
Set 120
.0 °C
122.6 °C
9. In the SETUP, adjust the calibration value
Cal2 to +2.6 K (actual value measured
minus setpoint temperature) and save the
setting by pressing the confirmation key.
CK0,2-
CK
CK
0,2-
Temperature Cal1
Cal2
Cal3 180.0
40.0
120.0 2,6+
10. After the calibration procedure, the
temperature measured by the reference
instrument should now also be 120 °C.
120.0°C
TEMP
Set 120
.0 °C
120.0 °C
With Cal1, a calibration temperature below Cal2 can be programmed accordingly, and with
Cal3, a temperature above. The minimum difference between the Cal values is 20 K for univer-
sal ovens UN
.../UF... and 10 K for incubators IN.../IF...
If all calibration values are set to 0.0 K, the factory calibration settings are restored.
46 D33363 | Date 01/2020
Maintenance and service
8. Maintenance and service
8.1 Cleaning
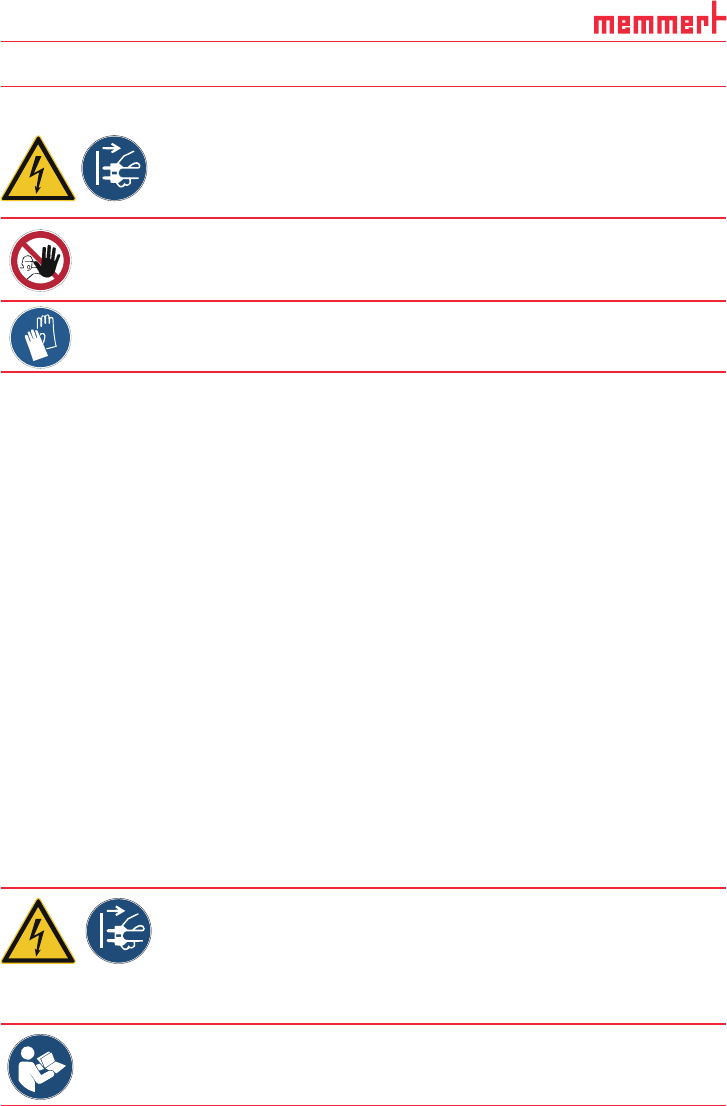
Warning!
Danger due to electric shock. Before doing any maintenance
work, pull out the mains plug.
Warning!
In case of appliances of a certain size, you can get accidentally
locked in, which is life-threatening. Do not climb into the appliance!
Caution!
Danger of cuts due to sharp edges. Always wear gloves when wor-
king in the chamber interior.
8.1.1 Working chamber and metal surfaces
Regular cleaning of the easy-to-clean working chamber prevents build up of material remains
that could impair the appearance and functionality of the stainless steel working chamber
over time.
The metal surfaces of the appliance can be cleaned with normal stainless steel cleaning
agents. Make sure that no rusty objects come into contact with the working chamber or with
the stainless steel housing. Rust deposits can lead to an infection of the stainless steel. If rust
spots should appear on the surface of the working chamber due to impurities, the affected
area must be immediately cleaned and polished.
8.1.2 Plastic parts
Do not clean the ControlCOCKPIT and other plastic parts of the appliance with caustic or
solvent-based cleaning agents.
8.1.3 Glass surfaces
Glass surfaces can be cleaned with a commercially available glass cleaner.
8.2 Regular maintenance
Once a year, grease the moving parts of the doors (hinges and lock) with thin silicone grease
and check that the hinge screws are not loose.
To guarantee perfect control, we recommend to calibrate the appliance once a year (see page
44).
8.3 Repairs and service
Warning!
After removing covers, live parts may be exposed. You may
receive an electric shock if you touch these parts. Disconnect
the mains plug before removing any covers. Any work inside
the appliance may only be performed by qualifi ed electri-
cians.
Repairs and service work are described in a separate service manual.