BA-UI-EN-D33363.pdf - 第21页
D33363 | Date 01/2020 21 Delivery , tr ansport and setting up 3.6.3 Tilt protection Attach the appliance to a wall with the tilt protection. The tilt protection is included in the delivery . 1. As illustrated, fasten the…
20 D33363 | Date 01/2020
Delivery, transport and setting up
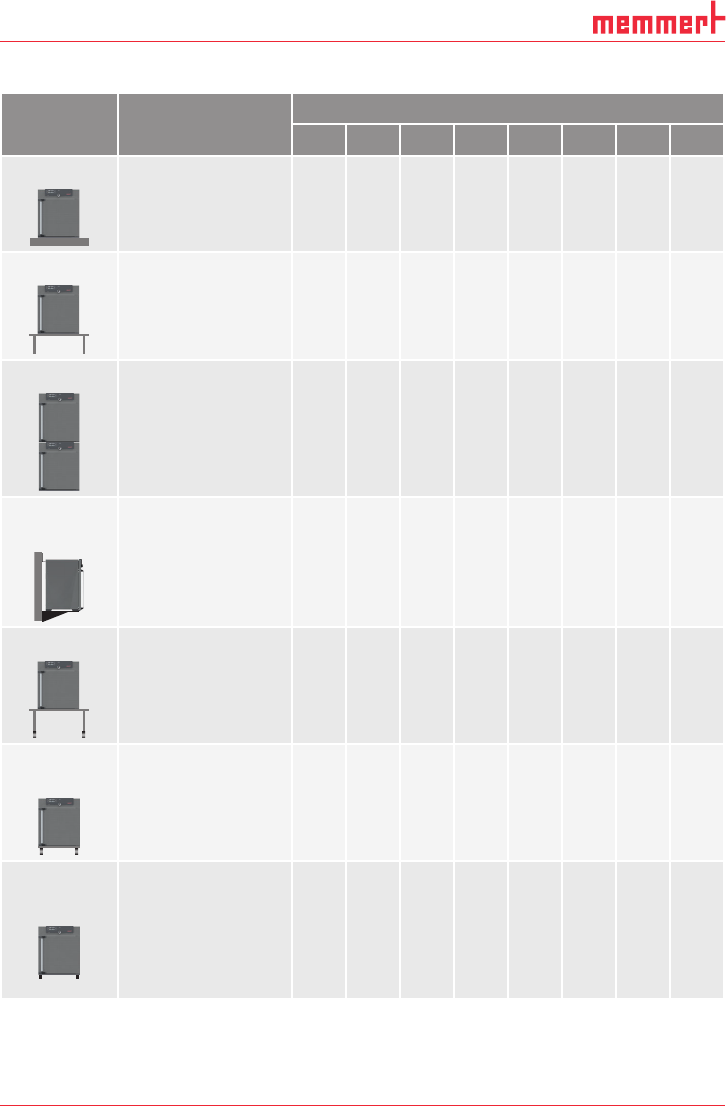
3.6.2 Installation options
Setting up Comments Suitable for appliance size ...
30 55 75 110 160 260 450 750
Floor
Table
Check the load
capacity first
Stacked
two appliances
maximum; mount-
ing material (feet)
provided
Wall
mounting
Separately packaged
fastening material is
included in the scope
of delivery. Observe
the assembly instruc-
tions provided.
Base
with/without cas-
tors
Castor
frame
Height ad-
justable feet
D33363 | Date 01/2020 21
Delivery, transport and setting up
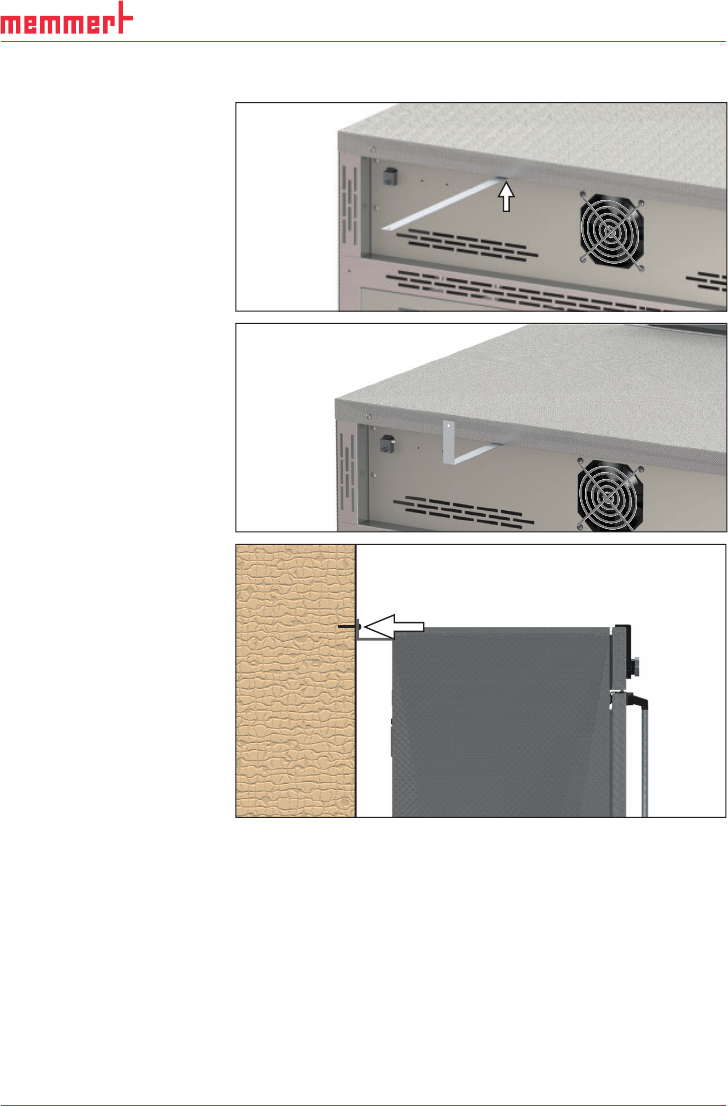
3.6.3 Tilt protection
Attach the appliance to a
wall with the tilt protection.
The tilt protection is included
in the delivery.
1. As illustrated, fasten the
tilt protection to the rear
side of the appliance.
2. Bend the tilt protec-
tion upwards by 90 ° in
the desired distance to
the wall (consider the
minimum distance to the
wall, see Fig. 8).
3. Drill a hole, insert a plug
and screw the tilt protec-
tion to a suitable wall.
22 D33363 | Date 01/2020
Delivery, transport and setting up
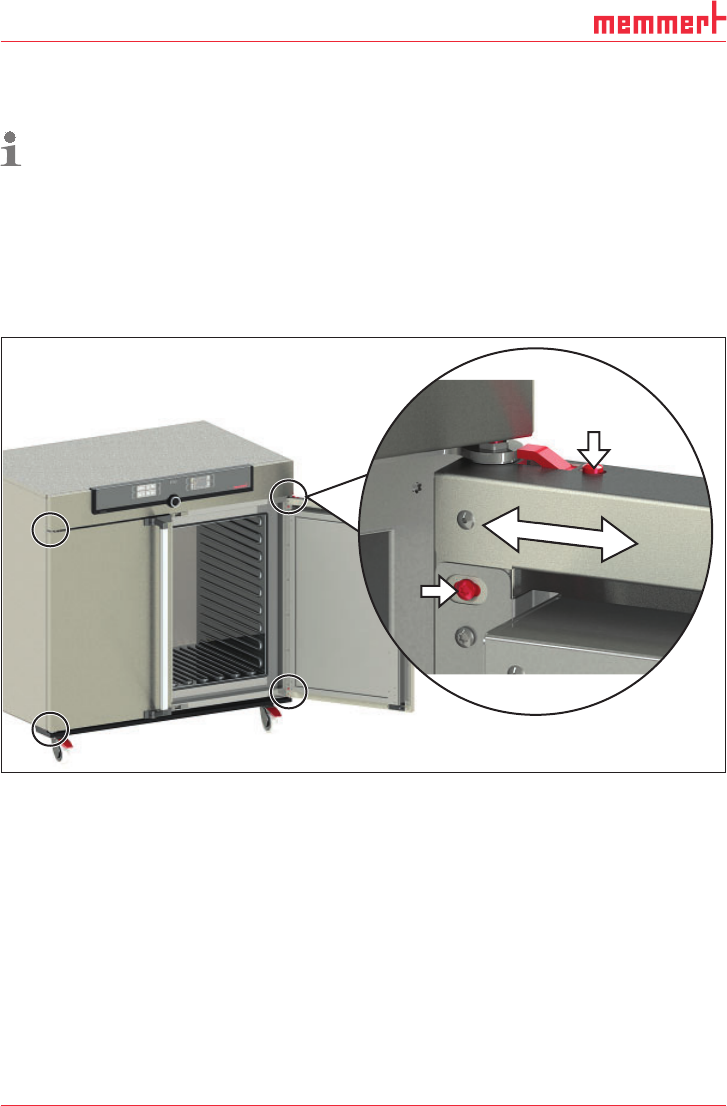
3.6.4 Adjusting the doors
For appliances it is possible to adjust doors that warp due to the floor conditions. In order to
do so, every door has two adjuster screws at the top and at the bottom (Fig. 9).
First, adjust the door at the top and then, if further adjustment is necessary, at the bottom
as well.
1. Open the door.
2. Undo the screws.
3. Adjust the door.
4. Tighten the screws again.
5. Check door alignment.
6. If necessary, readjust.
Fig. 9 Door adjustment screws