04_SM481_Service Manual Head.pdf - 第39页
Head 4-35 6. Un scr ew the fixing b ol ts securing the plate of R-axis mo t or using a he x wren c h and remove it. 7. When r eplacing the timing bel t , r epl a ce the b el t with a new one . Referen ce The part numbe…
Advanced High Speed Flexible Mounter
4-34
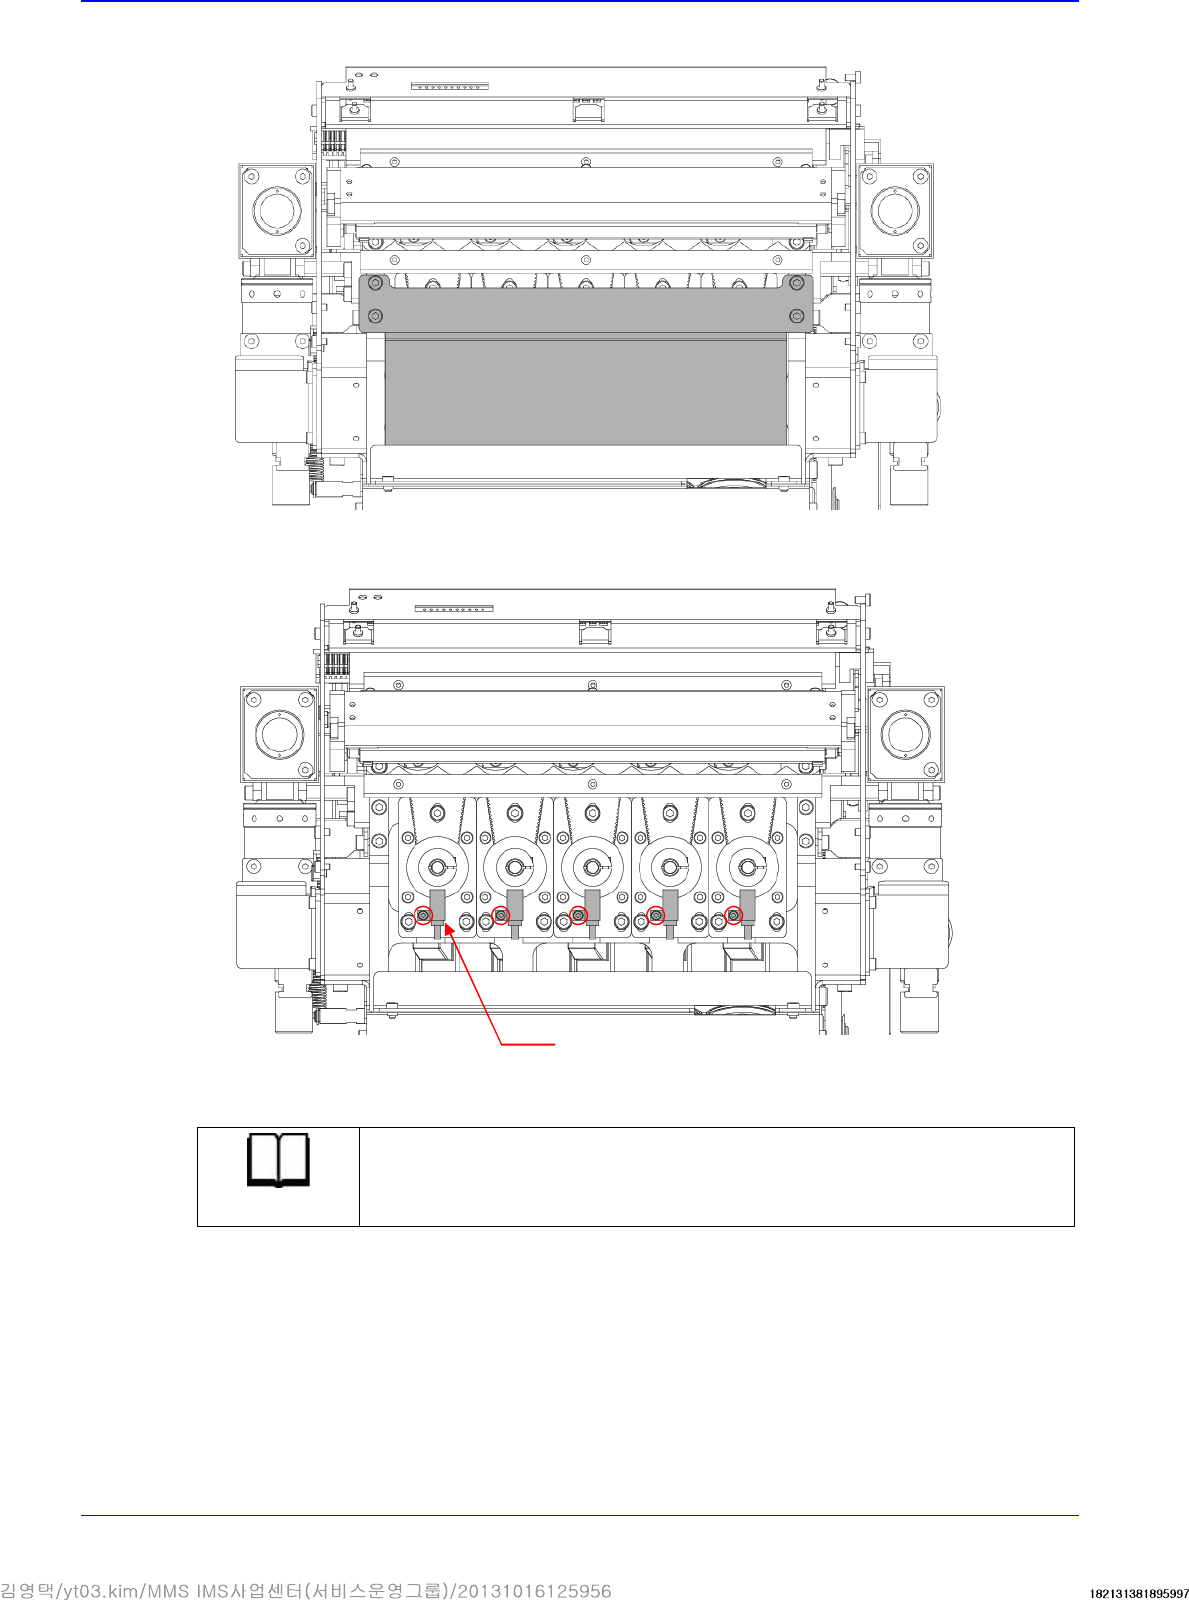
3. Unscrew the fixing bolts securing the cover using a hex wrench and remove it.
4. When replacing the sensor, unscrew the fixing bolts securing the sensor and remove it.
5. Replace the sensor with a new one.
Reference
The part number of the new sensor is J32121021A.
Sensor
Head
4-35
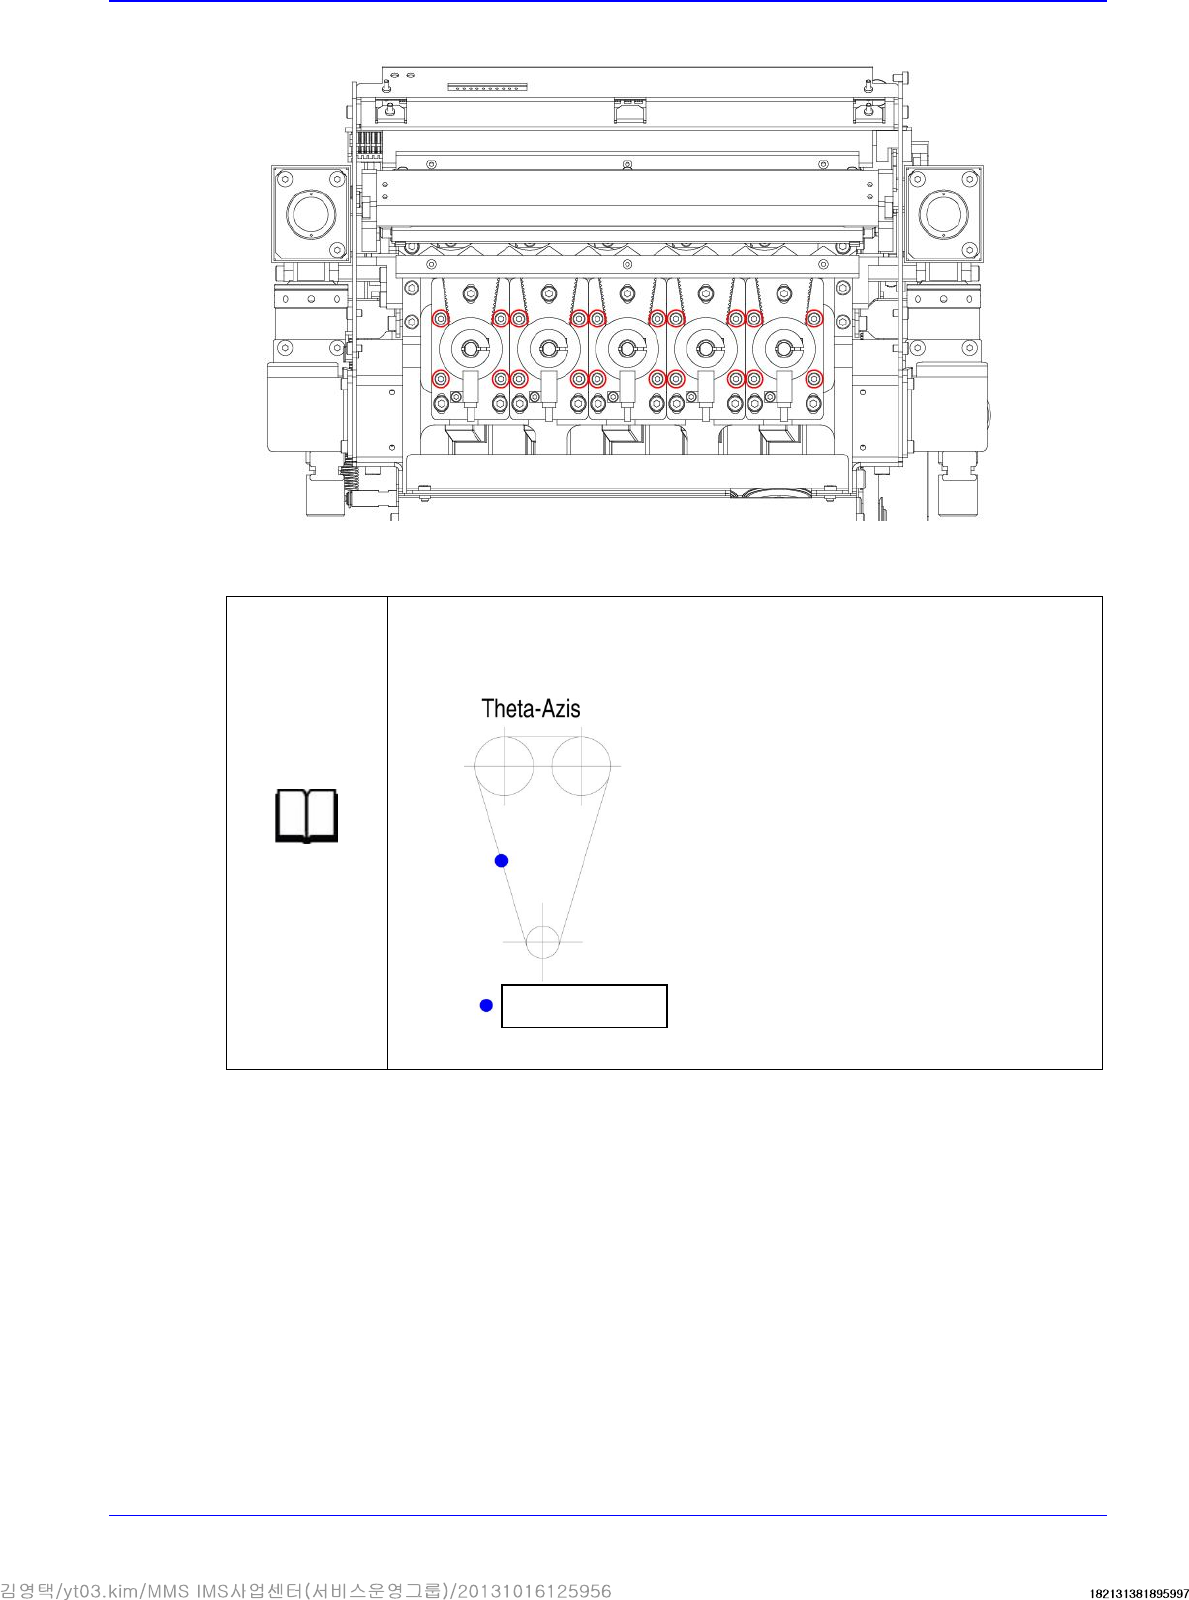
6. Unscrew the fixing bolts securing the plate of R-axis motor using a hex wrench and remove it.
7. When replacing the timing belt, replace the belt with a new one.
Reference
The part number of the new
belt
is
J66021183A
Measure the tension of the timing belt at the center by using
the unitta measuring device. (Standard value: 409~467 Hz)
Assemble the motor in the reverse order of disassembling.
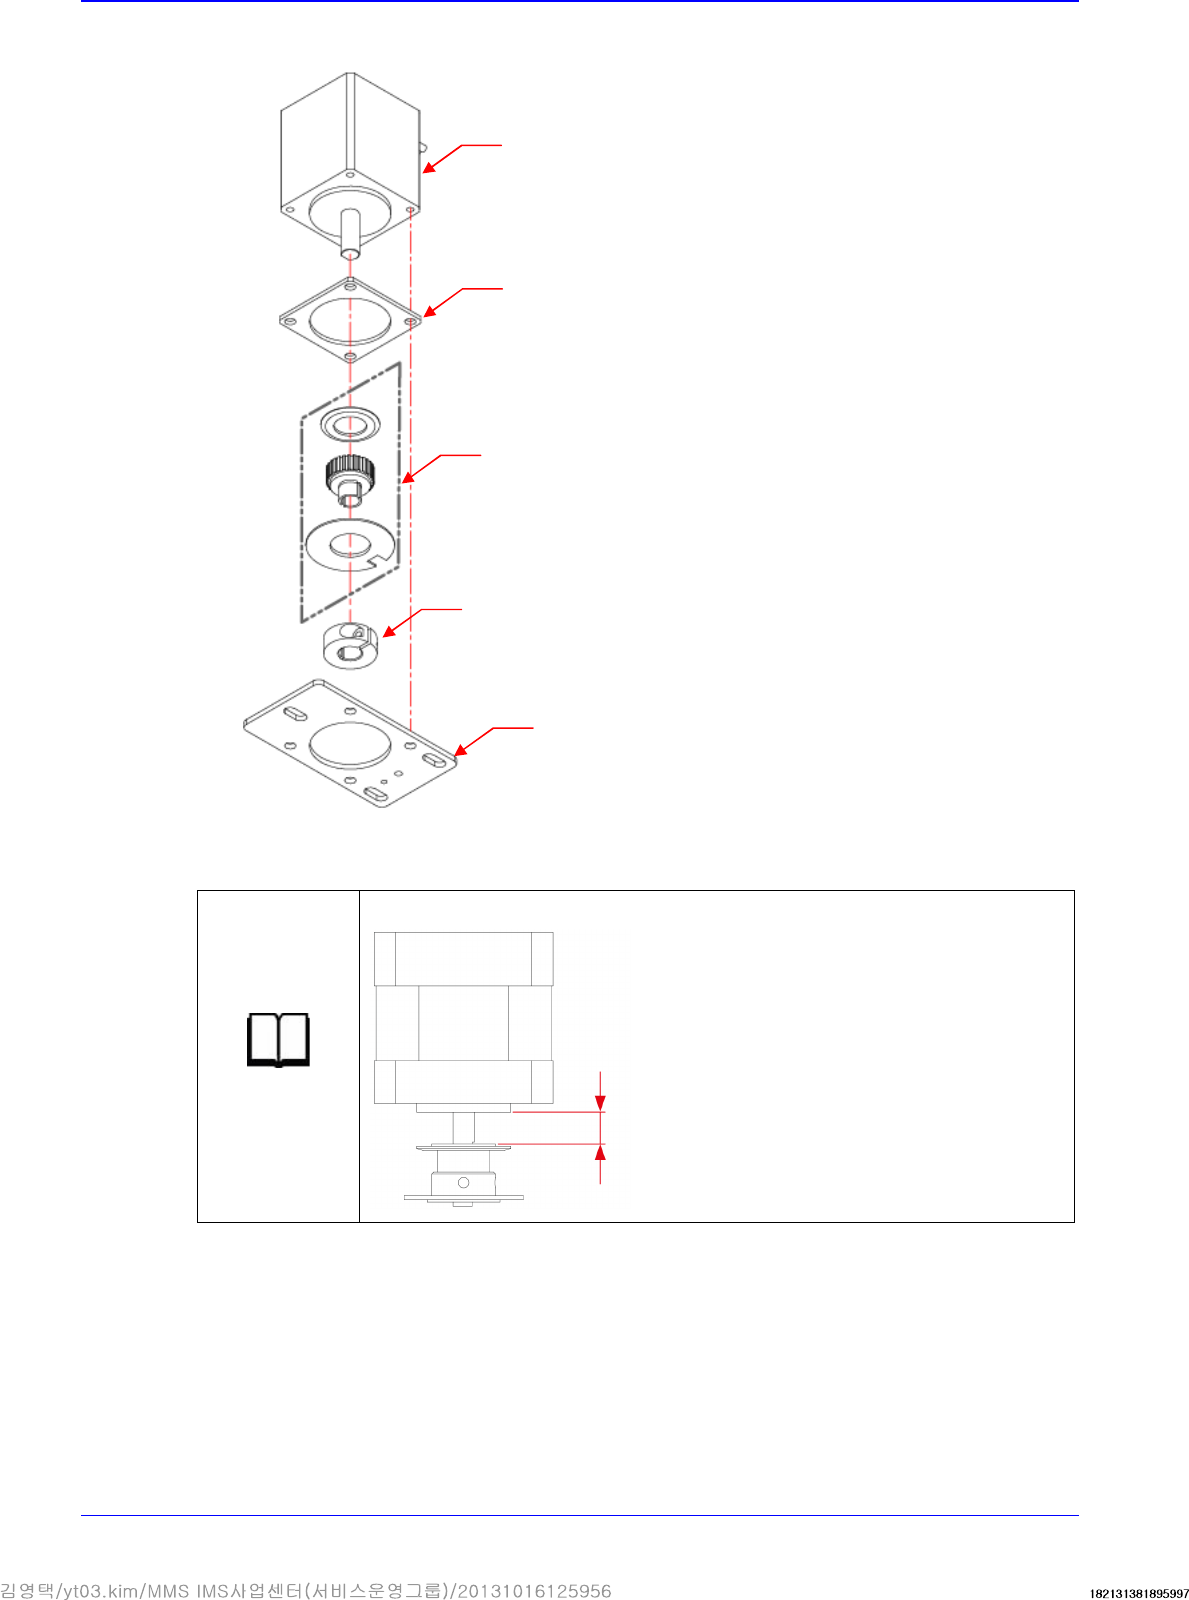
8. When replacing the motor, proceed with the next steps continuously.
9. Unscrew the set screw securing the pulley using a hex wrench and remove it.
Measurement
position
Advanced High Speed Flexible Mounter
4-36
10. Remove the motor.
11. Replace the motor with a new one.
Reference
The part number of the new
motor
is
EP08
-
000007
.
12. Assemble the motor in the reverse order of disassembling.
13. Check if the nozzle slots of Z1/Z2, Z3/Z4, Z5/Z6, Z7/Z8 and Z9/Z10 match.
First, match the axis having the home sensor dog with either one of the nozzle holder pins of
the jig and for other pairs of axes, rotate the shaft by slightly loosening the set screw of the R-
axis pulley 2 to perform setup to match with the jig. Then secure the set screw.
1.6 mm
Pulley
Plate
Pulley Clamp
Insulation
Motor