04_SM481_Service Manual Head.pdf - 第41页
Head 4-37 14. Turn o n t he m a in s wi tc h on t he front side of the m a chi ne and b oot the PC once t he r e p lac em ent is com p leted. 15. T he f ollowing calibrat io ns need to be perfo r m ed. R Offse t Ca li …
Advanced High Speed Flexible Mounter
4-36
10. Remove the motor.
11. Replace the motor with a new one.
Reference
The part number of the new
motor
is
EP08
-
000007
.
12. Assemble the motor in the reverse order of disassembling.
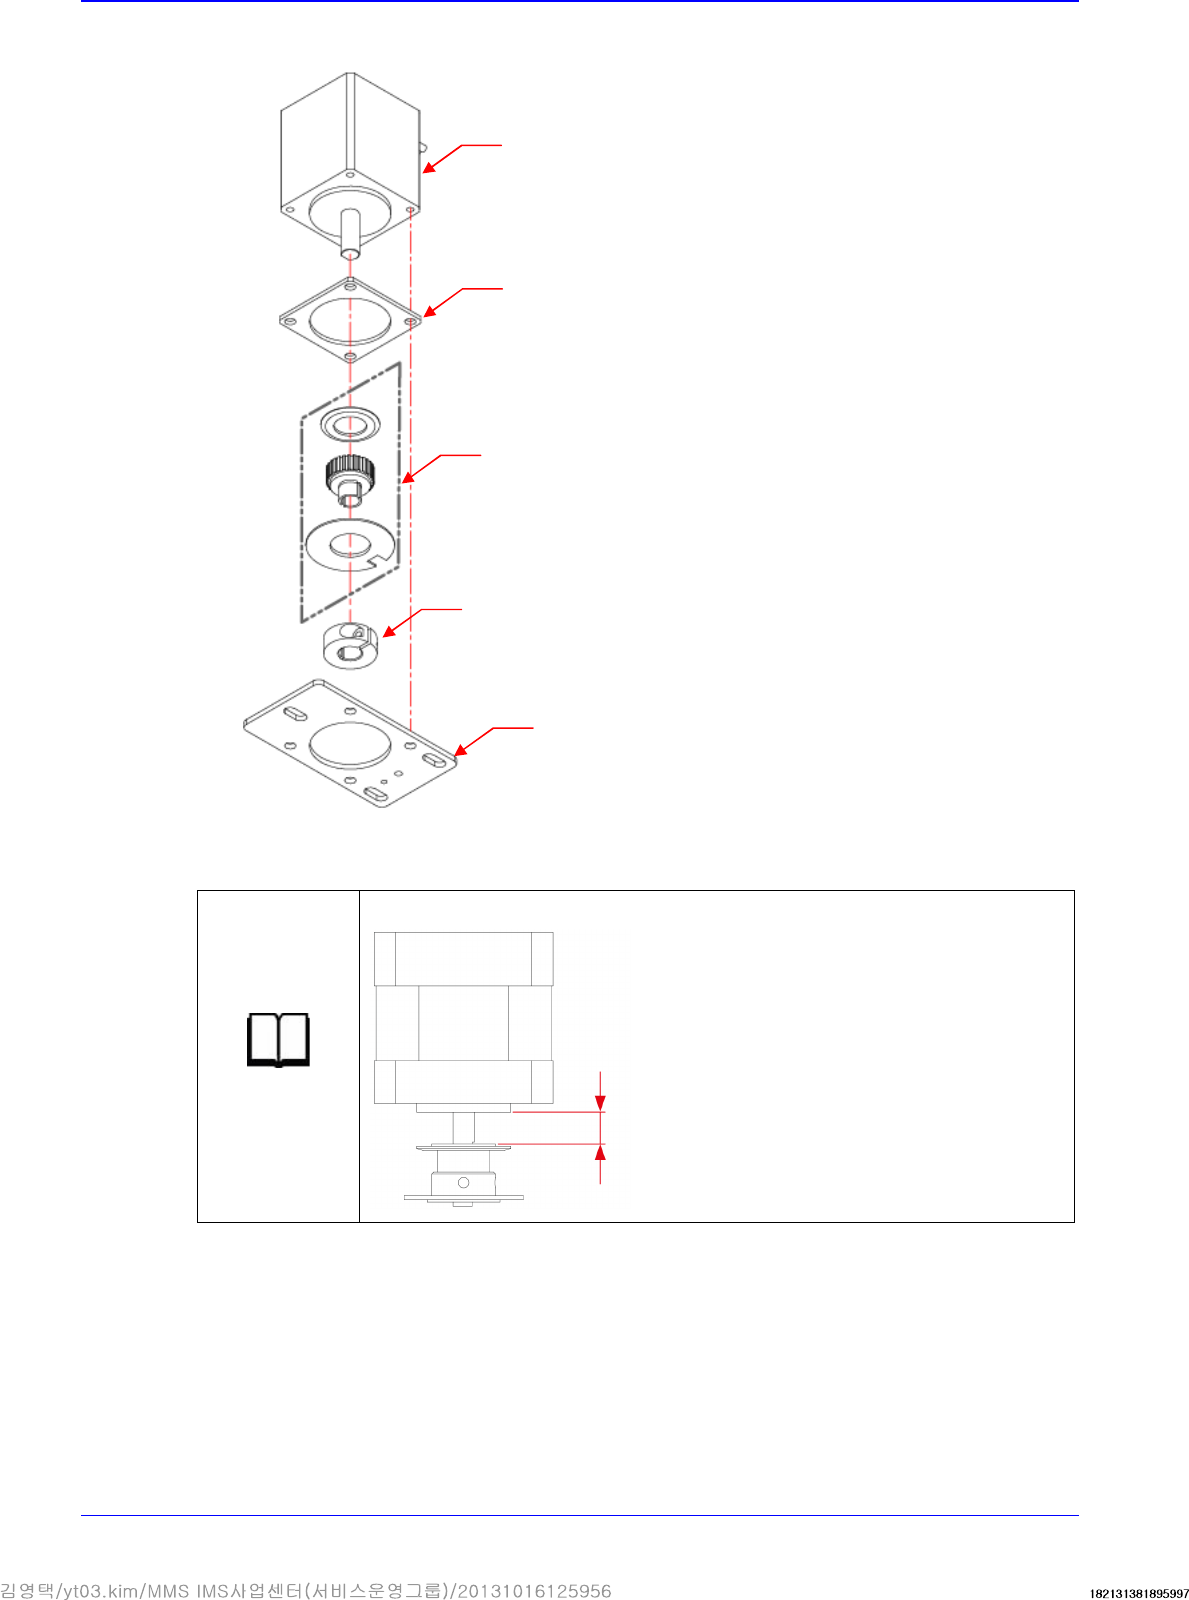
13. Check if the nozzle slots of Z1/Z2, Z3/Z4, Z5/Z6, Z7/Z8 and Z9/Z10 match.
First, match the axis having the home sensor dog with either one of the nozzle holder pins of
the jig and for other pairs of axes, rotate the shaft by slightly loosening the set screw of the R-
axis pulley 2 to perform setup to match with the jig. Then secure the set screw.
1.6 mm
Pulley
Plate
Pulley Clamp
Insulation
Motor

Head
4-37
14. Turn on the main switch on the front side of the machine and boot the PC once the replacement
is completed.
15. The following calibrations need to be performed.
R Offset Calibration
R-Axis Offset calibration
16. After finishing the calibration, perform the test to see if parts are placed normally.
Advanced High Speed Flexible Mounter
4-38
4.8. Z-Axis Motor / Timing belt
4.8.1. Required tools
Tension gage
T Wrench (other tools supplied) or Hex Wrench
4.8.2. Z-Axis Motor / Timing belt replacement procedure
1. Manipulate the teaching box to move the head module to the front.
2. Close the PC as usual and turn off the main switch at the front of the machine.
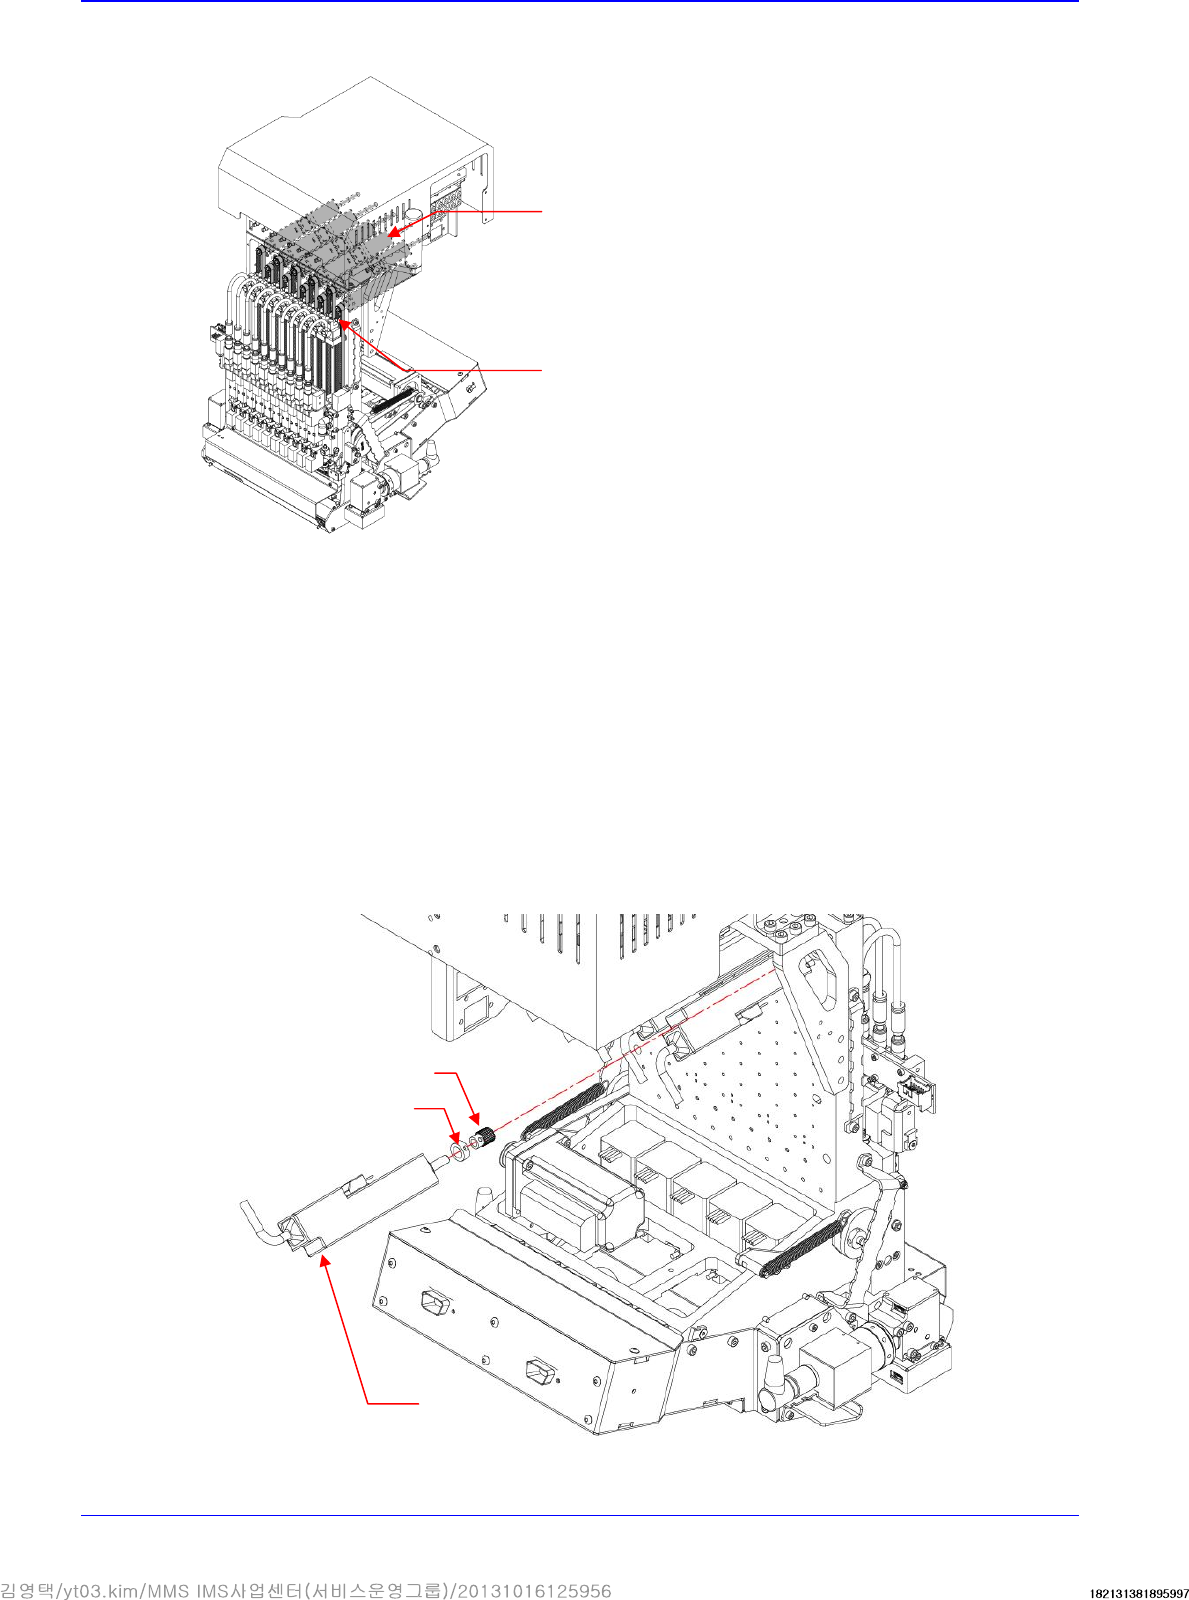
3. Remove the cable connected to the motor.
4. Unscrew the fixing bolts securing the motor bracket using a hex wrench and remove it.
5. Unscrew the set screw securing the pulley using a hex wrench and remove it.
Motor
Pulley
Bracket
Motor
Belt