00197490-03_SM_CP20-P-M2_EN保养维护.pdf - 第41页
5 DP drives 5.1 Replacing the DP drive Service Manual SIPLACE SpeedStar (C&P20 P / C&P20 M2) 03/2018 41 Fig.49: Board ► Carefully pull the board (1) off the connector (2) . Fig.50: Star carrier ► Remove the two…
5 DP drives
5.1 Replacing the DP drive
40 Service Manual SIPLACE SpeedStar (C&P20 P / C&P20 M2) 03/2018
Torques
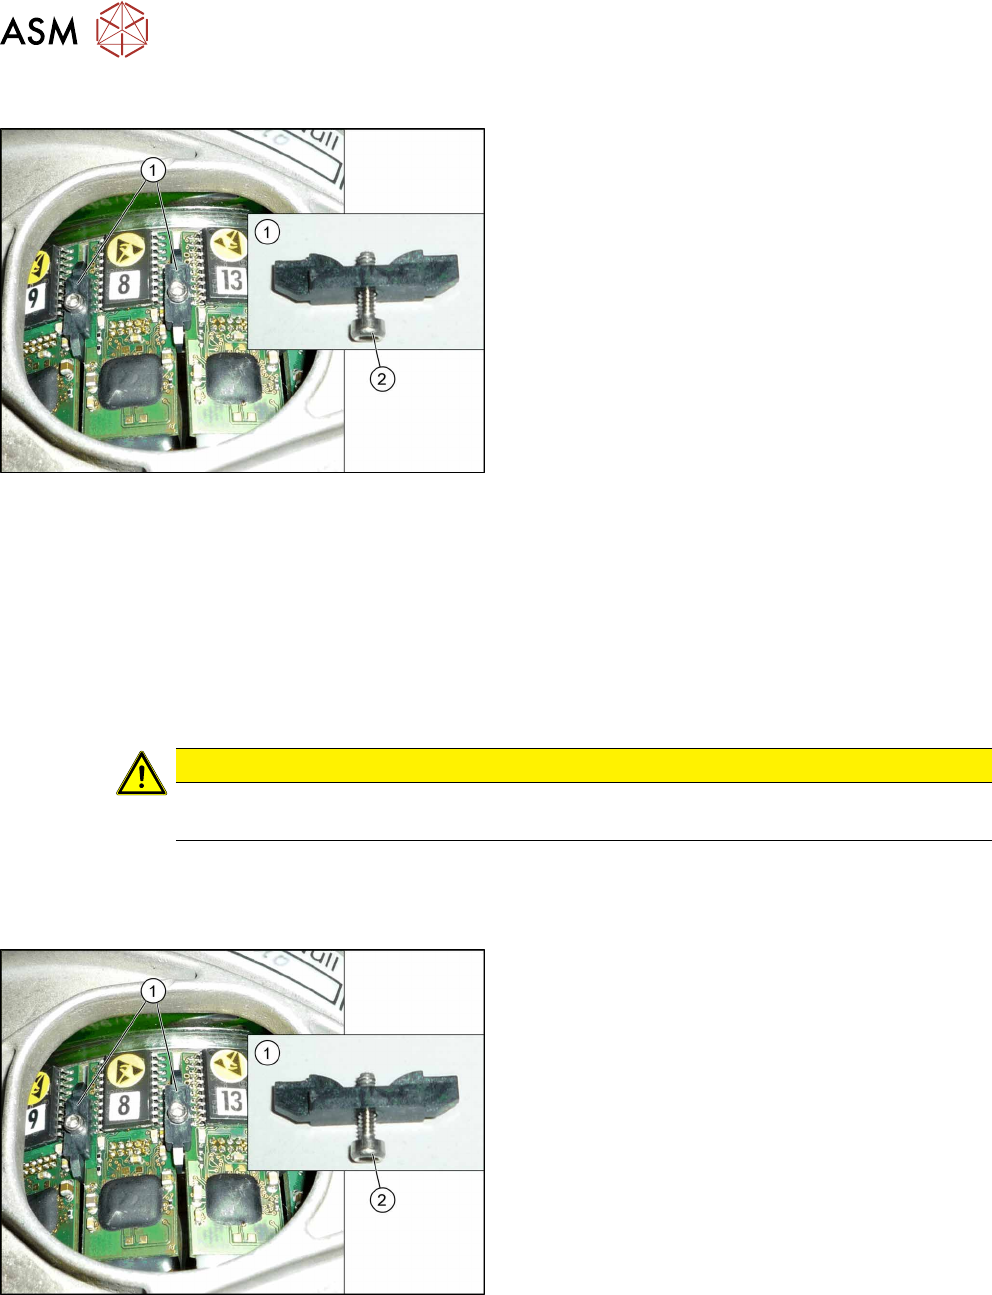
Fig.47: Clamping plate fastening screw
1. Clamping plates
2. Screw fastening the clamping plate
Torque: 0.1Nm
Preparation
► Remove the head from the machine. For details about removing and fitting the placement
head, refer to the service manual for your machine.
Fit the head on the head mount [03056231‑xx].
► Make sure that the component sensor protective cap is fitted.
1.1.3 "Safety instructions for the component sensor" [}6]
Removal
CAUTION
Tweezers, blunt 145mm size 3mm [00376493-xx]
Do not use any other tweezers for the hoses. If you do, the hoses could be damaged.
► Dismantle the holding circuit/aperture ring.
7.1 "Replacing the holding circuit/reflecting ring" [}61]
► Pull the nozzle off the segment.
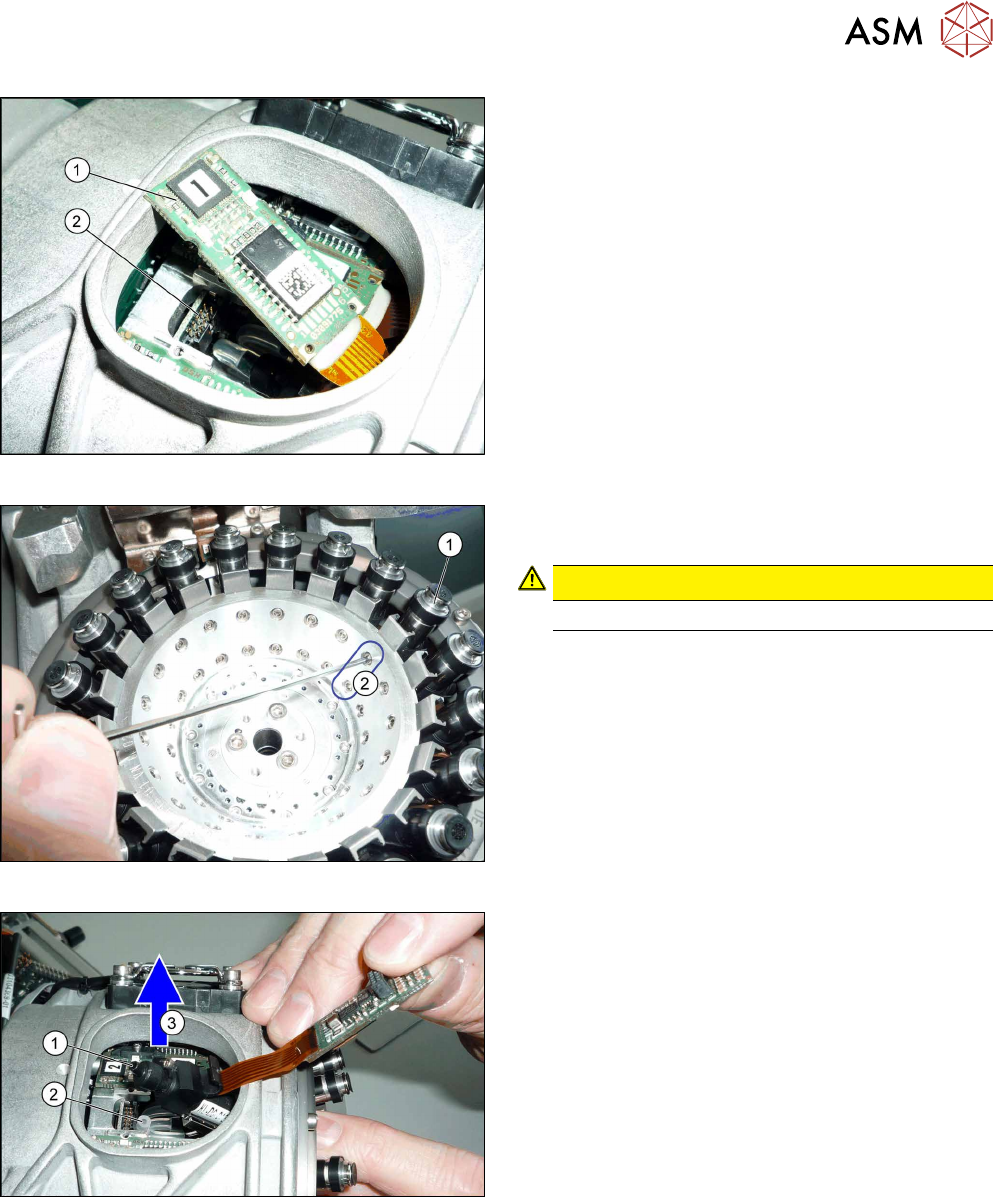
Fig.48: Clamping plates
► Remove the screws(2) fastening the clamping
plates(1), on the right and left of the relevant DP
drive and take off the clamping plates.
5 DP drives
5.1 Replacing the DP drive
Service Manual SIPLACE SpeedStar (C&P20 P / C&P20 M2) 03/2018 41
Fig.49: Board
► Carefully pull the board (1) off the connector (2).
Fig.50: Star carrier
► Remove the two screws (2) fastening the relevant
DP drive (1) to the inside of the star carrier.
CAUTION!
Take care not to lose the screws.
.
Fig.51: Hose
► Disconnect the hose (2) from the DP drive (1).
► (3) Remove the DP drive through the service
opening.
5 DP drives
5.1 Replacing the DP drive
42 Service Manual SIPLACE SpeedStar (C&P20 P / C&P20 M2) 03/2018
Installation
NOTICE
Check the hose
Before fitting the hose, check it for any damage and replace it if necessary.
► (See section5.2 "Replacing the DP drive hose" [}43].)
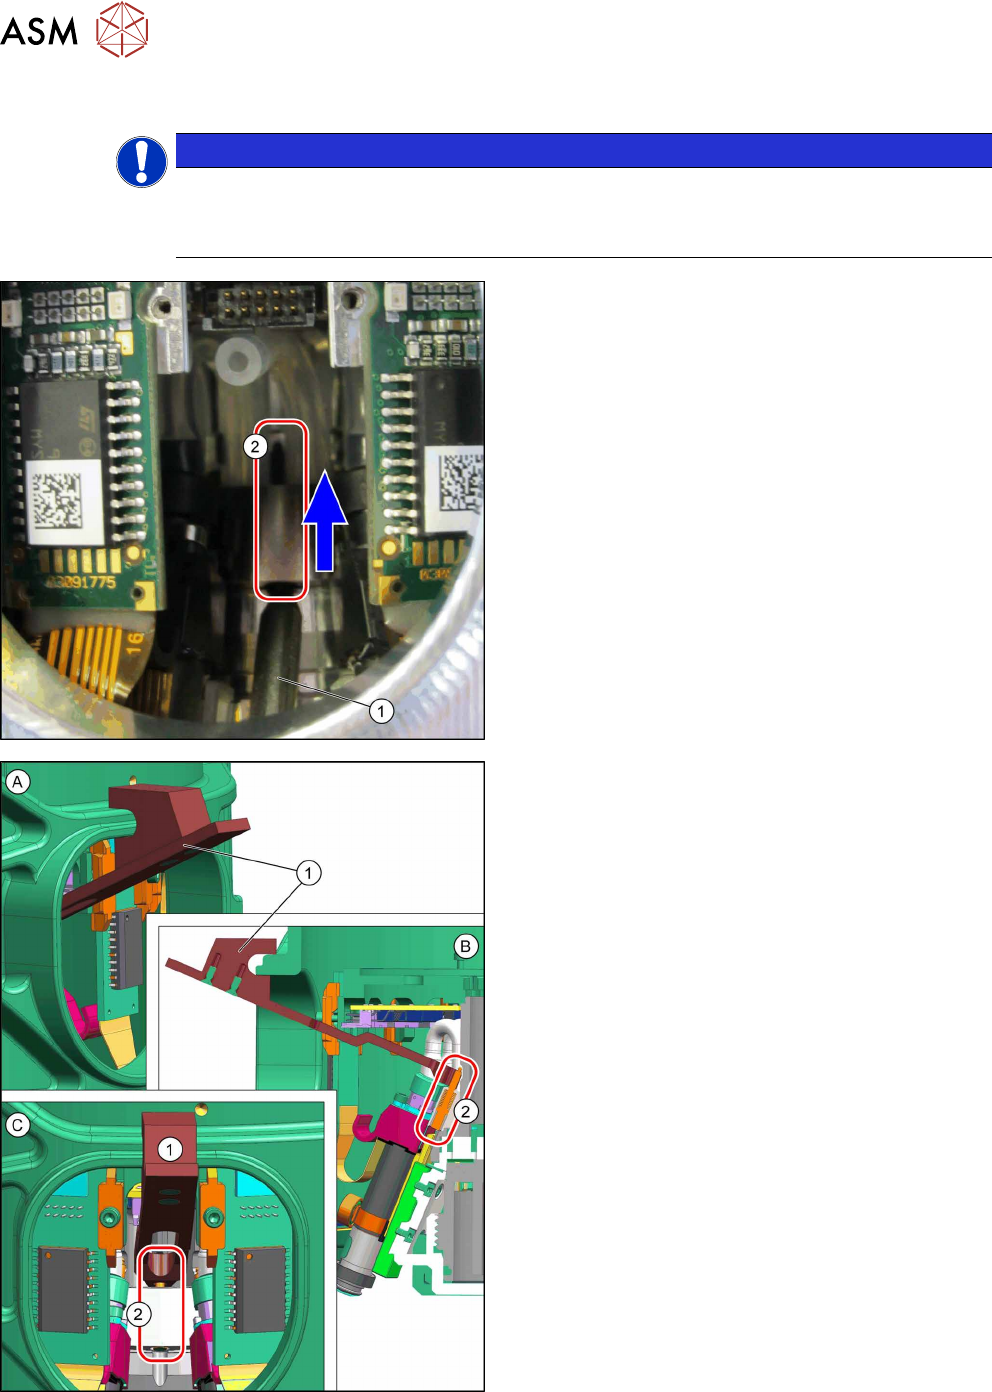
► Carefully push the spring pin(2) with a pair of
tweezers(1).
Insert the DP change tool as described in the following
steps.
Fig.52: Inserting the DP change tool
1. DP change tool
2. Spring pin
► (A) Make sure that the DP change tool is
anchored correctly to the head.
► (B) The pin must engage in the DP change tool.
► (C) The spring pin is held by the DP change tool
and is not visible.
► Coat the hose from inside with ethanol. This makes fitting to the star carrier easier. The nipple
is not directly visible.