00197490-03_SM_CP20-P-M2_EN保养维护.pdf - 第80页
9 Intermediate distributor 9.1 Replacing the intermediate distributor board 80 Service Manual SIPLACE SpeedStar (C&P20 P / C&P20 M2) 03/2018
9 Intermediate distributor
9.1 Replacing the intermediate distributor board
Service Manual SIPLACE SpeedStar (C&P20 P / C&P20 M2) 03/2018 79
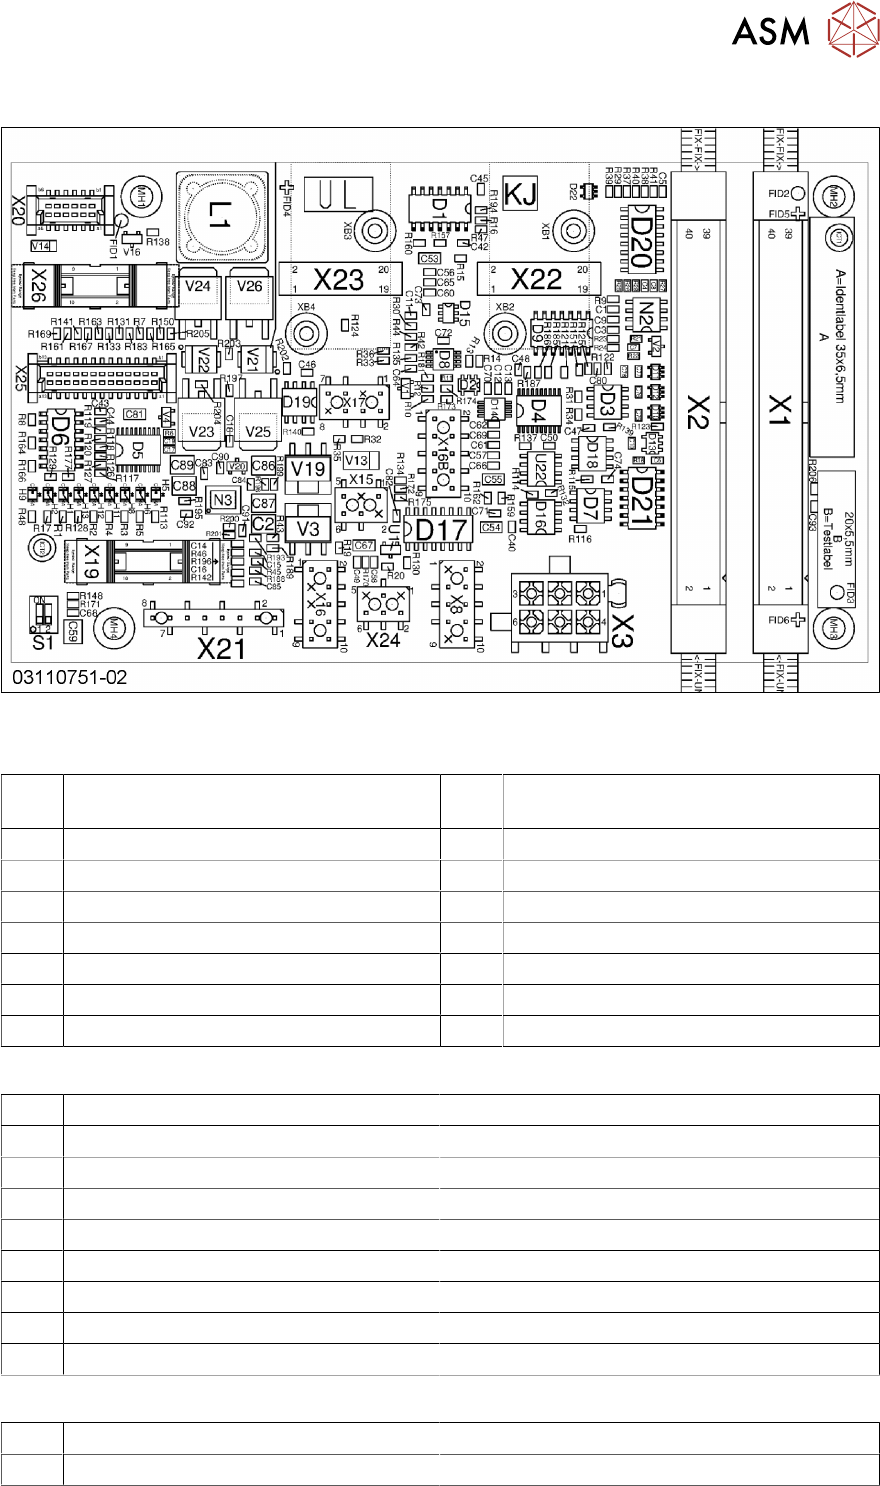
9.1.1 Intermediate distributor board for SIPLACE C&P20P [03110751-xx]
Fig.122: Intermediate distributor board for SIPLACE C&P20P
Connector
X1,X
2
Flat ribbon cable to the head adapter X3 Power supply for star motor
X8 Power supply for Z axis X15 Valve for return unit
X16 CAN bus X16b CAN bus
X17 Z axis light barrier down X19 Board for holding circuit vacuum sensor
X20 Power supply for ED distributor X21 Diagnosis connector
X22 Incremental star X23 Incremental Z axis
X24 Fan X25 Digital pressure control valve
X26 Component sensor
LEDs
H1 Fan Yellow
H2 Fan error Red
H5 +5 V Green
H6 +15 V Green
H8 +24 V Green
H9 Error 24 V DP Red
H11 24 V DP ON Yellow
H12 Return cylinder ON Yellow
H13 Status of pressure control valve Yellow
DIP switches
S1 DP Power ON 1-4 OFF
S1 Z down test 2-3 OFF

9 Intermediate distributor
9.1 Replacing the intermediate distributor board
80 Service Manual SIPLACE SpeedStar (C&P20 P / C&P20 M2) 03/2018

10 Miscellaneous
10.1 Replacing the handle
Service Manual SIPLACE SpeedStar (C&P20 P / C&P20 M2) 03/2018 81
10 Miscellaneous
10.1 Replacing the handle
Parts
●
Head handle SIPLACE C&P20P/M2 [03139524‑xx]
Overview
Fig.123: Head handle SIPLACE C&P20P/M2 [03139524‑xx]
1. Head handle SIPLACE C&P20P/M2
[03139524‑xx]
2. Three screws fastening the handle
(hexagon socket ISO4762M3x12)
Preparation
► Remove the head from the machine. For details about removing and fitting the placement
head, refer to the service manual for your machine.
Fit the head on the head mount [03056231‑xx].
► Make sure that the component sensor protective cap is fitted.
1.1.3 "Safety instructions for the component sensor" [}6]
Removal
► Remove the three screws fastening the handle and then take the handle off.
Installation
► Follow the removal instructions in reverse order for installation.