ACT - Accuracy Check Tool mit SSW 6xx User Manual 2017.pdf - 第111页
ACT with SSW 6xx / User Manual 07/2017 Edition 47 4.2.5 Working with the ACT Function under Stati on Software 605.xx NOTES On SIPLACE X and D ma chines running station software 605. xx (platform 2+), it is necessary to i…
ACT with SSW 6xx / User Manual 07/2017 Edition
46
4.2.4 Loading the Plate into the Measuring Machine
4.2.4.1 D- and X-Series
On the SIPLACE D- and X-series machines the glass plate can be inserted into the conveyor by
opening the covers of the input section (extension kit) or the machine cover.
► Insert the plate directly into the input section of the measuring machine so that the sensor is
activated.
► Press Start.
The board is automatically moved into the placement area and gets placed.
Thereafter, the measurement is automatically started, see section 4.2.5.
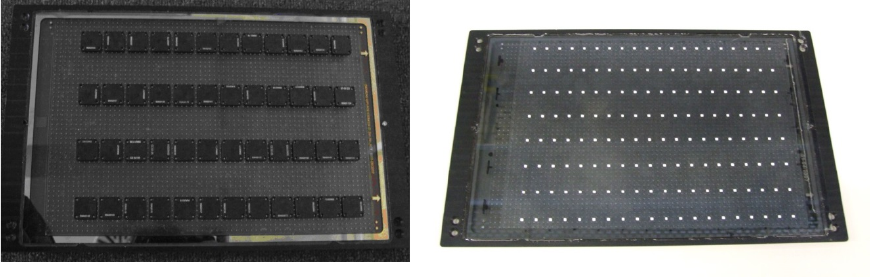
Figure 4-20 and Figure 4-21 show an assembled ACT plate, in one example with glass
components and in the other with ceramic components.
Figure 4-20: Measuring plate with placed glass comp. Figure 4-21: Measuring plate with placed ceramic comp.
ACT with SSW 6xx / User Manual 07/2017 Edition
47
4.2.5 Working with the ACT Function under Station Software 605.xx
NOTES
On SIPLACE X and D machines running station software 605.xx (platform 2+), it is
necessary to install additional software on the station computer to be able to use the
ACT.
The installation is described in chapter 5.
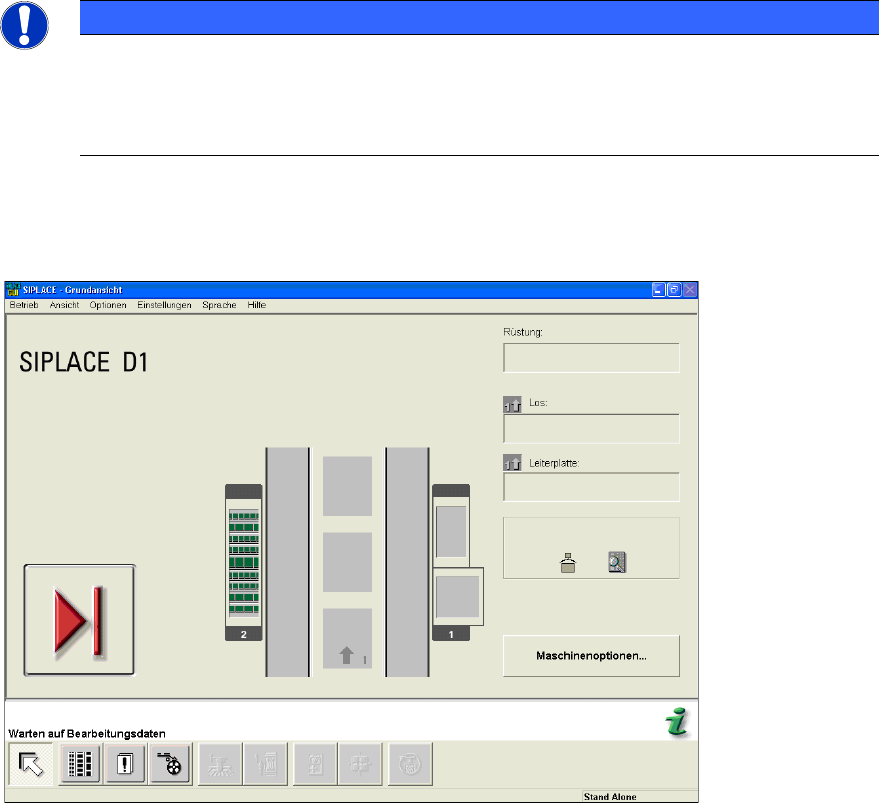
► Switch on the machine.
The station computer will boot. The user interface basic view for the SC program will soon appear.
Figure 4-22: Basic view of user interface GUI at the station
► From the Optionen (Options) menu, select Bedienebene… (Access level...) (Abbildung 4-23).
The Bedienebene (Access level) dialog box opens.
ACT with SSW 6xx / User Manual 07/2017 Edition
48
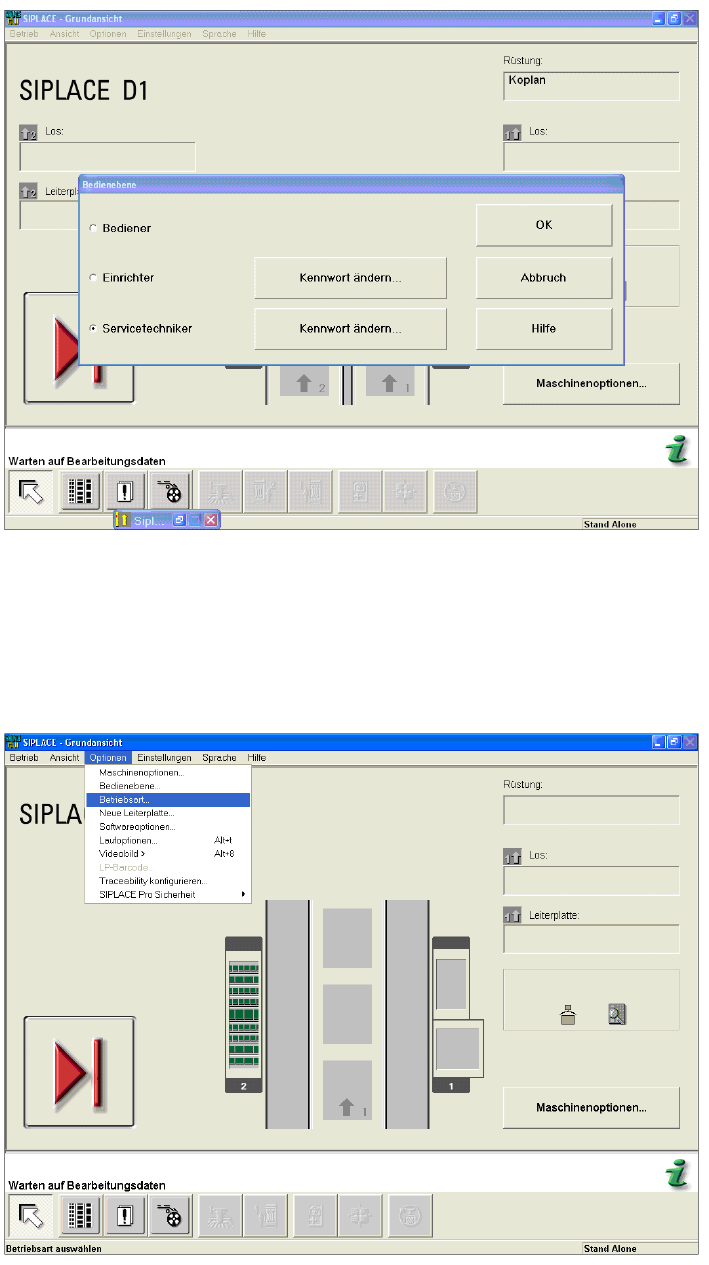
Figure 4-23: Dialog box: Access level (example SIPLACE D1)
► Enable the Servicetechniker (Service) access level and confirm your entry with OK.
If a password has been defined, a dialog box for entering the password opens.
► Enter the password and confirm with OK.
► Select the Optionen - Betriebsart...(Options − Control mode...) menu items.
Figure 4-24: Basic view of user interface for SC program (example SIPLACE D1)
The Betriebsart (Control mode) dialog box opens.
► Select SIPLACE Pro and confirm the setting with OK.