SMN-Tape Feeder Manual(Eng Ver5).pdf - 第30页
Samsung SM-Series Pneumatic T ape Feeder Users' Manual 1-12 Manual Feeding Figur e 1-10. Manual feeding butt on (8~16mm) Figur e 1-1. Manual feeding butt on (8~16mm) Operation of driving feeder with manual switc…
Overview
1-11
1.4.2. IT Function
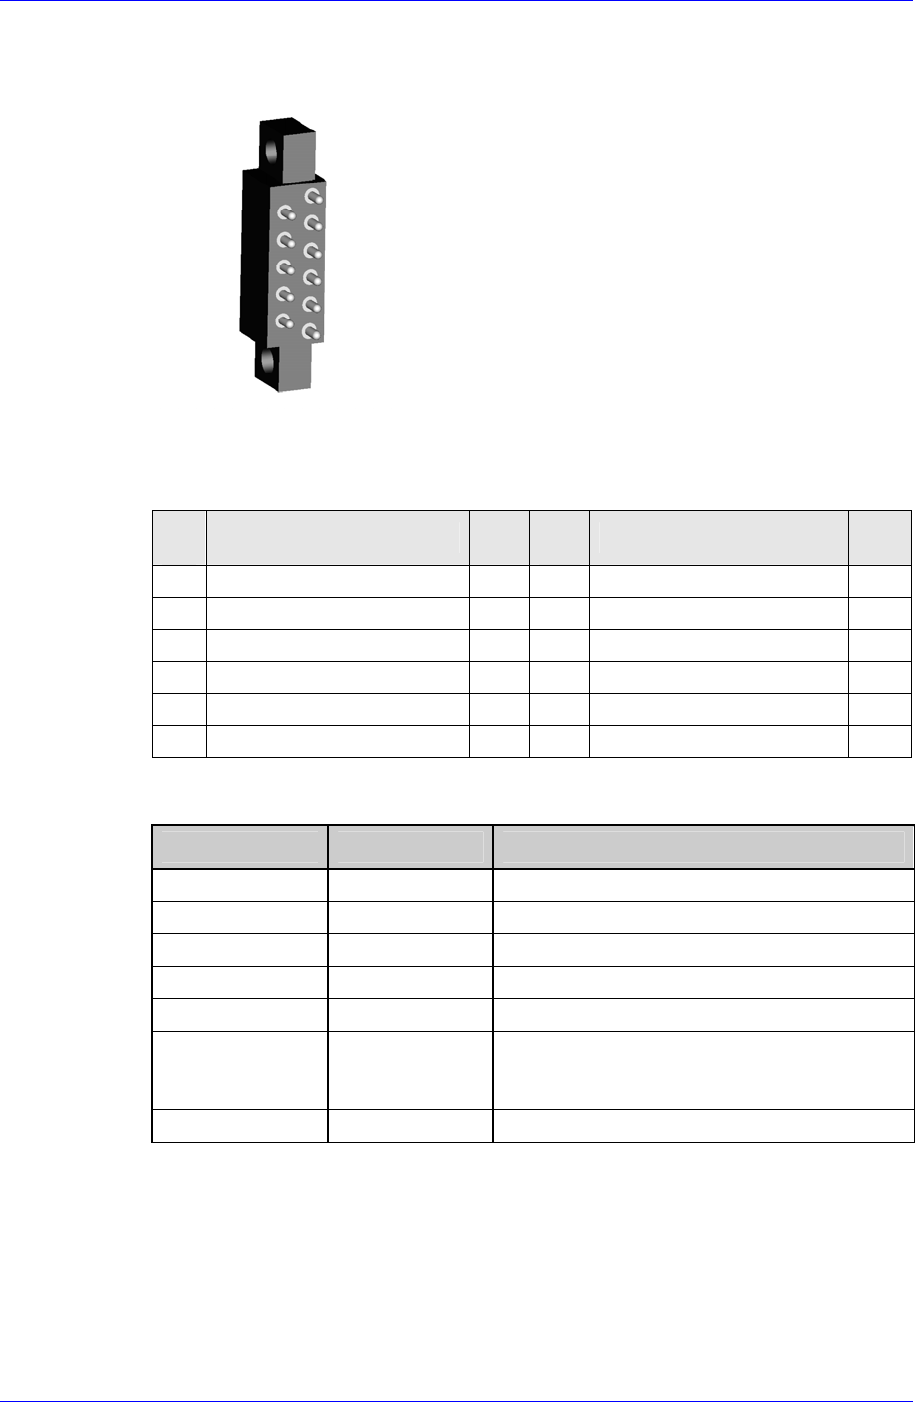
Probe Pin Components
1
3
5
7
9
11
2
4
6
8
10
Figure 1-9. IT Probe Pin Layout
Table 1-6. Probe Pin Assignment (IT)
Pin
No.
Function Use
Pin
No.
Function Use
1 ID0 O 7 Indexing Signal O
2 ID1 O 8 Clamping Signal O
3 D24V O 9 Indexing Command O
4 Communication O 10 F24V O
5 Communication O 11 F24G O
6 D24G O
LED Status
Feeder State LED Display * To indicate:
Not Powered Off Power is not supplied to the feeder
Normal(Ready) Green Feeder is ready
Not Connected Green Blink Not connected to CAN Master
Feeding(Busy) Orange Parts supply in progress (Busy)
Warning Orange Blink Feeder is in warning status (Warning)
Mismatching Red Blink Discrepancy between the feeder
arrangement information in the PCB program
and the actual feeder arrangement
Error Red Feeder is in error status (Error)
Samsung SM-Series Pneumatic Tape Feeder Users' Manual
1-12
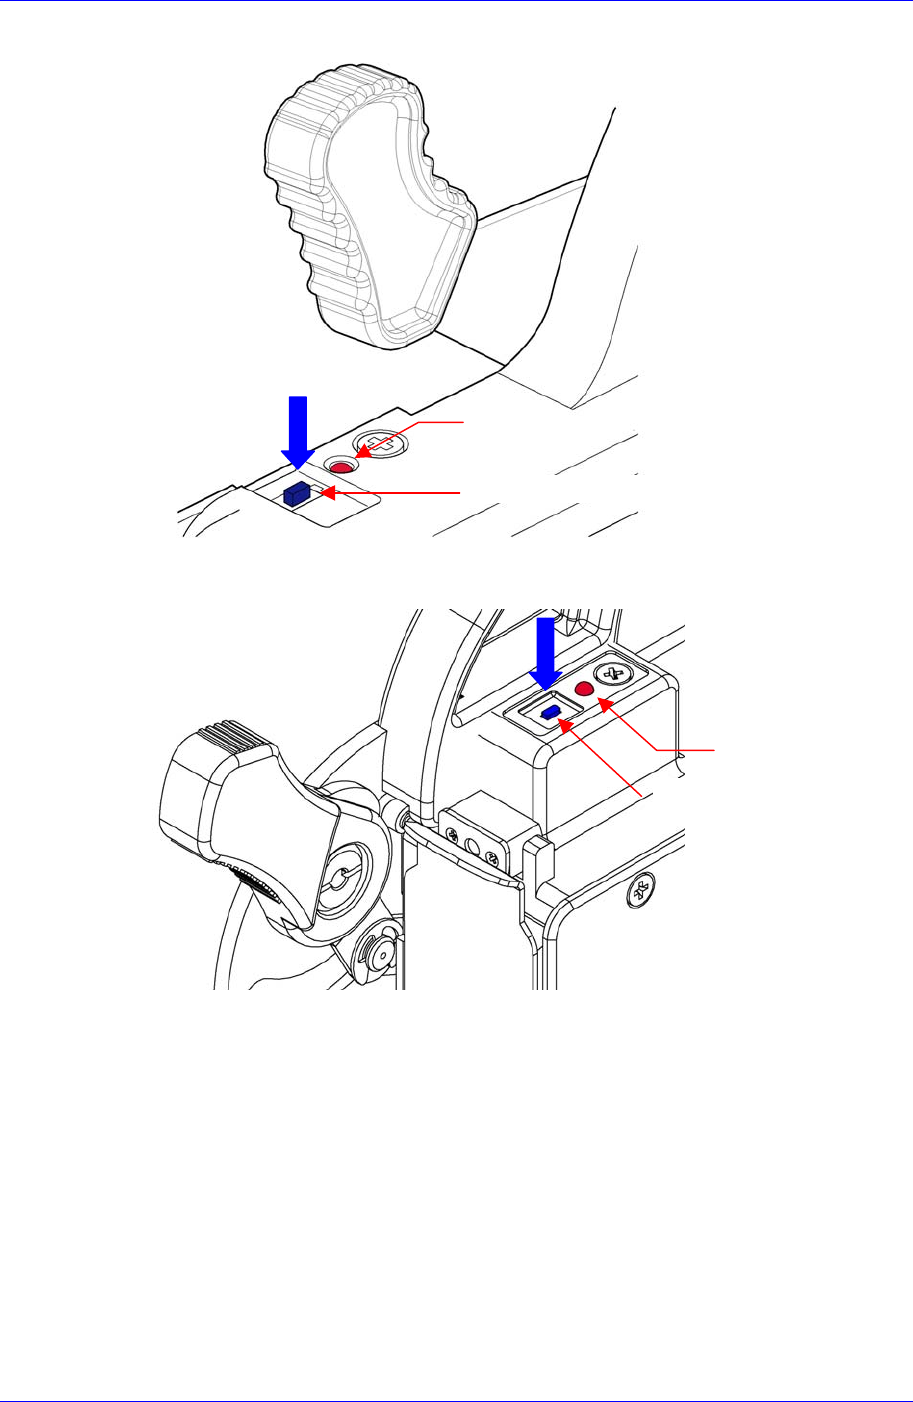
Manual Feeding
Figure 1-10. Manual feeding button (8~16mm)
Figure 1-1. Manual feeding button (8~16mm)
Operation of driving feeder with manual switch is possible only in IT feeder.
Power must be supplied at this time.
One click initiates one operation cycle.
- Shutter Open Step + Shutter Close Step(Feeding).
- At the first click, there is a time delay of 500msec.
While being pressed, continuous feeding is performed.
Delay time between the steps is intended to secure sufficient feeding time based
on the large feeder (72mm), which has a lengthy feeding time.
- 500 msec
State LED
Manual Feeding Switch
State LED
Manual Feeding Switch
Operation of the Tape Feeder
2-1
Chapter 2. Operation of the Tape Feeder
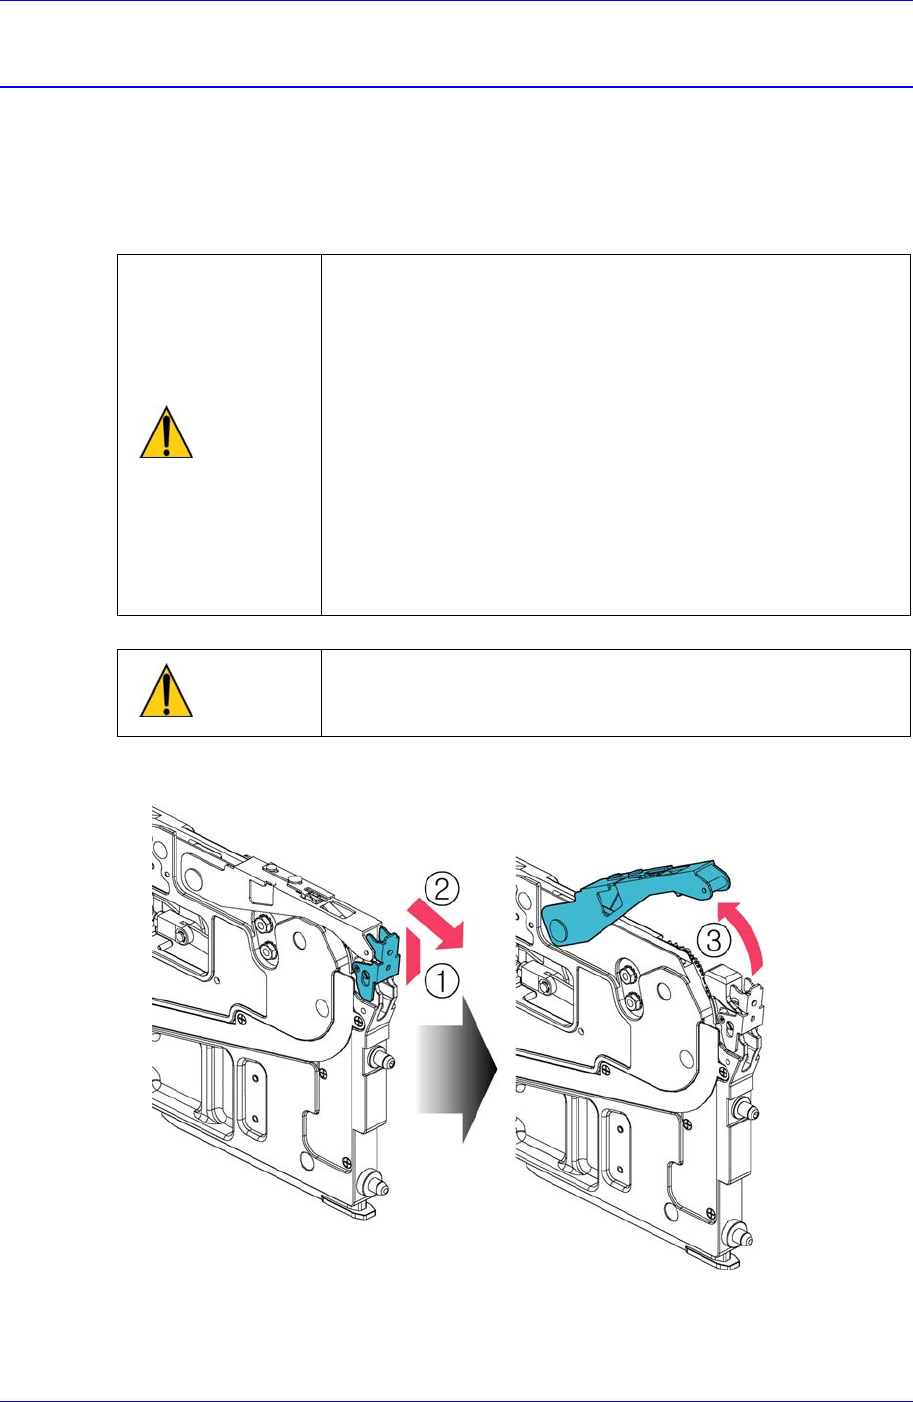
2.1. Installing the Tape
2.1.1. Opening Tape Guide
① Lift up, ② rotate and remove the locker in the direction of the arrow, and ③ open by
lifting up the tape guide.
Caution
Be sure to mount tapes in a safe place and make
sure that fingers don’t get stuck during the process.
Do not handle the feeder with excessive force.
Be sure to follow the specified sequence.
When transporting a large feeder, be careful not to
drop it.
Be sure to use a standard tape such as JIS or EIA for
the feeder.
Use only the right size component reel tape for the
feeder.
If the front part and locker of the tape guide are
deformed, the part pickup rate may be reduced.
Therefore, exercise great care when storing and
using the feeder.
Caution
Dismantling the feeder could cause damage or injury. If a
feeder malfunctions, please contact our designated local
agent.
8mm Tape Feeder
Figure 2-1. Opening the tape guide of the SM 8mm tape feeder