Board-Inverter-Operation-Manual-REV-F-2.pdf - 第33页
BI2000 Boa rd Invert er Manual Revision F / January 2022 Page 33 of 37 Main Air R egul ator • 201B Make sure th ere is n o water in th e bottom, d rain as necessar y. 72B Figure 33 : M ain Ai r R egul ator
BI2000 Board Inverter Manual
Revision F / January 2022
Page 32 of 37
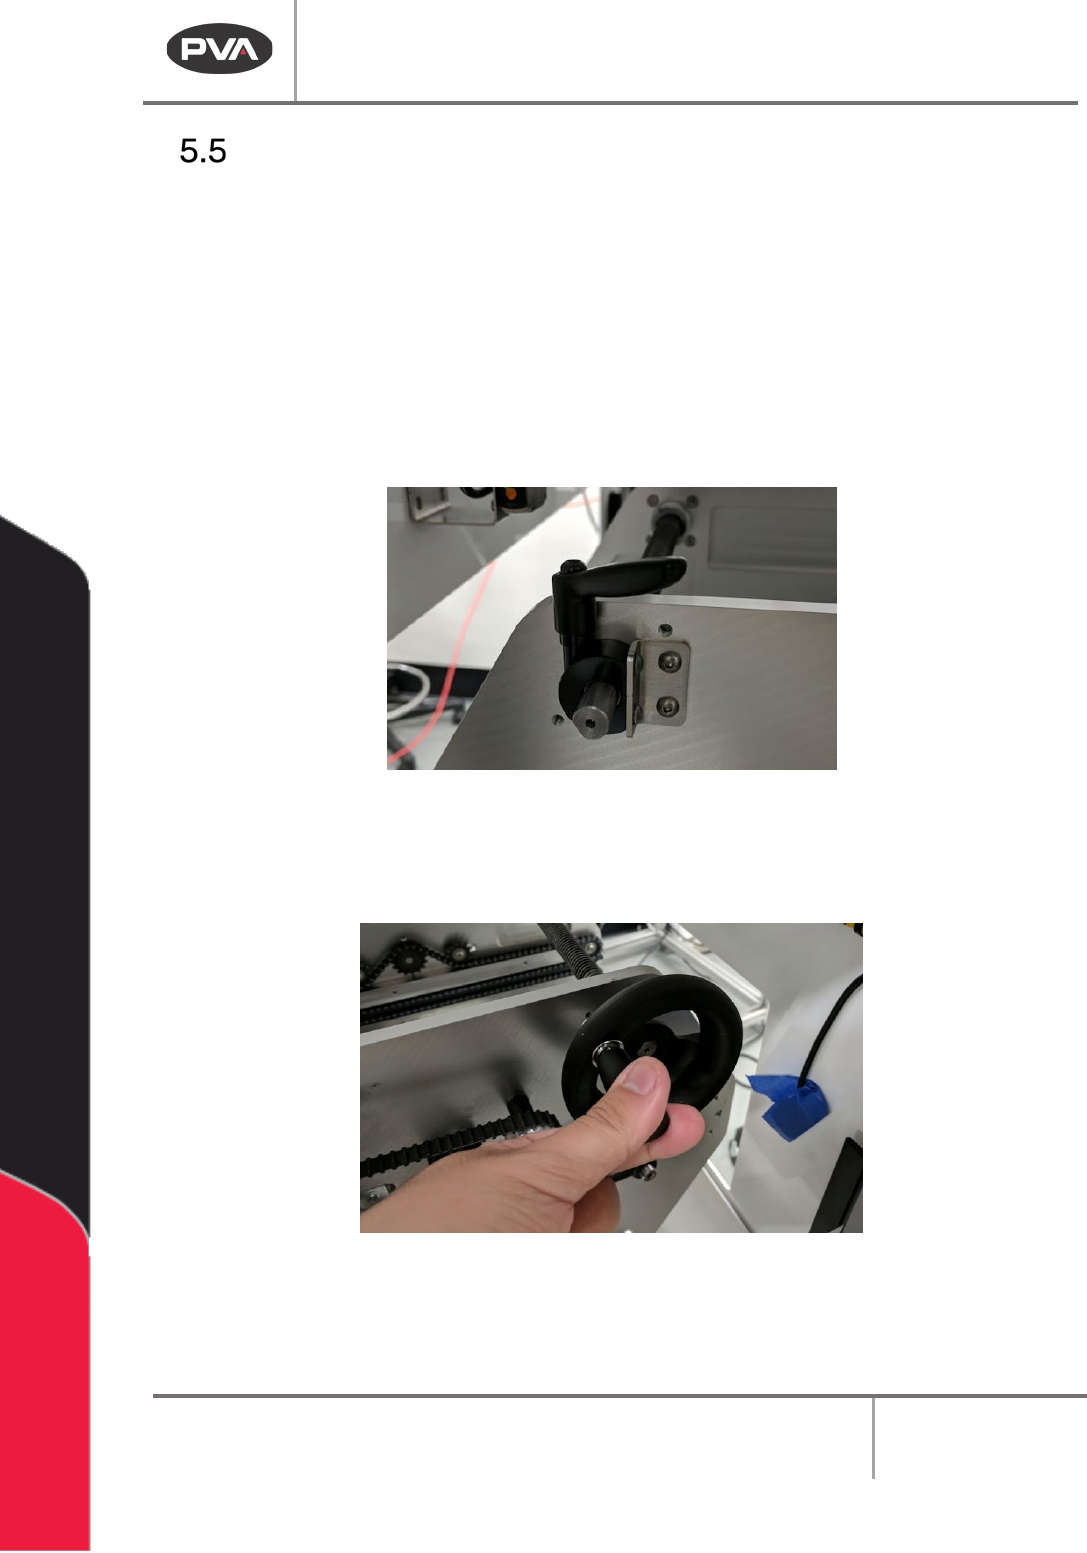
Width Adjustment
343BTo adjust the width of the rear conveyors on units that do not have the “Auto Adjust”
option, perform the procedure below.
Note: This is for systems that do not have automatic width adjust.
1.
196BEngage the “Emergency Stop” button.
2.
197BTurn the main air pressure to “Off”.
3.
198BTurn the adjustment lock counterclockwise to loosen it.
70BFigure 31: Adjustment Lock
4. 199BTurn the adjustment handle counterclockwise to increase the width or clockwise to
decrease the width of the of the conveyor.
71BFigure 32: Width Adjustment Handle
5. 200BWhen the necessary width is achieved, turn the adjustment lock clockwise to tighten.
BI2000 Board Inverter Manual
Revision F / January 2022
Page 33 of 37
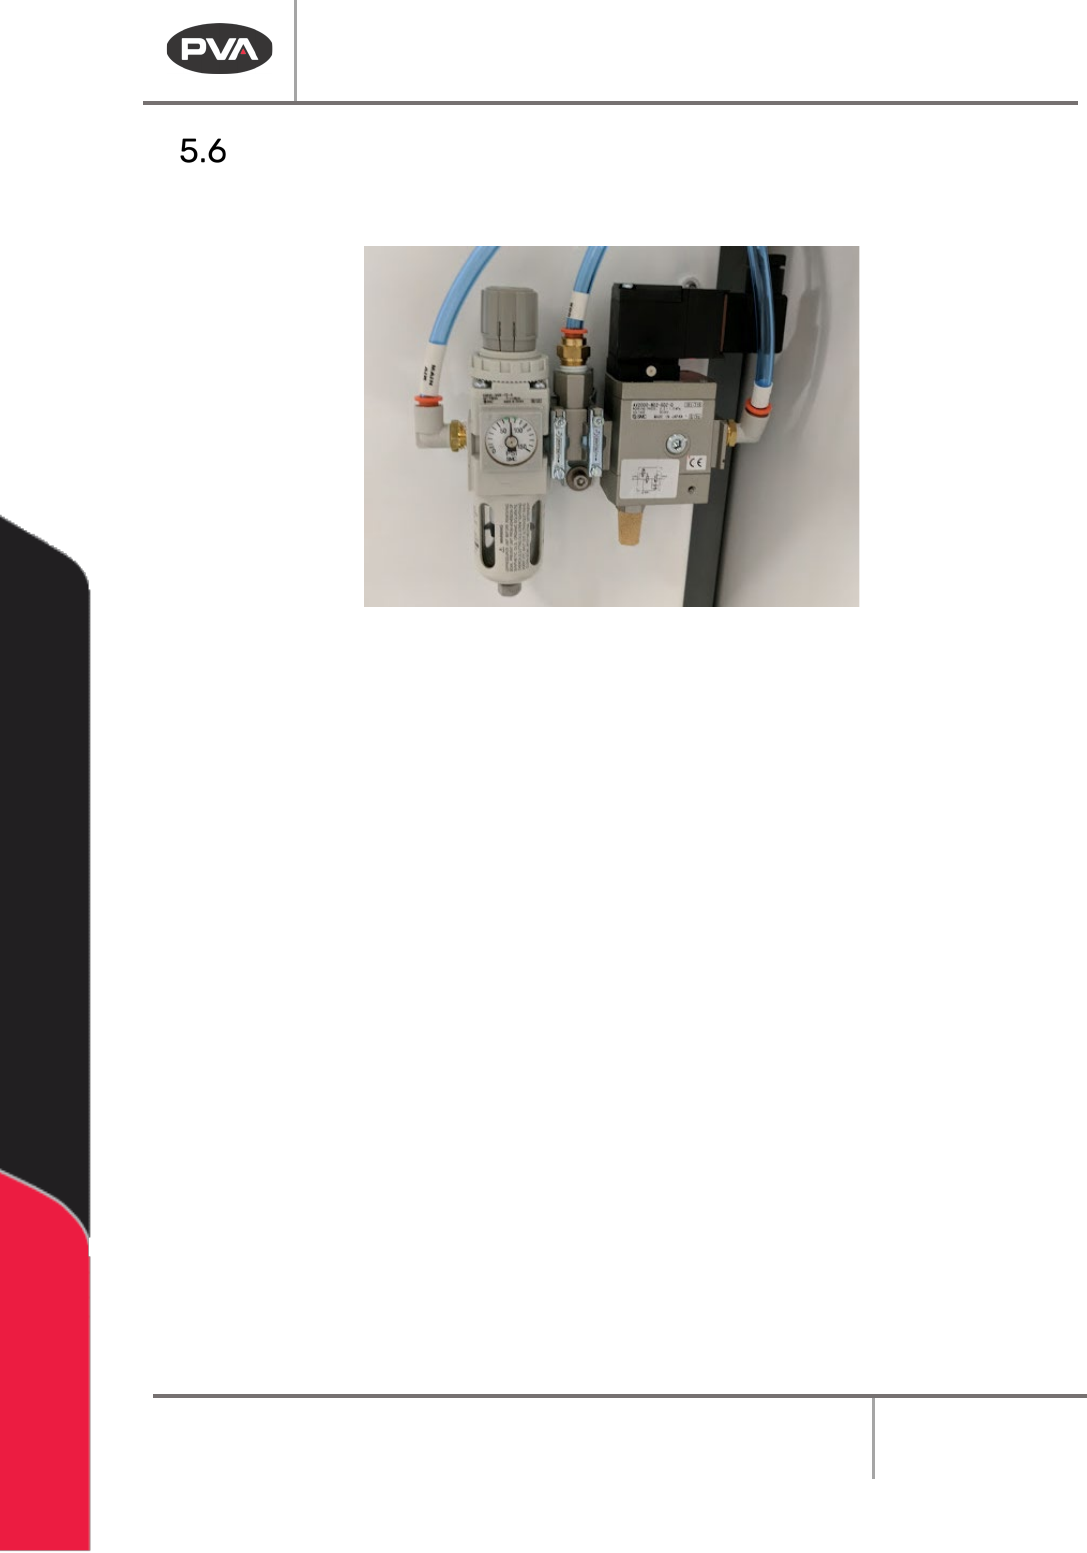
Main Air Regulator
• 201BMake sure there is no water in the bottom, drain as necessary.
72BFigure 33: Main Air Regulator

BI2000 Board Inverter Manual
Revision F / January 2022
Page 34 of 37
Troubleshooting
73B
Troubleshooting
Problem
74B
Possible Cause
75B
Corrective Action
0B
The machine is
On and the
operator
interface has no
power
•
1BCables are loose or not
connected
• 2BA fuse is blown
•
3BExamine the cable connections
and tighten loose connections
• 4BCheck the FU-1 fuse in the
electrical enclosure
5BBoard does not
transfer to or
from adjacent
station
•
6BThe SMEMA
connection is broken
• 7BA module in the line
is turned off
• 8BA fuse is blown
•
9BExamine the cable connections
and tighten loose connections
• 10BTurn the module on
• 11BCheck fuses FU-3 and FU-4 in
the electrical enclosure
12BThe part-in-place
sensor fails
•
13BA cable is loose or not
connected
• 14BThe sensor is positioned
incorrectly
•
15BThe sensor is out of
adjustment
•
16BExamine the cable connections
and tighten loose connections
• 17BMove the sensor
•
18BAdjust the sensor
19BConveyor does
not operate or
communication
error
•
20BConveyor belt stuck to
rails
• 21BChain does not operate
smoothly
• 22BCable is loose or not
connected
• 23BControl relay not on, or
Power On light not on
• 24BA fuse is blown
•
25BClean or replace belt
• 26BApply lubricant to the chain
• 27BExamine the cable connections
and tighten loose connections
• 28BCheck the system voltage and
electrical connections
• 29BCheck fuses FU-10 and FU-11 in
the electrical enclosure
30BPneumatic
position failure
•
31BNo air pressure
• 32BThe air lines are kinked
or torn
•
33BThe sensor is positioned
incorrectly
•
34BThe position sensor is
out of adjustment
•
35BThe rotary is out of
adjustment
•
36BMake sure main air regulator and
main air are both “On” and have
pressure
• 37BRepair or replace the lines
•
38BReplace the sensor
•
39BMove the sensor
•
40BAdjust the rotary