EdisonStandardOwnersManual-RevA-20170818B.pdf - 第113页
Edison Printer User Manual (Part Number 1023838) P RINTER O PERATIONS Rev. A 113 Copyright © 2017 ITW EAE All rights reserved. No part of the contents of this manual ma y be reproduced, copied or transmitted in any form …
PRINTER OPERATIONS Edison Printer User Manual (Part Number 1023838)
112 Rev. A
Copyright © 2017 ITW EAE
All rights reserved. No part of the contents of this manual may be reproduced, copied or transmitted in any form or by any
means including graphic, electronic, or mechanical methods or photocopying, recording, or information storage and
retrieval systems without the written permission of ITW EAE, unless for purchaser's personal use.
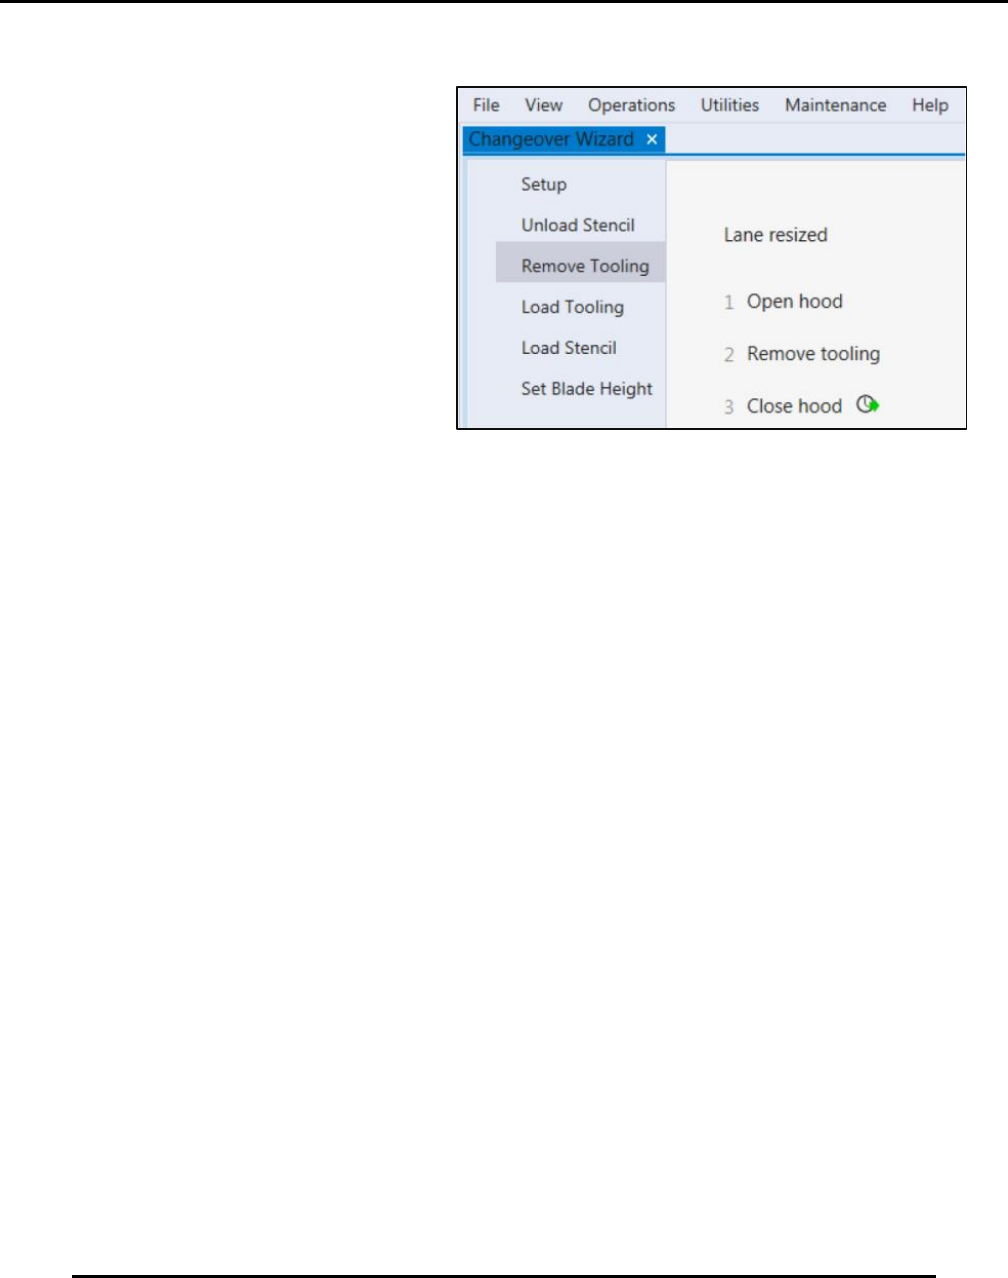
5.5.2.3. Remove Tooling
Navigate to Remove Tooling to position
printer components (Figure 99). The
screen displays the steps required for
removing any tooling from the worknest.
Figure 99. Remove tooling screen.
Edison Printer User Manual (Part Number 1023838) PRINTER OPERATIONS
Rev. A 113
Copyright © 2017 ITW EAE
All rights reserved. No part of the contents of this manual may be reproduced, copied or transmitted in any form or by any
means including graphic, electronic, or mechanical methods or photocopying, recording, or information storage and
retrieval systems without the written permission of ITW EAE, unless for purchaser's personal use.
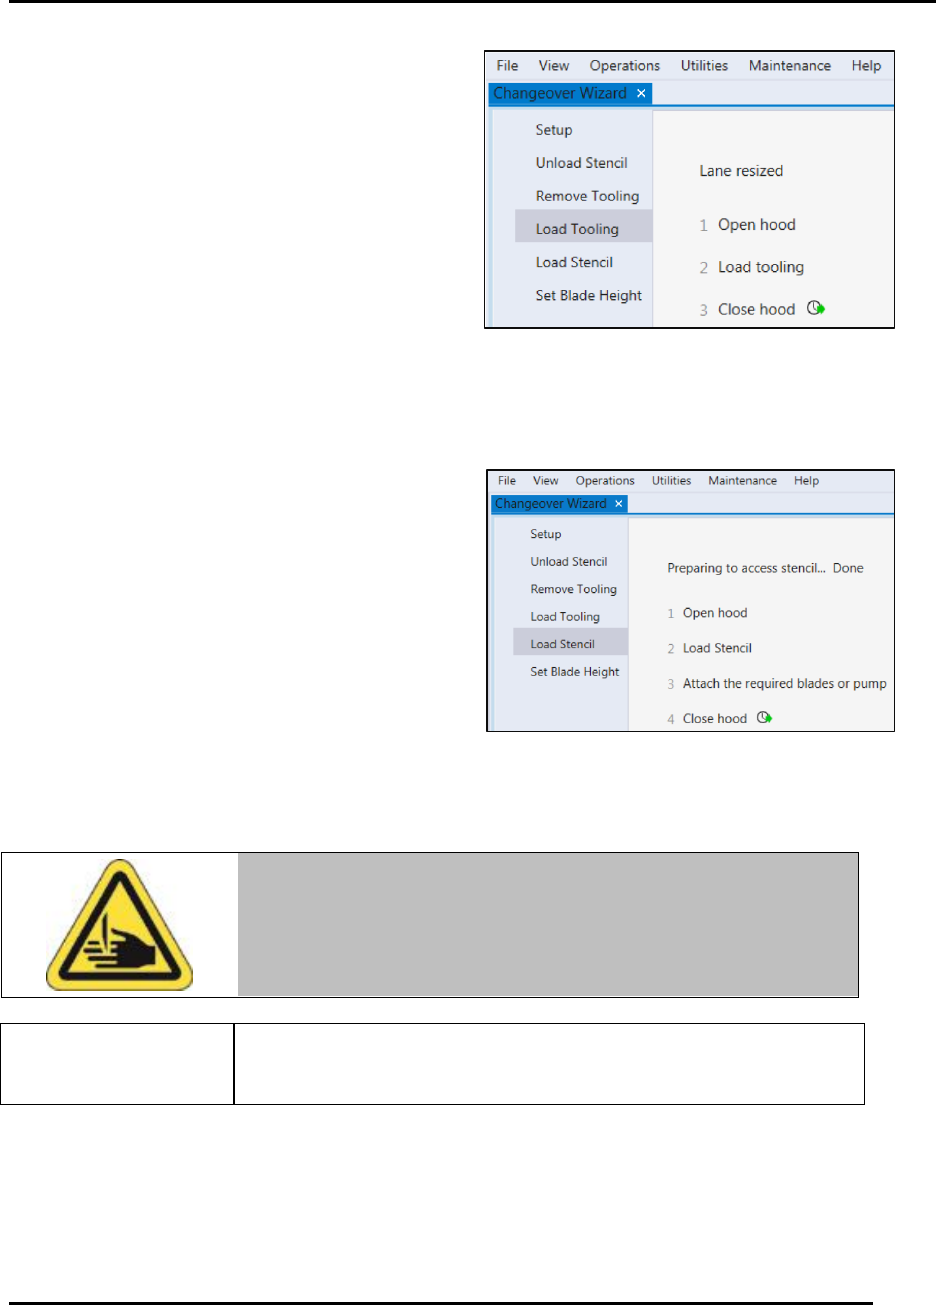
5.5.2.4. Load Tooling
Navigate to Load Tooling to gain access to the
worknest to add the required support tooling for
production (Figure 100).
5.5.2.5. Load Stencil
Navigate to Load Stencil to instruct the printer to position printer components for access to
stencil (Figure 101). Steps for loading and unloading the stencil appear on the screen. Install
required blades or pump at this as well.
When loading the stencil into the printer, push the
stencil all the way to the back of the frame.
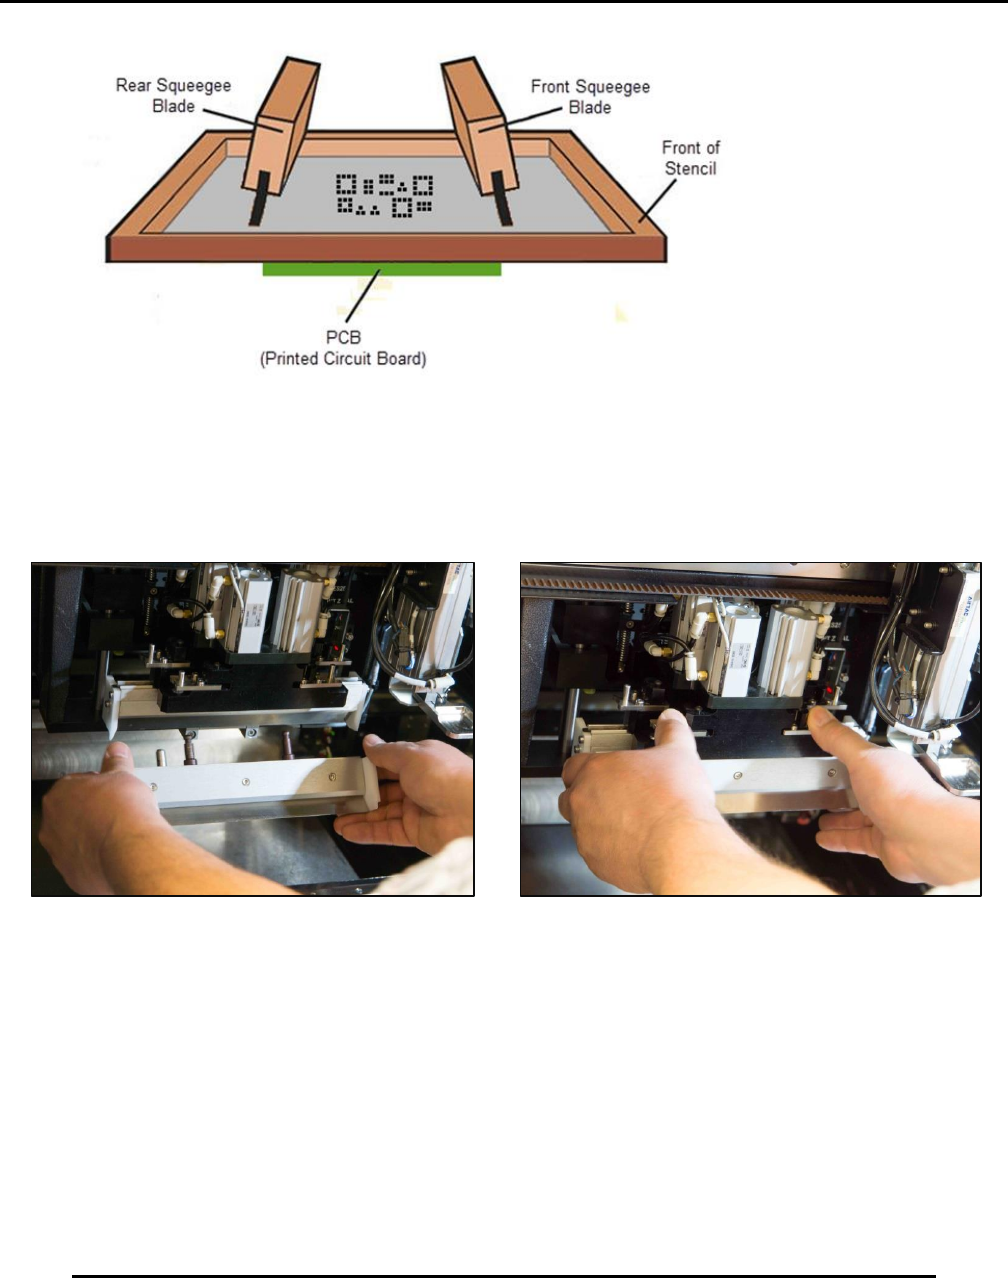
5.5.2.5.1. Attach Blades
Jog the print head forward first to bring the stencil shelf fully
forward.
1. Slide the rear blade into the rear holder, ensuring the blade is angled toward the back of the
stencil (Figure 102).
Warning!
Blade edges are sharp and can cut. Handle blades with care. Failure
to comply may result in injury.
Figure 100. Load tooling screen.
Figure 101. Load stencil screen.
PRINTER OPERATIONS Edison Printer User Manual (Part Number 1023838)
114 Rev. A
Copyright © 2017 ITW EAE
All rights reserved. No part of the contents of this manual may be reproduced, copied or transmitted in any form or by any
means including graphic, electronic, or mechanical methods or photocopying, recording, or information storage and
retrieval systems without the written permission of ITW EAE, unless for purchaser's personal use.
Figure 102. Rear blade placement.
2. Close the quick-release to the holder (Figure 103).
3. Repeat steps for the front blade, being careful to angle the front blade toward the front of the
stencil.
Figure 103. Position and insert front blades, then close quick-release.