EdisonStandardOwnersManual-RevA-20170818B.pdf - 第135页
Edison Printer User Manual (Part Number 1023838) M AINTENANCE Rev. A 135 Copyright © 2017 ITW EAE All rights reserved. No part of the contents of this manual ma y be reproduced, copied or transmitted in any form or by an…
MAINTENANCE Edison Printer User Manual (Part Number 1023838)
134 Rev. A
Copyright © 2017 ITW EAE
All rights reserved. No part of the contents of this manual may be reproduced, copied or transmitted in any form or by any
means including graphic, electronic, or mechanical methods or photocopying, recording, or information storage and
retrieval systems without the written permission of ITW EAE, unless for purchaser's personal use.
6.2. Preventive Maintenance Procedures
6.2.1. Paste Dispenser Preventive Maintenance
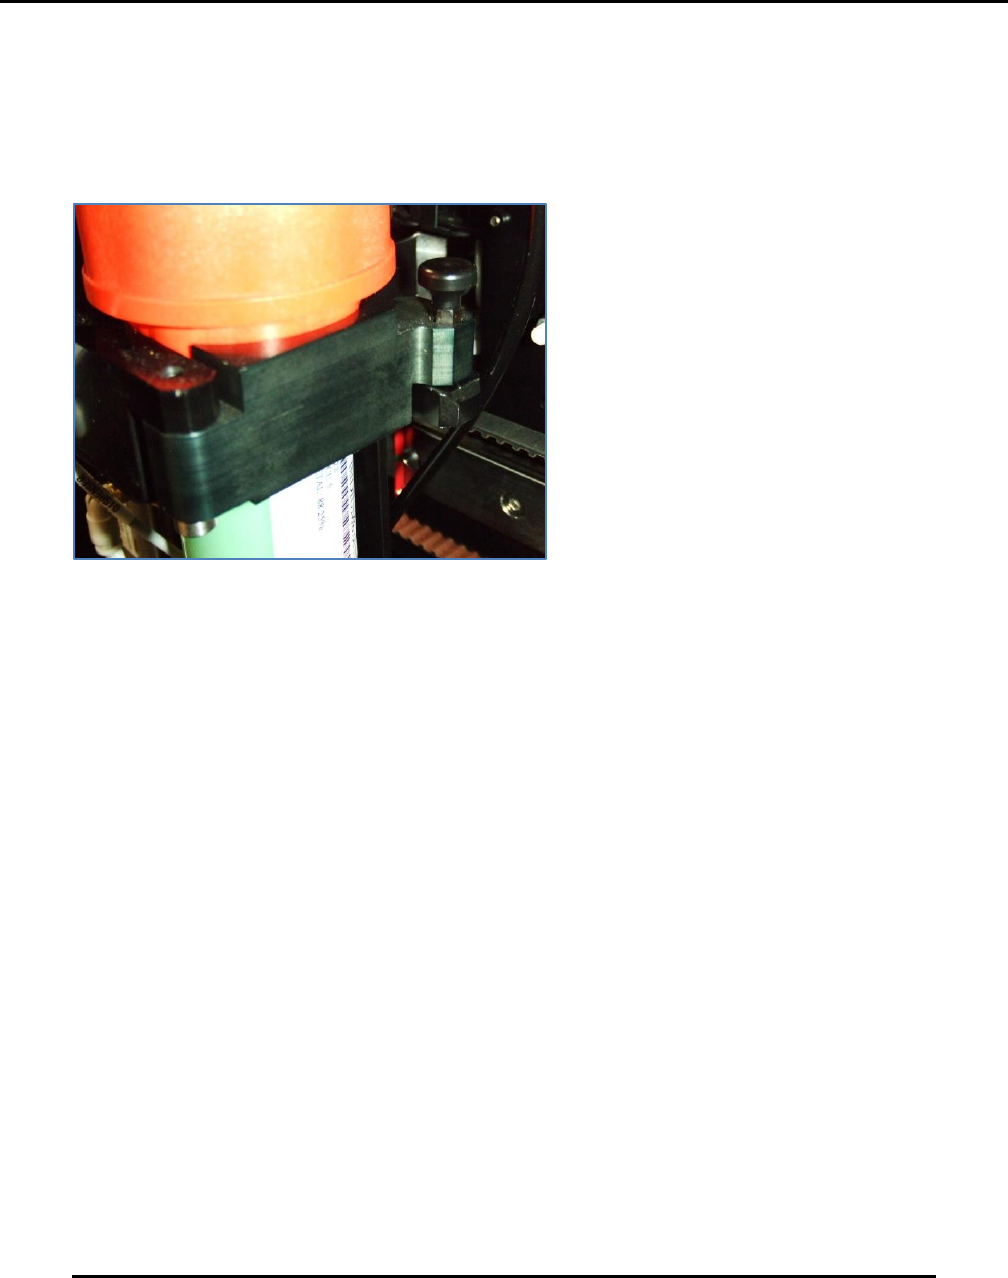
6.2.1.1. Inspect Paste Dispenser Cartridge Latch—Maintain Monthly
Figure 134. Inspect Paste Dispenser Cartridge Latch.
Introduction
Inspect and clean the paste dispenser cartridge latch monthly (Figure 134).
Estimated Completion Time
Less than 5 minutes.
Procedure
The paste dispenser cartridge latch is an area where paste build up can cause latch failure.
Remove any solder paste present.
Remove the cartridge from the paste dispenser assembly.
Examine the swing latch assembly
o Open and close the assembly to ensure proper security to the cartridge when
installed.
Clear using isopropyl alcohol.
Apply two drops of light oil (such as 3-in-One oil) to the latch pivot for smooth operation.
Edison Printer User Manual (Part Number 1023838) MAINTENANCE
Rev. A 135
Copyright © 2017 ITW EAE
All rights reserved. No part of the contents of this manual may be reproduced, copied or transmitted in any form or by any
means including graphic, electronic, or mechanical methods or photocopying, recording, or information storage and
retrieval systems without the written permission of ITW EAE, unless for purchaser's personal use.
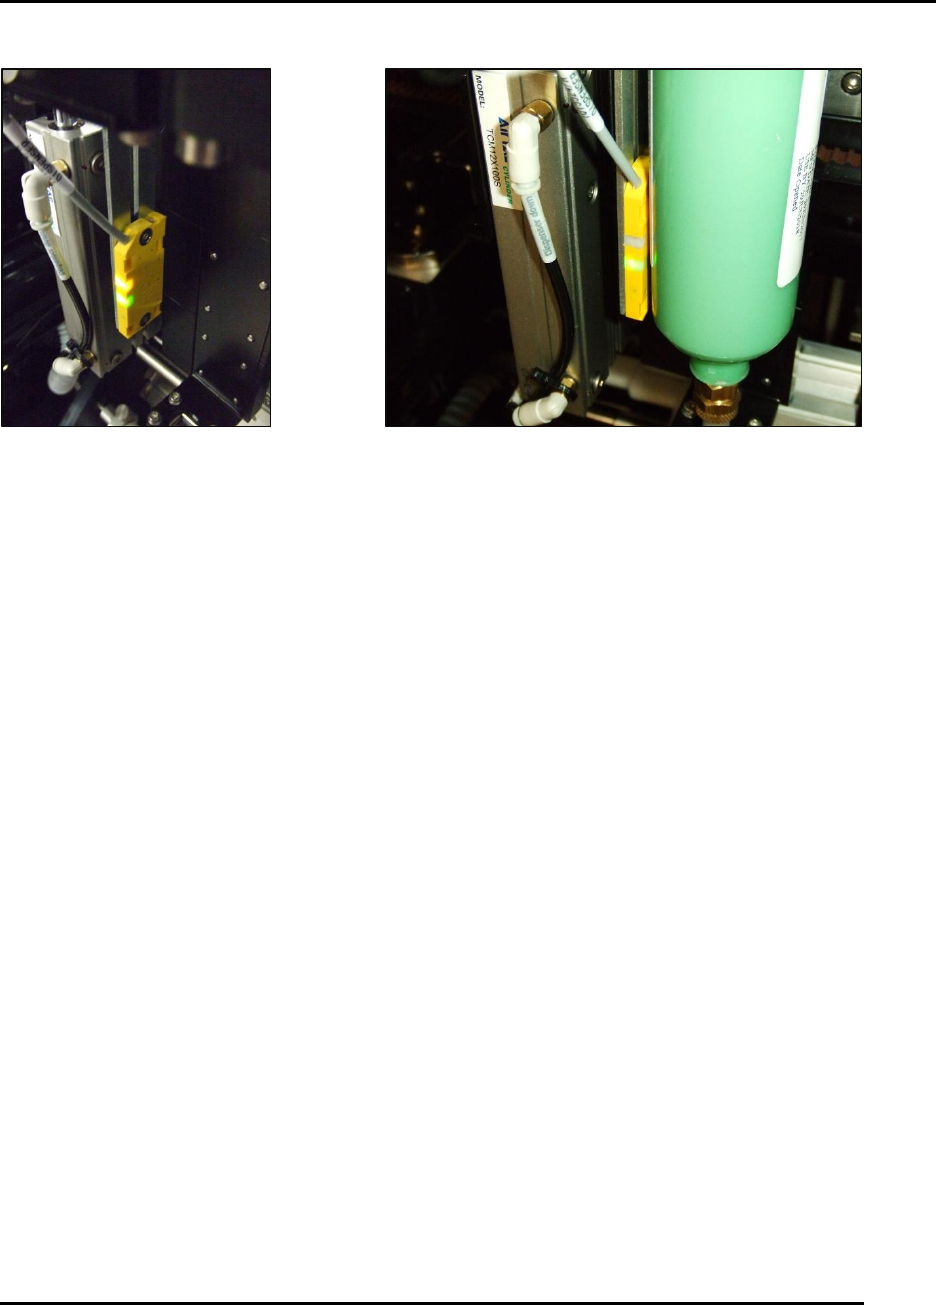
6.2.1.2. Inspect Paste Dispenser Empty Sensor–Monthly
Figure 135. Inspect Paste Dispenser Empty Sensor.
Introduction
Inspect and clean the paste dispenser empty sensor (SQ9).
Estimated Completion Time
Less than 5 minutes.
Procedure
Remove all paste from the surface of the sensor to prevent false triggers
With a full cartridge, the sensor should have only a green light illuminated (Figure 135).
Position the sensor downward to ensure the cartridge is empty and the plunger is bottomed
out before the yellow light illuminates
To ensure proper operation:
o Use a full cartridge and then move the cartridge to the right away from the sensor.
o At approximately 6 mm (.250 In) the yellow light should come on.
MAINTENANCE Edison Printer User Manual (Part Number 1023838)
136 Rev. A
Copyright © 2017 ITW EAE
All rights reserved. No part of the contents of this manual may be reproduced, copied or transmitted in any form or by any
means including graphic, electronic, or mechanical methods or photocopying, recording, or information storage and
retrieval systems without the written permission of ITW EAE, unless for purchaser's personal use.
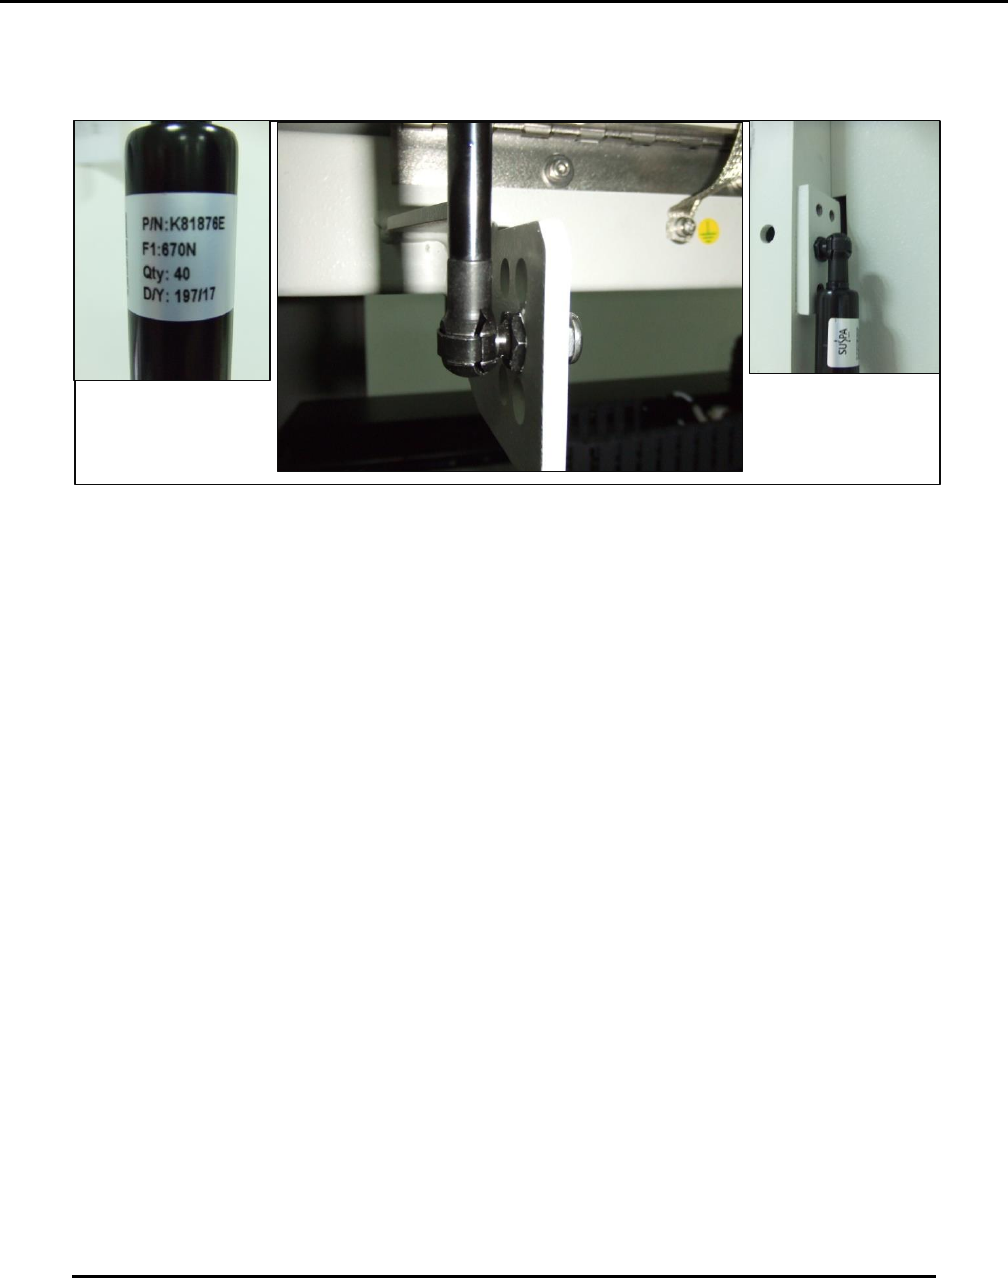
6.2.2. Inspect Hood Gas Springs—Daily
Figure 136. Inspect Hood Gas Springs Daily.
Introduction
Inspecting the Hood Gas Springs daily routine (Figure 136).
Estimated Completion Time
Less than 5 minutes
Procedure
Two gas springs (on the left and right sides of the hood) hold the hood up when open. These
springs must be inspected daily as follows:
Check to ensure the retaining clips holding the gas springs to the ball joints are present and
secure.
o A missing or defective clip can result in the gas spring coming loose and the hood
falling.
Check for oil on the shafts of the gas springs and/or on the area of the print head gantries
underneath the gas springs.
o The presence of oil indicates the spring is leaking.
o Leaking springs must be replaced immediately.
Check that hood does not fall:
o Open the hood all the way and ensure it does not begin to fall (it may rise slightly,
which is acceptable).
If the hood begins to fall, replace both gas springs immediately.
o Repeat with the hood approximately half way open.
If the hood begins to fall, replace both gas springs immediately.
If a great amount of force is required to close the hood the gas springs are defective.
o Replace both gas springs immediately.
If the hood seems heavy to lift or requires unusual force the gas springs are defective
o Replace both gas springs immediately.